# Advice and Answers from Keystone Team

## [General FAQ](/miscellaneous/faq)

<details>

<summary>Li-battery related EVERYTHING</summary>

For optimal charging of this product, it is recommended to acquire a USB type A charging adapter that delivers either a 5V1A or 5V2A output and to use the USB type A to USB type C charging cable with the product.&#x20;

The light indicator on the battery turns white when it's partially charged and yellow when fully charged.

The battery has a 1000mAh capacity and standby time of 1-2 days, but frequent usage may reduce it.

**Caution:**

1. An adapter with an output higher than 5V2A triggers a battery protection mechanism, and a lower than 5V1A may affect normal startup.
2. The battery does not support fast charging or charging via the laptop interface.

</details>

<details>

<summary>The Keystone device is not able to turn on using AAA batteries.</summary>

Keystone device requires **AAA 1.5V** batteries for proper operation.&#x20;

If your device is not turning on, please replace the existing 4 AAA batteries with new ones within the valid period. We suggest using rechargeable AAA batteries for better stability and compatibility with our device, but we do not recommend using Amazon Rechargeable Batteries as they may be prone to quick consumption.

</details>

<details>

<summary><strong>Which cryptocurrencies and tokens does Keystone support?</strong></summary>

Keystone supports a range of digital assets including BTC, ETH, SOL, NEAR, BNB, POLYGON, APTOS, DOT, KSM, XRP, LTC, DASH, BCH, AR, and TRON.\
\
To make it easier to manage your assets, Keystone only displays the main-chain assets. You can add and manage additional tokens via the mobile app.\
\
Support for ATOM, and ADA is coming soon.\
\
A list of currently [Supported Assets and Wallets](https://keyst.one/supported-wallets-and-assets) can be found on our website.

</details>

<details>

<summary><strong>Is it possible to import a recovery phrase generated by a different wallet into Keystone?</strong></summary>

Keystone supports 12/18/24-word recovery phrases generated by any BIP39 wallet.

</details>

<details>

<summary>Keystone supports 12/18/24-word recovery phrases generated by any BIP39 wallet.<strong>Can I use a different brand of a hardware wallet to recover my assets if my Keystone is lost or damaged?</strong></summary>

Keystone requires users to have complete control and ownership of their private keys (recovery phrase). If the Keystone device is lost or damaged, the Secure Element will protect the private keys from being exposed. The Keystone Pro also has a self-destruct mechanism that automatically erases all information, including private keys, if the device is disassembled.\
\
Different brands of hardware wallets use different derivation paths, so if you import the recovery phrase into a hardware wallet of a different brand, some of the assets on certain addresses may not be visible or accessible. If your Keystone is lost or broken, it is recommended to recover your assets using a wallet with the same derivation path as Keystone.\
\
If you have any additional concerns, please contact the [Keystone Support Team](https://keystonewallet.atlassian.net/servicedesk/customer/portal/1). Our administrators will assist you as soon as possible.

</details>

## Keystone Hardware Wallet

<table data-view="cards"><thead><tr><th></th><th data-hidden data-card-target data-type="content-ref"></th></tr></thead><tbody><tr><td><strong>Get Started</strong></td><td><a href="/pages/-MVp5c7T7wLbcy22IPRP">/pages/-MVp5c7T7wLbcy22IPRP</a></td></tr><tr><td><strong>Firmware Upgrade</strong></td><td><a href="/pages/-MVz-o9g8Dc-vlyVuAZj">/pages/-MVz-o9g8Dc-vlyVuAZj</a></td></tr><tr><td><strong>Basic Features</strong></td><td><a href="/pages/-MVz-o9f1E229ynoBl2p">/pages/-MVz-o9f1E229ynoBl2p</a></td></tr><tr><td><strong>Advanced Features</strong></td><td><a href="/pages/-MVzhywt-oAP0YQ8pcO3">/pages/-MVzhywt-oAP0YQ8pcO3</a></td></tr><tr><td><strong>Security Practices</strong></td><td><a href="/pages/-MW3HcQmNGst7IOirgBJ">/pages/-MW3HcQmNGst7IOirgBJ</a></td></tr></tbody></table>

## 3rd Party Wallets

<table data-view="cards"><thead><tr><th></th><th data-hidden data-card-target data-type="content-ref"></th></tr></thead><tbody><tr><td><strong>BTC Wallets</strong></td><td><a href="/pages/-MW7JcqQh0YnBuDQNmW2">/pages/-MW7JcqQh0YnBuDQNmW2</a></td></tr><tr><td><strong>MetaMask &#x26; ETH Wallets</strong></td><td><a href="/pages/-Mgn-2Bfe-59InDv7wXh">/pages/-Mgn-2Bfe-59InDv7wXh</a></td></tr><tr><td><strong>Aptos Wallets</strong></td><td><a href="/pages/D2FvMvHWSbcPh07upRrL">/pages/D2FvMvHWSbcPh07upRrL</a></td></tr><tr><td><strong>Cosmos Wallets</strong></td><td><a href="/pages/37SFfsdxkxcGOSPpfvXo">/pages/37SFfsdxkxcGOSPpfvXo</a></td></tr><tr><td><strong>SOL Wallets</strong></td><td><a href="/pages/oFsIZiRdhDCspINPIV64">/pages/oFsIZiRdhDCspINPIV64</a></td></tr><tr><td><strong>Near Wallets</strong></td><td><a href="/pages/NFxGztAd2zJXxs97CSwv">/pages/NFxGztAd2zJXxs97CSwv</a></td></tr><tr><td><strong>Polkadot Wallets</strong></td><td><a href="/pages/VnpjNm7P9NSHNfudmXnm">/pages/VnpjNm7P9NSHNfudmXnm</a></td></tr><tr><td><strong>Dapp(DeFi)</strong></td><td><a href="/pages/-MW7L8qfSwLwo6YHtKMs">/pages/-MW7L8qfSwLwo6YHtKMs</a></td></tr><tr><td><strong>XRP Wallets</strong></td><td><a href="/pages/-MW7Ls6ikl8Tq3m-5m7O">/pages/-MW7Ls6ikl8Tq3m-5m7O</a></td></tr><tr><td><strong>Arweave Wallets</strong></td><td><a href="/pages/QGn7swxXwVCN31tcbp2x">/pages/QGn7swxXwVCN31tcbp2x</a></td></tr></tbody></table>

## Keystone Companion App

<table data-view="cards"><thead><tr><th></th><th data-hidden data-card-target data-type="content-ref"></th></tr></thead><tbody><tr><td><strong>Syncing with</strong> <br><strong>Keystone Companion App</strong></td><td><a href="/pages/-MVyOy-t8rfzqoaEeCAD">/pages/-MVyOy-t8rfzqoaEeCAD</a></td></tr><tr><td><strong>Sending</strong> <br><strong>Cryptocurrencies</strong></td><td><a href="/pages/-MVzajx6I9jPc5ai69dd">/pages/-MVzajx6I9jPc5ai69dd</a></td></tr><tr><td><strong>Receiving Cryptocurrencies</strong></td><td><a href="/pages/-MVzanDIYwexVNLNenxj">/pages/-MVzanDIYwexVNLNenxj</a></td></tr><tr><td><strong>Adding tokens</strong></td><td><a href="/pages/-MVyP7YeJBCFPZIyXQKR">/pages/-MVyP7YeJBCFPZIyXQKR</a></td></tr></tbody></table>

## Keystone Accessories

<table data-view="cards"><thead><tr><th></th><th data-hidden data-card-target data-type="content-ref"></th></tr></thead><tbody><tr><td><strong>Keystone Tablet</strong></td><td><a href="/pages/-MW3MinP5f2Dl7WJWI9c">/pages/-MW3MinP5f2Dl7WJWI9c</a></td></tr></tbody></table>

## [About Keystone](/about-keystone)


# General Navigation Guide

This page will help you navigate the various features based on your user profile (Beginners, Bitcoiners, Web3 Users, Advanced users).&#x20;

Please kindly note that this is not a 101 guide on crypto. We assume you already understand basic concepts like seed phrases, private keys, addresses and have some experience with software wallets.

## Beginners

For beginners, the first and ultimate thing you should remember is to NEVER share your seed phrase to ANYONE. Some of the common tricks by scammers include:

1. DM you on social media with our team member's profile to ask you to share your seed phrase or share a  website link to collect that info.
2. Buy ads on social media or search engines for their phishing sites to collect your seed phrase or register similar domains expecting you to enter sensitive data.

As a beginner, feel free to follow these tutorials to easily utilize your Keystone hardware wallet with its companion app to achieve 100% air-gapping security when sending and receiving cryptocurrencies.

{% content-ref url="/pages/x541tZDZhcrX90Xg7iNU" %}
[Setting Up Keystone (New)](/getting-started/setting-up-keystone-new)
{% endcontent-ref %}

{% content-ref url="/pages/-MVz-o9g8Dc-vlyVuAZj" %}
[Firmware Upgrade](/getting-started/firmware-upgrading)
{% endcontent-ref %}

{% content-ref url="/pages/-MVyOy-t8rfzqoaEeCAD" %}
[Keystone Mobile App Syncing](/getting-started/syncing-with-the-keystone-vault-mobile-app)
{% endcontent-ref %}

{% content-ref url="/pages/-MVzanDIYwexVNLNenxj" %}
[Receiving Cryptocurrency](/getting-started/receiving-cryptocurrency)
{% endcontent-ref %}

{% content-ref url="/pages/-MVzajx6I9jPc5ai69dd" %}
[Sending Cryptocurrency](/getting-started/sending-cryptocurrency)
{% endcontent-ref %}

## Bitcoiners

If you are a bitcoiner, we highly recommend [upgrading](https://support.keyst.one/getting-started/firmware-upgrading) your Keystone device with the BTC-only firmware since removing all altcoin functinality from the firmware will [improve the security for your bitcoin](https://twitter.com/the_charlatan_/status/1331248010672693251).

After you upgrade your hardware wallet with the BTC-only firmware, you can use it with the following Bitcoin wallets:

{% content-ref url="/pages/-MkpBGPcelERWFQflli\_" %}
[Casa](/3rd-party-wallets/bitcoin-wallets/casa)
{% endcontent-ref %}

{% content-ref url="/pages/-MW7JjU4MJsyCBlEQdIq" %}
[Enhance the security of BlueWallet](/3rd-party-wallets/bitcoin-wallets/bluewallet)
{% endcontent-ref %}

{% content-ref url="/pages/-MW7JyMLhkbyPQnAGzj9" %}
[Specter](/3rd-party-wallets/bitcoin-wallets/specter)
{% endcontent-ref %}

{% content-ref url="/pages/-MVyPn\_yLMfkxVguGxt6" %}
[Sparrow Wallet](/3rd-party-wallets/bitcoin-wallets/sparrow)
{% endcontent-ref %}

{% content-ref url="/pages/-MVyPRneulZeH1WoxoaV" %}
[Electrum](/3rd-party-wallets/bitcoin-wallets/electrum)
{% endcontent-ref %}

{% content-ref url="/pages/-MVyPYuZK6BMVgx3ND0l" %}
[Wasabi Wallet](/3rd-party-wallets/bitcoin-wallets/wasabi)
{% endcontent-ref %}

{% content-ref url="/pages/-MVyPfx1gnjhrcoPt9AF" %}
[BTCPay Server](/3rd-party-wallets/bitcoin-wallets/btcpayserver)
{% endcontent-ref %}

{% content-ref url="/pages/IGQTcrQZo0SkoaxNWL9V" %}
[Nunchuk](/3rd-party-wallets/bitcoin-wallets/nunchuk)
{% endcontent-ref %}

{% content-ref url="/pages/vuBbbtkDZYqOZsrjZhfh" %}
[Simple Bitcoin Wallet](/3rd-party-wallets/bitcoin-wallets/simple-bitcoin-wallet)
{% endcontent-ref %}

#### Bitcoin Multi Signature

Before you start using Keystone for bitcoin multi-signature, it's highly recommended to fully read the 2 articles below(tutorials):

{% embed url="<https://medium.com/shiftcrypto/the-pitfalls-of-multisig-when-using-hardware-wallets-9b0e98e4c19c>" %}

{% embed url="<https://btcguide.github.io/>" %}

You can also find detailed multi-signature tutorial for Keystone with other compatible hardware and software wallets on the link provided below:

{% content-ref url="/pages/-MVzjUcz3-N1eX4qDuwK" %}
[Multi Signature](/advanced-features/multi-signature)
{% endcontent-ref %}

## Web3 Users

If you are a Web3/DeFi/Dapp/NFT/GameFi user, please read this article first about one of the biggest security black holes in Web3.

{% embed url="<https://blog.keyst.one/blind-signing-a-security-black-hole-for-the-ethereum-community-13f909b848b6>" %}

After you finish reading about basic [setting up Keystone](https://support.keyst.one/getting-started/setting-up-keystone-in-5-steps) and [firmware upgrade](https://support.keyst.one/getting-started/firmware-upgrading), you can try out these Web3 integrations:

{% content-ref url="/pages/-MVzjClzDuQFACnCeQ1h" %}
[MetaMask](/3rd-party-wallets/eth-and-web3-wallets-keystone/bind-metamask-with-keystone)
{% endcontent-ref %}

{% content-ref url="/pages/oHvS1irb46ULViPBi9bL" %}
[MetaMask Mobile](/3rd-party-wallets/eth-and-web3-wallets-keystone/metamask-mobile)
{% endcontent-ref %}

{% content-ref url="/pages/lFotIHfhPBVy644v7iFc" %}
[Rabby Wallet](/3rd-party-wallets/eth-and-web3-wallets-keystone/rabby-wallet)
{% endcontent-ref %}

{% content-ref url="/pages/-MhXlgJczCzEtcxU-lhS" %}
[Displaying ENS Names](/advanced-features/displaying-ens-names)
{% endcontent-ref %}

{% content-ref url="/pages/-MhrWcnEIG8SD47bOj9d" %}
[Safe](/3rd-party-wallets/defi-dapp-with-keystone/gnosis-safe)
{% endcontent-ref %}

{% content-ref url="/pages/-Mgj80imYuKykt1C7hCw" %}
[SushiSwap](/3rd-party-wallets/defi-dapp-with-keystone/how-to-use-sushiswap-defi-with-keystone)
{% endcontent-ref %}

{% content-ref url="/pages/-Mhr9C9zrEwJs6Fds8uS" %}
[Yearn Finance](/3rd-party-wallets/defi-dapp-with-keystone/yearn-finance)
{% endcontent-ref %}

{% content-ref url="/pages/-Mi0XDX0Qyh72Vm7SaCw" %}
[Zapper](/3rd-party-wallets/defi-dapp-with-keystone/zapper)
{% endcontent-ref %}

## Advanced users

Please kindly note that the features listed in these part are for advanced users. Make sure you fully understand the terminology and each detail disclosed before using them.

Some extra articles that explain things under the hood:

{% embed url="<https://blog.keyst.one/keystone-product-design-principles-cd833bc11125>" %}

{% embed url="<https://blog.keyst.one/on-open-source-and-transparency-ba37fa1c1e8c>" %}

{% embed url="<https://blog.keyst.one/web-authentication-a-counter-to-supply-chain-attacks-62d0272f656b>" %}

{% embed url="<https://blog.keyst.one/self-destruct-mechanisms-unique-defense-against-side-channel-attacks-4cfea3d4eff1>" %}

If you want to add extra protection for your wallet, you can consider Passphrase or Shamir Backup.

{% content-ref url="/pages/-MVzlZEKlGAlnYgk\_uyP" %}
[Passphrase](/advanced-features/passphrase)
{% endcontent-ref %}

{% content-ref url="/pages/-MVzlCzBToRaAC5tzCvu" %}
[Import or Create Shamir Backup](/advanced-features/recovery-phrase/import-or-create-shamir-backup)
{% endcontent-ref %}

One of the core design principles of the Keystone hardware wallet is minimizing the dependency on trust. You can generate entropy by yourself so that you don't need to trust the device's private keys generation process.

{% content-ref url="/pages/-MVzlITEioyVDlh2gKSG" %}
[Use Dice to Generate Recovery Phrase](/advanced-features/recovery-phrase/use-dice-to-generate-recovery-phrase)
{% endcontent-ref %}

{% content-ref url="/pages/-MVzl8Bd3g2IVaMy6V1n" %}
[Construct Your Own Recovery Phrase](/advanced-features/recovery-phrase/construct-own-recovery-phrase)
{% endcontent-ref %}

If you want to verify the QR code or our firmware, please refer to these articles or our Github repo:

{% embed url="<https://blog.keyst.one/ever-wondered-what-your-hardware-wallet-inputs-and-outputs-9b33b4cedafd>" %}

{% embed url="<https://github.com/KeystoneHQ/Keystone-developer-hub>" %}

Please be advised that we delete shipping info when it becomes 6 months old. If you have received your product and there are no outstanding disputes regarding it, you can always request to bypass this 6 month wait for an early deletion of your purchase records. Our detailed Shipping Data Retention Policy is available in the link below:

{% embed url="<https://blog.keyst.one/shipping-data-retention-policy-db473493483c>" %}


# About Keystone

<figure><img src="https://miro.medium.com/max/2048/1*edNZoGr4D_ab9Bput3K3_w.png" alt="Keystone-2"><figcaption></figcaption></figure>

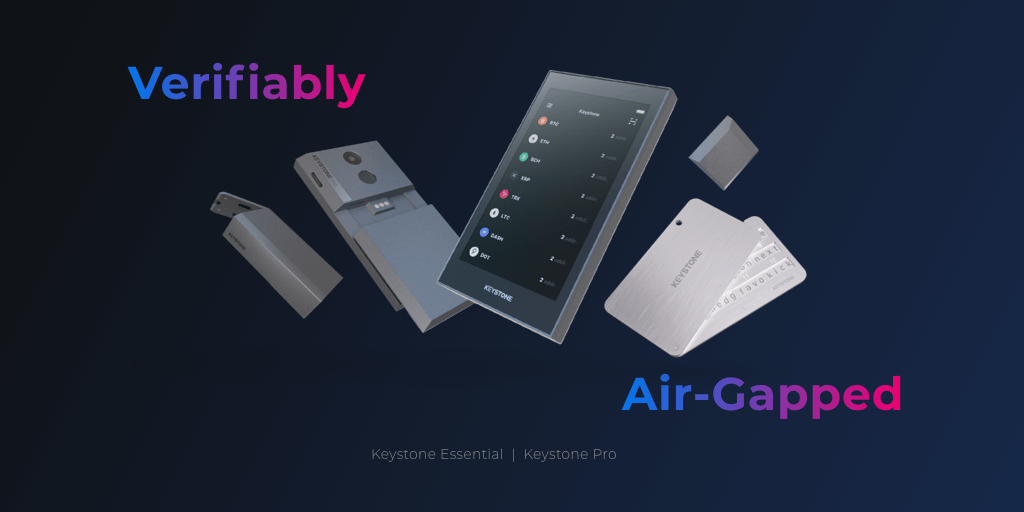
Keystone Hardware Wallet is a 100% Air-gapped QR code communication hardware wallet for Bitcoin, Ethereum, USDT, BCH, XRP, Tron, LTC, Dash, Polkadot, Kusama and 1000+ cryptocurrencies.

It offers convenient cold storage solution with an open source firmware, 4 inch touchscreen and PSBT Bitcoin multisig support. Protect your cryptocurrency with the perfect balance between secure and convenient hardware wallet with mobile phone support.

These are the full feature highlights of the Keystone Essential and Pro.

<figure><img src="/files/-MbnhG_q-tzJlG1paIUC" alt="Keystone-Air gapped"><figcaption></figcaption></figure>

All hardware wallets need some means of connecting to the network to sign transactions; how “air-gapped” your hardware wallet is depends on how it limits the attack surface when transmitting data to an internet-enabled device. QR codes have a smaller attack surface than USB, NFC, and Bluetooth, making them the perfect means of data transmission for an air-gapped hardware wallet. We have pioneered an animated QR code solution that enables transmission of larger amounts of transaction data and have also developed microSD card capability as requirements for compatibility with desktop wallets like Electrum and Wasabi are more demanding.

<figure><img src="/files/-Mbnid1tW1grTS0vLhzU" alt="Keystone-QR codes"><figcaption></figcaption></figure>

With QR codes, you can verify each and every data transmission to ensure that information coming into the Keystone Hardware Wallet contains no trojans or viruses and information going out doesn’t leak private keys or any other sensitive information. In contrast to USB or Bluetooth, QR codes are entirely [verifiable](https://blog.keyst.one/ever-wondered-what-your-hardware-wallet-inputs-and-outputs-9b33b4cedafd) as any normal QR code scanner can convert their data contents into human-readable format.

<figure><img src="/files/-Mbnilwh1U3Mn3t2YPB5" alt="Keystone-Secure Element"><figcaption></figcaption></figure>

Keystone Hardware Wallet uses a bank-grade Secure Element to [generate true random numbers](https://blog.keyst.one/secure-elements-harnessing-a-force-of-nature-14a959da7b54), derive private and public keys, sign transactions, and [protect private keys](https://blog.keyst.one/secure-elements-the-last-line-of-defense-4669012d4edc) from being leaked if an attacker has physical access to the device. In addition to ensuring your keys really are your keys by sourcing them from physical entropy, a Secure Element is vital to storing your private keys with the best possible protection from physical attack. A hardware wallet equipped with a Secure Element is a foundation of security long-term hodlers can rely on.

<figure><img src="/files/-MbnipmQvmgaD5brO0Uc" alt="Keystone-Open Source"><figcaption></figcaption></figure>

Keystone Hardware Wallet is the first hardware wallet to have open source Secure Element firmware code, which allows you to verify all core cryptographic operations such as how private keys are generated and contained entirely within the Secure Element. You are able to compile the open source Secure Element firmware and hardware wallet application layer code available on our Github page if you want to verify the genuinity of firmware upgrade packages for Keystone Essential and Pro yourself. We have also released the device schematic circuit diagram.

<figure><img src="/files/-MbnjZPvaApQq2NAhcnh" alt="Keystone-Battery"><figcaption></figcaption></figure>

The weakest link in an electronic device tends to be the battery because it’s usually only built to last a few years. Keystone batteries are detachable to prevent corrosion damage and both Keystone Essential and Pro come with AAA battery support so you never have to worry about battery failure down the road. Keystone Pro also comes with a rechargeable battery.

Be aware AAA battery voltage is not steady, which is why it is generally used for products that do not need a constant voltage, like remote controllers. The AAA battery support option is intended for infrequent use. If you are likely to turn on your hardware wallet more than a couple of times a month, we recommend getting Keystone Pro.

<figure><img src="/files/-MbnjhX6pMDaMxkiIm4A" alt="Keystone-Fingerprint"><figcaption></figcaption></figure>

More sophisticated hardware wallet owners may have multiple devices used for different purposes. Keystone Pro has a fingerprint sensor option that can be used to take care of business in public locations like cafes or airports to prevent your passwords from being stolen by onlookers or surveillance cameras. Fingerprint authentication for device unlock and transaction signing can be toggled off in settings at the user’s discretion.

<figure><img src="/files/-MbnlW9Uaox_eY1ghIXG" alt="Keystone-Secure Strategy"><figcaption></figcaption></figure>

Hardware wallets are more vulnerable when you take them around with you. To prevent a side-channel attack from succeeding if you lose your device, we designed a multilayered [self-destruct mechanism](https://blog.keyst.one/self-destruct-mechanisms-unique-defense-against-side-channel-attacks-4cfea3d4eff1) for Keystone Pro. Upon detection of disassembly, the self-destruct mechanism will wipe the private keys and any sensitive information so that an attacker cannot extract it from your device.

<figure><img src="/files/-Mbnl_Kn7DqIZTs-wFDW" alt="Keystone-Multicoins support"><figcaption></figcaption></figure>

Keystone Hardware Wallet supports BTC, ETH, USDT, BCH, XRP, TRON, LTC, DASH, DOT and KSM. ETH and TRX tokens are also supported. View our full list of supported coins and tokens [here](https://keyst.one/supported-crypto-assets). If you are interested in a Bitcoin-only hardware wallet, a [Bitcoin-only firmware version](https://keyst.one/firmware) for upgrading Keystone Essential and Pro is also available.

<figure><img src="/files/-MbnmkWydIFNOcoMf3L8" alt="Keystone-Compare"><figcaption></figcaption></figure>

Keystone Essential is intended for long-term hodlers and comes with AAA battery support for 119 USD. Keystone Pro is designed for more portable access to funds and comes with a rechargeable battery, fingerprint sensor, and self-destruct mechanism for 169 USD. Shipping is free to the United States and Canada.

[**Buy Now**](https://keyst.one/)

### Final Words <a href="#id-4ae1" id="id-4ae1"></a>

our Absolute 100% security may not exist, but that doesn’t mean it shouldn’t be the ideal that we strive for. These features reflect our vision for improving hardware wallets and our commitment to staying apace of developments in the community. To learn more about our approach to building hardware wallets, please read our article on [Keystone’s design principles](https://blog.keyst.one/keystone-product-design-principles-cd833bc11125).

If you have other features you would like to see us develop, you can send an email to <support@keyst.one>.

All Keystone models support Web Authentication, a process that ensures product authenticity. We highly recommend you [complete](https://keyst.one/authentication?locale=en) Web Authentication when you receive your device to prevent supply chain attacks.

Give us a shoutout on Twitter [@KeystoneWallet](https://twitter.com/KeystoneWallet/) if you have any questions or comments about our product and follow us to stay updated with all the upcoming feature releases.


# Keystone Firmware (Multi-Coin)

These pages contain the history of changes made in firmware updates.

They may contain one or more of the following:

* New features
* New coin support
* Bug fixes
* Performance improvements

To request a new feature or report a bug, please visit [this page](https://keystonewallet.atlassian.net/servicedesk/customer/portal/1).


# M-13.0(Multi-Coin)

The multi-coin firmware M-13.0 update includes the following:

* Added support for managing TRX、LTC、BCH、DASH assets using OKX Wallet
* Removed connect to Keystone Companion App entry

Download the latest firmware [here](https://keyst.one/firmware).


# M-12.6 (Multi-Coin)

The multi-coin firmware M-12.6 update includes the following:

* Add a tutorial for OKX Wallet Mobile.&#x20;
* Add error prompts for particular transaction scenarios.&#x20;
* Change the text color for the inability to parse ABI.
* Support Signing Message with ArConnect.

Tutorial for firmware upgrade:

{% content-ref url="/pages/-MVz-o9g8Dc-vlyVuAZj" %}
[Firmware Upgrade](/getting-started/firmware-upgrading)
{% endcontent-ref %}


# M-12.4 (Multi-Coin)

The multi-coin firmware M-12.4 update includes the following:

* Add a tutorial for OKX Wallet Mobile.&#x20;
* Add error prompts for particular transaction scenarios.&#x20;
* Change the text color for the inability to parse ABI.

Tutorial for firmware upgrade:

{% content-ref url="/pages/-MVz-o9g8Dc-vlyVuAZj" %}
[Firmware Upgrade](/getting-started/firmware-upgrading)
{% endcontent-ref %}


# M-12.2 (Multi-Coin)

The multi-coin firmware M-12.2 update includes the following:

* Fixed the issue of transaction signature rejections in certain scenarios for Polkadot

Tutorial for firmware upgrade:

{% content-ref url="/pages/-MVz-o9g8Dc-vlyVuAZj" %}
[Firmware Upgrade](/getting-started/firmware-upgrading)
{% endcontent-ref %}


# M-12.0(Multi-Coin)

The multi-coin firmware M-12.0 the update includes the following:

* Officially supported Sui integration through the Fewcha wallet
* Fixed the issue of failed XRP transaction signature scanning

Tutorial for firmware upgrade:

{% content-ref url="/pages/-MVz-o9g8Dc-vlyVuAZj" %}
[Firmware Upgrade](/getting-started/firmware-upgrading)
{% endcontent-ref %}


# M-11.0(Multi-Coin)

The multi-coin firmware M-11.0 the update includes the following:

* Added support for OKX Extension integration.
* Optimized the connection process with the BitKeep wallet.

Tutorial for firmware upgrade:

{% content-ref url="/pages/-MVz-o9g8Dc-vlyVuAZj" %}
[Firmware Upgrade](/getting-started/firmware-upgrading)
{% endcontent-ref %}


# M-10.8(Multi-Coin)

The multi-coin firmware M-10.8 the update includes the following:

* Fix scenarios where a few Arweave addresses cannot be generated.&#x20;
* Optimize the display of Arweave transaction parsing.
* &#x20;Improve the scenario for counting the number of incorrect password inputs.

Tutorial for firmware upgrade:

{% content-ref url="/pages/-MVz-o9g8Dc-vlyVuAZj" %}
[Firmware Upgrade](/getting-started/firmware-upgrading)
{% endcontent-ref %}


# M-10.6(Multi-Coin)

The multi-coin firmware M-10.6 the update includes the following:

* Optimized the export logic for BTC XPUB
* Updated logos for Arbitrum & Gnosis chains
* All transaction history on the default wallet will not be visible after accessing the passphrase wallet

Tutorial for firmware upgrade:

{% content-ref url="/pages/-MVz-o9g8Dc-vlyVuAZj" %}
[Firmware Upgrade](/getting-started/firmware-upgrading)
{% endcontent-ref %}


# M-10.4(Multi-Coin)

The multi-coin firmware M-10.4 the update includes the following:

* Official integration with Core wallet
* Resolved the issue of random addresses getting automatically added
* Rectified the problem that prevented the selection of various networks other than Bitcoin, Ethereum, and Binance Smart Chain while syncing with the Keystone Companion App
* Fixed the unit display error during the Aptos transaction analysis

Tutorial for firmware upgrade:

{% content-ref url="/pages/-MVz-o9g8Dc-vlyVuAZj" %}
[Firmware Upgrade](/getting-started/firmware-upgrading)
{% endcontent-ref %}


# M-10.2(Multi-Coin)

The multi-coin firmware M-10.2 the update includes the following:

* BitKeep Mobile integration
* &#x20;Optimization of the 【My Assets】 page
* Improved the transaction record storage process
* Resolved the issue of pages 'Lagging'
* &#x20;Fixed the problem of being unable to access the \[My Assets] page
* Enhanced the copywriting of error messages for QR code scanning issues
* Refined and boosted signature scenarios in Cosmos

Tutorial for firmware upgrade:

{% content-ref url="/pages/-MVz-o9g8Dc-vlyVuAZj" %}
[Firmware Upgrade](/getting-started/firmware-upgrading)
{% endcontent-ref %}

<br>


# M-10.0(Multi-Coin)

The multi-coin firmware M-10.0 the update includes the following:

* New UI interaction
* Official integration with Petra
* Official integration with BlockWallet
* Support for BlueWallet
* Improved display of NFT avatars

Tutorial for firmware upgrade:

{% content-ref url="/pages/-MVz-o9g8Dc-vlyVuAZj" %}
[Firmware Upgrade](/getting-started/firmware-upgrading)
{% endcontent-ref %}


# M-9.6(Multi-Coin)

The multi-coin firmware M-9.6 the update includes the following:

* Optimizing transaction signing scenarios

Tutorial for firmware upgrade:

{% content-ref url="/pages/-MVz-o9g8Dc-vlyVuAZj" %}
[Firmware Upgrade](/getting-started/firmware-upgrading)
{% endcontent-ref %}


# M-9.4(Multi-Coin)

The multi-coin firmware M-9.4 the update includes the following:

* Keystone now supports the Arweave ecosystem via integration with ArConnect

{% content-ref url="/pages/LGsUQjQOIhtk0o3NPLc4" %}
[ArConnect](/3rd-party-wallets/arweave-wallets/arconnect)
{% endcontent-ref %}

* Support Ledger derivation paths for NEAR&#x20;
* Enabled the cancelation of the "Reset Database" popup for Polkadot
* Optimization of copywriting on the multi-account import page for Aptos
* Resolved the text display problem on the page connecting to the software wallet when the current system language is not English or Russian
* Fixed a bug that prevented the signing of certain scenes on Restake.app

Tutorial for firmware upgrade:

{% content-ref url="/pages/-MVz-o9g8Dc-vlyVuAZj" %}
[Firmware Upgrade](/getting-started/firmware-upgrading)
{% endcontent-ref %}


# M-9.2(Multi-Coin)

The multi-coin firmware M-9.0 the update includes the following:

* Keplr wallet support

{% content-ref url="/pages/aQA45gizzi1ay1WcUNPQ" %}
[Keplr (Extension)](/3rd-party-wallets/cosmos-wallets/keplr-extension)
{% endcontent-ref %}

* Support exporting extended public keys for BTC (in 3 address formats), LTC, DASH, BCH
* Fixed a bug where the Russian language appears on the Connect Wallet page instead of the master language (English)
* Optimization of content on the “Connect Wallet” page
* Optimized the prompt copy on the "Receive Page" for ETH

Tutorial for firmware upgrade:

{% content-ref url="/pages/-MVz-o9g8Dc-vlyVuAZj" %}
[Firmware Upgrade](/getting-started/firmware-upgrading)
{% endcontent-ref %}


# M-8.8(Multi-Coin)

The multi-coin firmware M-8.8 update includes the following:

* Added support for Russian language
* Added a display password button to reveal characters when entering passphrases/passwords
* Updated the information for various Uniswap smart contract addresses in the built-in ABI library
* Updated the contents under the \[Receive TRON] page when in the Companion App mode
* Supports a deeper detailed level of parsing custom ABI files
* Disabling the function of adding multiple addresses for DOT when in the Companion App mode

Tutorial for firmware upgrade:

{% content-ref url="/pages/-MVz-o9g8Dc-vlyVuAZj" %}
[Firmware Upgrade](/getting-started/firmware-upgrading)
{% endcontent-ref %}


# M-8.4(Multi-Coin)

The multi-coin firmware M-8.4 includes the following updates:

* Fixed BTC transaction issues in some specific cases
* Added support for Palm Chain (EVM compatible)
* Lowered the minimum number of characters for passwords to 6 digits
* Added security prompts to highlight important information for users importing/creating a wallet
* Fixed decoding crowdloan transaction issues in Polkadot ecosystem

Tutorial for firmware upgrade:

{% content-ref url="/pages/-MVz-o9g8Dc-vlyVuAZj" %}
[Firmware Upgrade](/getting-started/firmware-upgrading)
{% endcontent-ref %}


# M-8.2(Multi-Coin)

The multi-coin firmware M-8.2 includes the following updates:

* Support SubWallet in Polkadot mode

{% content-ref url="/pages/BjbaYyY18YHSF8B8nSIA" %}
[SubWallet](/3rd-party-wallets/polkadot-wallets/subwallet)
{% endcontent-ref %}

* Support Safe Mobile app in iOS client

{% content-ref url="/pages/Fyv2SwzD2UctKwjq26oM" %}
[Safe Mobile App](/3rd-party-wallets/defi-dapp-with-keystone/safe-mobile-app)
{% endcontent-ref %}

* Support decoding transaction in Aptos mode

Tutorial for firmware upgrade:

{% content-ref url="/pages/-MVz-o9g8Dc-vlyVuAZj" %}
[Firmware Upgrade](/getting-started/firmware-upgrading)
{% endcontent-ref %}


# M-8.0 (Multi-Coin)

The multi-coin firmware M-8.0 includes the following updates:

* Supporting Aptos mode and integrated with Fewcha wallet

Tutorial for firmware upgrade:

{% content-ref url="/pages/-MVz-o9g8Dc-vlyVuAZj" %}
[Firmware Upgrade](/getting-started/firmware-upgrading)
{% endcontent-ref %}


# M-7.2 (Multi-Coin)

The multi-coin firmware M-7.2 includes the following updates:

* Supporting decoding Multi-sig transactions on Safe

{% content-ref url="/pages/MkJOFMKJVg6AtRov0GMv" %}
[Decoding Multi-Signature Transactions](/advanced-features/decoding-multi-signature-transactions)
{% endcontent-ref %}

Tutorial for firmware upgrade:

{% content-ref url="/pages/-MVz-o9g8Dc-vlyVuAZj" %}
[Firmware Upgrade](/getting-started/firmware-upgrading)
{% endcontent-ref %}


# M-7.0 (Multi-Coin)

The multi-coin firmware M-7.0 includes the following updates:

* Add Solana mode for supporting Near blockchain, currently can work with Sender wallet extension.

{% content-ref url="/pages/5azhnVYOXIcsw1Yqw4uZ" %}
[Sender Wallet (Extension)](/3rd-party-wallets/near-wallets/sender-wallet-extension)
{% endcontent-ref %}

Tutorial for firmware upgrade:

{% content-ref url="/pages/-MVz-o9g8Dc-vlyVuAZj" %}
[Firmware Upgrade](/getting-started/firmware-upgrading)
{% endcontent-ref %}


# M-6.10 (Multi-Coin)

The multi-coin firmware M-6.10 includes the following updates:

1. Supports decoding tuple-type transactions on Solana.
2. Built-in Bored Ape Yacht Club ABI contracts.
3. Fixed non-deterministic signature issues.

Tutorial for firmware upgrade:

{% content-ref url="/pages/-MVz-o9g8Dc-vlyVuAZj" %}
[Firmware Upgrade](/getting-started/firmware-upgrading)
{% endcontent-ref %}


# M-6.8 (Multi-Coin)

The multi-coin firmware M-6.8 includes the following updates:

We now support Solflare Mobile.

{% content-ref url="/pages/yETEMuEEQSX40TfyXwBi" %}
[Solflare Mobile](/3rd-party-wallets/solana-wallets/solflare-mobile)
{% endcontent-ref %}

Performance improvements:&#x20;

Adding \[Solflare Mobile] tutorial link

Bug fixed: \
Resolved a bug that causes QR-code-scanning failures during signature signing in Solana dApps.<br>

Tutorial for firmware upgrade:

{% content-ref url="/pages/-MVz-o9g8Dc-vlyVuAZj" %}
[Firmware Upgrade](/getting-started/firmware-upgrading)
{% endcontent-ref %}


# M-6.6 (Multi-Coin)

The multi-coin firmware M-6.6 includes the following updates:

Bug fixed: \
1\) Resolved a bug that causes QR-code-scanning failures during signature signing in specific situations

Tutorial for firmware upgrade:

{% content-ref url="/pages/-MVz-o9g8Dc-vlyVuAZj" %}
[Firmware Upgrade](/getting-started/firmware-upgrading)
{% endcontent-ref %}


# M-6.4 (Multi-Coin)

The multi-coin firmware M-6.4 includes the following updates:

* New features: Keystone Hardware Wallet now supports showing your Solana NFT on the lock screen. ([Tutorial](/advanced-features/show-nft-on-lock-screen))
* Performance improvements: \
  1\) \[MM / DeFi / Web3] has been renamed to \[MM / Rabby /DeFi]\
  2\) \[Solflare / Slope] has been renamed to \[Solflare]\
  3\) Correct some contents in Traditional-Chinese language version\
  4\) Correct some titles in decoding 4-byte function signature page
* Bug fixed: \
  1\) Fixed the bug on the Keystone hardware wallet when scanning the receive QR code of LTC on the Keystone Companion APP.

Tutorial for firmware upgrade:

{% content-ref url="/pages/-MVz-o9g8Dc-vlyVuAZj" %}
[Firmware Upgrade](/getting-started/firmware-upgrading)
{% endcontent-ref %}


# M-6.2 (Multi-Coin)

The multi-coin firmware M-6.2 includes the following updates:

* Bug fixed: The browser prompts "invalid signature" when signing a transaction in the Confirm Listing stage of selling NFT on Opensea.

Tutorial for firmware upgrade:

{% content-ref url="/pages/-MVz-o9g8Dc-vlyVuAZj" %}
[Firmware Upgrade](/getting-started/firmware-upgrading)
{% endcontent-ref %}


# M-6.0 (Multi-Coin)

The multi-coin firmware M-6.0 includes the following updates:

* Add Solana mode for supporting Solana blockchain, currently can work with Solflare extension.
* Support **Method Selector** for Ethereum transaction based data from [4bytes](https://github.com/ethereum-lists/4bytes). Method Selector will further decode the MethodID from the smart contract to make the transaction safer in another way when the ABI can not be decoded.
* Make some UI and UX changes of the Keystone hardware wallet.\
  1\) "The watch-only wallet" has been renamed to "Software Wallet"\
  2\) The feature of "Import the wallet" has been moved to the tool bar and renamed to "Connect Software wallet"

Download the latest firmware [here](https://keyst.one/firmware).

Tutorial for firmware upgrade:&#x20;

{% content-ref url="/pages/-MVz-o9g8Dc-vlyVuAZj" %}
[Firmware Upgrade](/getting-started/firmware-upgrading)
{% endcontent-ref %}

<br>


# M-5.4 (Multi-Coin)

The multi-coin firmware M-5.4 includes the following updates:

Keystone Hardware Wallet now supports showing your NFT on the lock screen. ([Tutorial](/advanced-features/show-nft-on-lock-screen))

Download the latest firmware [here](https://keyst.one/firmware).

Tutorial for firmware upgrade:

{% content-ref url="/pages/-MVz-o9g8Dc-vlyVuAZj" %}
[Firmware Upgrade](/getting-started/firmware-upgrading)
{% endcontent-ref %}


# M-5.3 (Multi-Coin)

The multi-coin firmware M-5.3 includes some bug fix.

Tutorial for firmware upgrade:

{% content-ref url="/pages/-MVz-o9g8Dc-vlyVuAZj" %}
[Firmware Upgrade](/getting-started/firmware-upgrading)
{% endcontent-ref %}


# M-5.2 (Multi-Coin)

The multi-coin firmware M-5.2 includes the following updates:

1\. Keystone Hardware Wallet now supports three different kinds of BTC address formats: BTC Native Segwit, BTC Nested Segwit, and BTC Legacy. ([Tutorial](https://support.keyst.one/advanced-features/three-btc-address-formats-support-legacy-native-segwit-nested-segwit))

2\. The issue of BTC address reuse is fixed.&#x20;

{% hint style="warning" %}
**Please upgrade Keystone companion app to V1.1.0 or later to activate these new updates！**
{% endhint %}

{% content-ref url="/pages/WrjhRkEZzVT8cSWBWLyW" %}
[V 1.1.0](/changelog/keystone-companion-app/v-1.1.0)
{% endcontent-ref %}

{% content-ref url="/pages/AxNclEX4PKuusYGhWka3" %}
[Three BTC Address Formats Support](/advanced-features/s-da-a)
{% endcontent-ref %}

Tutorial for firmware upgrade:

{% content-ref url="/pages/-MVz-o9g8Dc-vlyVuAZj" %}
[Firmware Upgrade](/getting-started/firmware-upgrading)
{% endcontent-ref %}


# M-5.0 (Multi-Coin)

Multi-coin firmware M-5.0 includes the following updates:

1. In the MetaMask / DeFi / Web3 mode, Keystone can now be used with MetaMask and DeFi applications. ([Tutorial](https://support.keyst.one/3rd-party-wallets/eth-and-web3-wallets-keystone/bind-metamask-with-keystone))
2. In the MetaMask / DeFi / Web3 mode, Keystone now supports the switching of wallet paths to Ledger Live and Legacy formats. ([Tutorial](https://support.keyst.one/3rd-party-wallets/eth-and-web3-wallets-keystone/bind-metamask-with-keystone/how-to-switch-eth-path-to-ledger-live-legacy-format))
3. Further optimization of the initialization process.
4. Keystone now supports Spanish and Korean.
5. The labeling of the firmware versions scheme has changed. M-x.x stands for "Multi-cion firmware" while B-x.x stands for "Bitcoin-only firmware".

Tutorial for firmware upgrade:

{% content-ref url="/pages/-MVz-o9g8Dc-vlyVuAZj" %}
[Firmware Upgrade](/getting-started/firmware-upgrading)
{% endcontent-ref %}


# V 1.4.2 (Multi-Coin)

Multi-coin firmware V1.4.2 includes the following updates:

1\. Bug fix regarding crash issues when Keystone scans certain DeFi transactions.

2\. Built-in Zapper contracts’ ABI.


# V 1.4.0 (Multi-Coin)

Multi-coin firmware V1.4.0 includes the following updates:

1\. We now support decoding Gnosis Safe transactions (Built-in Gnosis Safe contract ABI).

2\. We now support the display for ENS corresponding to the associated address (External ENS Data Base File).&#x20;

&#x20;  Please check the tutorial and ENS Data Base File download link [here](https://support.keyst.one/advanced-features/displaying-ens-names).

{% content-ref url="/pages/-MhXlgJczCzEtcxU-lhS" %}
[Displaying ENS Names](/advanced-features/displaying-ens-names)
{% endcontent-ref %}


# V 1.3.0 (Multi-Coin)

Multi-coin firmware V1.3.0 includes the following changes and updates:

1\. The watch-only wallet has been renamed from "Keystone Ethereum Extension" to "Web3" and will be integrated  with other Web3 wallets and DeFi projects through [Onboard.js](https://github.com/blocknative/onboard) at a later date.

2\. In the Web3 mode, we have upgraded the QR code encoding/decoding to a new format. **This is an incompatible change and you need to upgrade your Keystone Ethereum** [**Chrome**](https://chrome.google.com/webstore/detail/keystone-ethereum-extensi/obefccfphekeeeojgpicpeafipdlohig?hl=en-US\&authuser=1) **Extension accordingly to the latest version.**

3\. In the Web3 mode, we have optimized the function of “decoding DeFi transactions”.

* The ABI file data structure is optimized so downloading it now to a microSD card only requires \~30 seconds compared to \~30 minutes in the previous version. **Please note that the previous ABI package no longer works so you will need to re-download the package after this firmware upgrade. Please check the tutorial and ABI package download link** [**here**](https://support.keyst.one/advanced-features/decode-defi-transactions)**.**&#x20;
* Supports decoding tuple type transactions.

4\. The Keystone Ethereum [Chrome](https://chrome.google.com/webstore/detail/keystone-ethereum-extensi/obefccfphekeeeojgpicpeafipdlohig?hl=en-US\&authuser=1) Extension is also updated with a new QR code encoding/decoding method and it now supports EIP 191 personal\_sign message.

Instruction recommended:

{% content-ref url="/pages/-MeTrCm1NbNLC1YuswHl" %}
[Decoding DeFi Transactions](/advanced-features/decode-defi-transactions)
{% endcontent-ref %}


# V 1.2.0 (Multi-Coin)

The Multi-coin firmware V1.2.0 includes the updates below:

1\. Keystone now supports the decoding of DeFi transactions in Keystone Ethereum Extension mode.&#x20;

{% hint style="info" %}
**Please Note:**&#x20;

**The function of “Decoding DeFi Transactions” has been further optimized in** [**firmware version V1.3.0**](https://keyst.one/firmware)**.**&#x20;

**For more details and a related tutorial, please check** [**here**](https://support.keyst.one/changelog/keystone-changelog/v-1.3.0-multi-coin) **or the page link below.**
{% endhint %}

{% content-ref url="/pages/-MfWkrWAS0dt\_8EL\_88\_" %}
[V 1.3.0 (Multi-Coin)](/changelog/keystone-changelog/v-1.3.0-multi-coin)
{% endcontent-ref %}


# V 1.1.0 (Multi-Coin)

Multi-coin firmware V1.1.0：

1. &#x20;"Metamask for Keystone" was renamed to "Keystone Ethereum Extension".


# Keystone Firmware (BTC-Only)

These pages contain the history of changes made in firmware updates.

They may contain one or more of the following:

* New features
* Bug fixes
* Performance improvements

To request a new feature or report a bug, please visit [this page](https://keystonewallet.atlassian.net/servicedesk/customer/portal/1).


# B-3.6 (BTC-Only)

BTC-Only firmware B-3.6 includes the updates below:

* Removed connect to Keystone Companion App entry

Download the latest firmware [here](https://keyst.one/firmware).


# B-3.4 (BTC-Only)

BTC-Only firmware B-3.4 includes the updates below:

* Resolved the issue with BTC transaction signatures failing in certain situations
* Enhanced Multi-signature wallet compatibility&#x20;

Download the latest firmware [here](https://keyst.one/firmware).

Tutorial for firmware upgrade:

{% content-ref url="/pages/-MVz-o9g8Dc-vlyVuAZj" %}
[Firmware Upgrade](/getting-started/firmware-upgrading)
{% endcontent-ref %}


# B-3.2 (BTC-Only)

BTC-Only firmware B-3.2 includes the updates below:

* Fixed the transaction failure issue due to large amount of UTXO
* Added a button to un-hide characters when entering a passphrase/password
* Lowered the minimum number of characters for passwords to 6

Download the latest firmware [here](https://keyst.one/firmware).

Tutorial for firmware upgrade:

{% content-ref url="/pages/-MVz-o9g8Dc-vlyVuAZj" %}
[Firmware Upgrade](/getting-started/firmware-upgrading)
{% endcontent-ref %}


# B-2.5 (BTC-Only)

BTC-Only firmware B-2.5 includes the updates below:

1\. Keystone now supports Spanish.

Download the latest firmware [here](https://keyst.one/firmware).

Tutorial for firmware upgrade:

{% content-ref url="/pages/-MVz-o9g8Dc-vlyVuAZj" %}
[Firmware Upgrade](/getting-started/firmware-upgrading)
{% endcontent-ref %}


# B-2.0 (BTC-Only)

BTC-Only firmware B-2.0 includes the updates below:

1\. Keystone now supports Casa, a key management protocol, in multi-signature wallet mode.

2\. The labeling of the firmware versions scheme has changed. M-x.x stands for "Multi-cion firmware" while B-x.x stands for "Bitcoin-only firmware".

Instructions recommended:

{% content-ref url="/pages/-MkpBGPcelERWFQflli\_" %}
[Casa](/3rd-party-wallets/bitcoin-wallets/casa)
{% endcontent-ref %}


# V 1.1.1 (BTC-Only)

BTC-Only firmware V1.1.1 includes the updates below：

&#x20;   1\. New QR code formatting.

&#x20;   2\. Support formatting microSD card to FAT32.

&#x20;   3\. Single signature PSBT compatibility with Sparrow Wallet.


# Keystone Companion App

These pages contain the history of changes made to the Keystone Companion App.

They may contain one or more of the following:

* New features
* New coin support
* Bug fixes
* Performance improvements

To request a new feature or report a bug, please visit [this page](https://keystonewallet.atlassian.net/servicedesk/customer/portal/1).

{% content-ref url="/pages/WrjhRkEZzVT8cSWBWLyW" %}
[V 1.1.0](/changelog/keystone-companion-app/v-1.1.0)
{% endcontent-ref %}

{% content-ref url="/pages/oPmCQCyQ2W0GTIv33sN3" %}
[ERC-20 Token Delisting](/changelog/keystone-companion-app/erc-20-token-delisting)
{% endcontent-ref %}


# V1.2.3

The new version of the Keystone Companion App V1.2.3 contains the following updates:

1. Enhanced the loading speed of the “Home” and “Loading” pages.


# V1.2.2

The new version of the Keystone Companion App V1.2.2 contains the following updates:<br>

1. Fixed an issue with LTC transactions not being sent on-chain due to small amounts of UTXO；
2. Resolved connection and network lagging issues to optimize user experience when linking wallets；


# V1.2.1

The new version of the Keystone Companion App V1.2.1 contains the following updates:

1. Addition of a prompt when importing the same Keystone wallet
2. Added a description of account model on the \[Receive] page
3. Changed the description of \[Payment Address] & \[Receiving Address] to \[Send from address] & \[Send to address]
4. Added a prompt when the amount of UTXO is too small to be transferred
5. Fixed the companion app error - Quitting unexpectedly when adding addresses in certain specific cases
6. Updated the XRP transfer reserve (Must at least keep 10 XRP + 2N XRP in your account. “N” represents the number of owned token.)


# V 1.1.2

The Keystone Companion App V1.1.2 includes the following updates:

1\. Support displaying Satoshi and sending a transaction in Satoshi

2\. Keystone Companion App now supports LTC Native Segwit address format.&#x20;

3\. Bug fixes


# V 1.1.0

The Keystone Companion App V1.1.0 includes the following updates:

1\. Keystone Companion App now supports three BTC address formats (BTC Native Segwit, BTC Nested Segwit, BTC Legacy) and also includes additional product optimizations. ([Tutorial](https://support.keyst.one/advanced-features/s%20da%20a))

2\. The issue of BTC address reuse is fixed.&#x20;

{% hint style="warning" %}
**Please upgrade Keystone Multi-coin Firmware to M-5.2 or later to activate these new updates.**
{% endhint %}

{% content-ref url="/pages/hU9QiGFpXHXDUknVkRSv" %}
[M-5.2 (Multi-Coin)](/changelog/keystone-changelog/m-5.2-multi-coin)
{% endcontent-ref %}

{% content-ref url="/pages/AxNclEX4PKuusYGhWka3" %}
[Three BTC Address Formats Support](/advanced-features/s-da-a)
{% endcontent-ref %}


# ERC-20 Token Delisting

Due to various tokens being recently upgraded and now have their mainnet, we have updated our ERC-20 token list for optimization purposes.

The following tokens are no longer supported on the Keystone app and have been delisted. Here are the affected ERC-20 tokens:&#x20;

Wax Token, UST, Bytom, Zilliqa, AION, XinFin XDCE, THETA, Binance Coin, Kin, Bitquence, VeChain Token, IoTeX, Havven, Presearch, Aeternity, Wrapped UST Token, Matic Network, Dogecoin.


# Setting Up Keystone (Legacy)

If your Keystone is running firmware version [**M-4.5 (Multi-Coin)**](#foreword) **or newer**, please refer to the setupthe  below:

{% content-ref url="/pages/x541tZDZhcrX90Xg7iNU" %}
[Setting Up Keystone (New)](/getting-started/setting-up-keystone-new)
{% endcontent-ref %}

## I. **Web Authentication**

**Preparation**：① Keystone  ② Laptop or Phone

1\. Press and hold the “Power” button for 3s to boot Keystone.

2\. Choose a system language and tap \[Next].

<figure><img src="/files/-MXkdpaZtw8ufk_CxKe8" alt="Keystone-Web Authentication-1"><figcaption></figcaption></figure>

3\. Visit [Keystone official website](https://keyst.one/authentication) on your laptop or mobile phone. Click \[Authenticate] to display the Web Authentication QR code. Please adjust QR code size with the slide bar if Keystone has trouble scanning the QR code.

<figure><img src="/files/-Mb5xTa5dVMPOVbBXShp" alt="Keystone-Web Authentication-2"><figcaption></figcaption></figure>

4\. Tap \[Scan QR Code] on your Keystone device. Scan the QR code displayed on the "Web Authentication" page of the official website and Keystone will show the 8-digit verification code.

<figure><img src="/files/-Mb9irJSsazJ1fwGPn6E" alt="Keystone-Web Authentication-3"><figcaption></figcaption></figure>

5\. Input the 8-digit code shown on your Keystone on the website and click \[Verify].

<figure><img src="/files/-Mb9ivf5VZQEBTzrAS29" alt="Keystone-Web Authentication-4"><figcaption></figcaption></figure>

6\. If the web page says “Your Device is Secure!”, tap \[Success] on your Keystone device.

<figure><img src="/files/-MbK02QOk8xTkbYfhUDH" alt="Keystone-Web Authentication-5"><figcaption></figcaption></figure>

{% hint style="info" %}
Web Authentication helps prevent supply chain attacks. If the device has been tampered with, authentication will fail. For more information on how Web Authentication works, visit our [blog](https://blog.keyst.one/web-authentication-a-counter-to-supply-chain-attacks-62d0272f656b).&#x20;
{% endhint %}

## **II. Set a Strong Password**

1\. Password Length: At least 10 characters.

2\. Must include upper and lower case letters and digits, symbols are allowed.

<figure><img src="/files/-MXB-KhsCa1YJwzKzWnp" alt="Keystone-GetStarted-1"><figcaption></figcaption></figure>

{% hint style="info" %}
After the Keystone imports a recovery phrase, the password can be used to sign transactions (private keys will call a password for signature). This means your cryptocurrencies can be sent out if your password is leaked. Please set **a strong password** instead of using simple passwords like names or birthdays as this may make it easier for an attacker to brute force it and access your recovery phrase.
{% endhint %}

## **III. Creating or Importing a Wallet & Recording the Recovery Phrase**

**Preparation**: Recovery phrase paper or metal tablet&#x20;

{% hint style="danger" %}
**Caution: You are not recommended to perform this step in public places or with others.**
{% endhint %}

### 1. Create a Wallet

If you do not have a recovery phrase or need to generate a new recovery phrase, please select \[Create Wallet]. &#x20;

a. Tap \[Create Wallet], then \[Next], then \[I UNDERSTAND] (please read the prompts on the Keystone carefully).

<figure><img src="/files/-Mcr1KB6YnEIppAIU_Lv" alt="Keystone-GetStarted-2"><figcaption></figcaption></figure>

b. Carefully record the recovery phrase while it is being displayed. You may want to use a metal tablet for more permanence.

<figure><img src="/files/-MXAyNzbWhr-Y4qpsa-1" alt="Keystone-GetStarted-3"><figcaption></figcaption></figure>

c. Tap \[Recovery Phrase Saved], then \[Next Step].

<figure><img src="/files/-MXAyT3rfx8s1Z5KKOXb" alt="Keystone-GetStarted-4"><figcaption></figcaption></figure>

d. Input the recovery phrase and tap \[Confirm] to create the wallet.

<figure><img src="/files/-MXB7BNRaxRSi4DC9v2i" alt="Keystone-GetStarted-5"><figcaption></figcaption></figure>

### 2. Import Wallet

If you already have a recovery phrase, you can select \[Import Wallet]. We recommend users create a new recovery phrase when beginning use of the Keystone to isolate assets from risks associated with previous use of an old recovery phrase (such as having entered it on a mobile phone connected to the internet or taking and saving pictures of the recovery phrase on a mobile phone, etc.).

a. Tap \[Import Wallet], then tap \[Import a Wallet with Single Backup].

<figure><img src="/files/-MXB8YPJ_CzXaZ-Fzwyh" alt="Keystone-GetStarted-6"><figcaption></figcaption></figure>

b. Carefully record the recovery phrase while it is being displayed. You may want to use a metal tablet for more permanence. Select recovery phrase length and tap \[Next].

<figure><img src="/files/-MXBBr4Not5l0_CQGwiY" alt="Keystone-GetStarted-7"><figcaption></figcaption></figure>

c. Enter your recovery phrase. Tap \[Import Wallet] to start creating a wallet. Then tap \[Confirm].

<figure><img src="/files/XHquP1YYftiu36rkTa33" alt="Keystone-GetStarted-8"><figcaption></figcaption></figure>

{% hint style="info" %}
Keystone supports importing 12/18/24-word recovery phrases and generating 24-word recovery phrases by default.
{% endhint %}

{% hint style="info" %}
The recovery phrase entails complete ownership of the cryptocurrency. If your Keystone is lost or stolen, the recovery phrase is the only way to retrieve your assets. Please make sure you have physically backed up your recovery phrase instead of saving it as a photo or other format on any device which may connect to the internet. Air-gapped mobile phones, laptops, and USB sticks have [larger attack surfaces](https://blog.keyst.one/air-gapped-computers-and-phones-vs-hardware-wallets-whats-the-difference-458888cdd97), so we advise against using them.
{% endhint %}

## **IV. Add Assets**

1\. Select the Assets you need to manage.

2\. Tap the \[√] icon on the top right of the page.

<figure><img src="/files/-MXBD02Pd0Bk-ng15ANr" alt="Keystone-GetStarted-9"><figcaption></figcaption></figure>

{% hint style="info" %}
The Keystone hardware wallet only supports showing main-chain cryptocurrencies. Please add and manage Tokens on the Keystone mobile app.
{% endhint %}

{% hint style="info" %}
If you upgrade Keystone to the BTC-Only firmware version, you will only be able to manage bitcoin in Assets and cannot switch back.
{% endhint %}

&#x20;[How to add tokens on the Keystone mobile app](https://support.keyst.one/basic-features/adding-tokens-on-the-mobile-app)

[Which tokens are supported?](https://keyst.one/keystone-supported-crypto-assets)

## **V. Sync with** Keystone **Mobile App**

**Preparation:** [Download the Keystone mobile app](https://keyst.one/companion-app)

If the firmware version of your Keystone is a BTC-Only version, you can also use **Electrum, Wasabi Wallet, Bluewallet, BTCPay Server, Specter, Sparrow,** or **Casa** as a watch-only wallet in place of the Keystone companion app.

{% content-ref url="/pages/-MVyPRneulZeH1WoxoaV" %}
[Electrum](/3rd-party-wallets/bitcoin-wallets/electrum)
{% endcontent-ref %}

{% content-ref url="/pages/-MVyPYuZK6BMVgx3ND0l" %}
[Wasabi Wallet](/3rd-party-wallets/bitcoin-wallets/wasabi)
{% endcontent-ref %}

{% content-ref url="/pages/-MW7JjU4MJsyCBlEQdIq" %}
[Enhance the security of BlueWallet](/3rd-party-wallets/bitcoin-wallets/bluewallet)
{% endcontent-ref %}

{% content-ref url="/pages/-MVyPfx1gnjhrcoPt9AF" %}
[BTCPay Server](/3rd-party-wallets/bitcoin-wallets/btcpayserver)
{% endcontent-ref %}

{% content-ref url="/pages/-MW7JyMLhkbyPQnAGzj9" %}
[Specter](/3rd-party-wallets/bitcoin-wallets/specter)
{% endcontent-ref %}

{% content-ref url="/pages/-MVyPn\_yLMfkxVguGxt6" %}
[Sparrow Wallet](/3rd-party-wallets/bitcoin-wallets/sparrow)
{% endcontent-ref %}

{% content-ref url="/pages/-MkpBGPcelERWFQflli\_" %}
[Casa](/3rd-party-wallets/bitcoin-wallets/casa)
{% endcontent-ref %}

1\. Open the Keystone mobile app and tap \[Bind]. Scan the QR code displayed on the Keystone hardware wallet.

<figure><img src="/files/-Magwbnz_ZM8LONOoQA_" alt="Keystone-GetStarted-10"><figcaption></figcaption></figure>

2\. If you have difficulty scanning the QR code, please tap \[Difficulty scanning?...] and try again.

<figure><img src="/files/-McrmQJ5AfW6OzkKN3RK" alt="Keystone-GetStarted-11"><figcaption></figcaption></figure>

{% hint style="info" %}
If a transaction is large, the number of QR codes will increase. Please keep scanning until the process finishes.
{% endhint %}

{% hint style="info" %}
Problems scanning? Please [submit a request](https://keyst.one/request) to us. Our admins will reply to you ASAP.
{% endhint %}


# Setting Up Keystone (New)

{% hint style="danger" %}
**Please note that this tutorial is only applicable to Keystone with firmware version M-4.5 (Multi-Coin) or newer!**
{% endhint %}

If your Keystone is running firmware versions **older than** M-4.5 (Multi-coin), please refer to the setup below:

{% content-ref url="/pages/-MVz8Ytx1SJGMucwFAK5" %}
[Setting Up Keystone (Legacy)](/getting-started/setting-up-keystone-in-5-steps)
{% endcontent-ref %}

## Foreword

The Keystone Hardware Wallet will help you create your cryptocurrency wallet in a secure and offline environment.&#x20;

Now, let‘s get to [know your Keystone](https://support.keyst.one/) and properly set it up to secure your crypto.

## Preparation

1\. Keystone with battery level 70% or above.&#x20;

2\. Computer: For visiting the online beginner's guide, interact with the provided web authentication tool, and download the firmware upgrade file.&#x20;

3\. A MicroSD card (Default FAT32 format and capacity not exceeding 512GB.）&#x20;

4\. A MicroSD card reader (Not necessary if your laptop has a microSD card port.)

5\. Recovery phrase paper or metal tablet: For storing your recovery phrase (seed or secret words).&#x20;

## Step 1. Web Authentication

1\. Press and hold the “Power” button for 3s to boot up your Keystone.

2\. Choose a system language, in this case, \[English], then select \[Next] > \[It's ready, start].

<figure><img src="/files/Z9Tffb870SoFyyU9HgmP" alt="Keystone-New-GetStarted-1"><figcaption></figcaption></figure>

3\. Visit [Web Authentication interface](https://keyst.one/authentication?locale=en) on Keystone's official website on your laptop or mobile phone. Click \[Authenticate] to display the Web Authentication QR code.&#x20;

<figure><img src="/files/LuQCbXPW2cAQotyq5WqE" alt="Keystone-New-GetStarted-2"><figcaption></figcaption></figure>

5\. Tap \[Scan QR Code] on your Keystone device. Scan the QR code displayed on the "Web Authentication" page and your Keystone device will show an 8-digit verification code.

<figure><img src="/files/aq7uISvmqTmDAczYc8RG" alt="Keystone-New-GetStarted-3"><figcaption></figcaption></figure>

{% hint style="info" %}
**Tip:** Please readjust the QR code size with the slide bar below the QR code if you are experiencing any difficulties scanning the QR code with your Keystone device.
{% endhint %}

<figure><img src="/files/A8oElZO4IvffvnkSCTRS" alt="Keystone-New-GetStarted-4"><figcaption></figcaption></figure>

6\. Enter the 8-digit verification code on the web page and click on \[Verify].

<figure><img src="/files/aQUtk1EmC0VrmNcVRA1b" alt="Keystone-New-GetStarted-5"><figcaption></figcaption></figure>

7\. If the web page says “Your Device is Secure!”, tap \[Success] on your Keystone device.

<figure><img src="/files/wnulMMUlH59RHNHNVdUT" alt="Keystone-New-GetStarted-6"><figcaption></figcaption></figure>

{% hint style="info" %}
**Did you know?**&#x20;

Web Authentication tools help prevent supply chain attacks. If the device has been tampered with in any way, the authentication will fail. For more information on how Web Authentication works, visit our [blog](https://blog.keyst.one/web-authentication-a-counter-to-supply-chain-attacks-62d0272f656b).
{% endhint %}

## Step 2. Set a Strong Password

1\. Password Length: At least 10 characters.

2\. Must include upper and lower case letters and digits. symbols are allowed.

<figure><img src="/files/vinOif2hmNIqZisb39yw" alt="Keystone-New-GetStarted-7"><figcaption></figcaption></figure>

{% hint style="info" %}
**Did you know?**&#x20;

After the Keystone imports a recovery phrase, the password can be used to sign transactions (private keys will call a password for signature). This means your cryptocurrencies can be sent out if your password is leaked. Please set a strong password instead of using simple passwords like names or birthdays as this may make it easier for an attacker to force their access to your recovery phrase.
{% endhint %}

## Step 3. Firmware Upgrade&#x20;

Upgrading your firmware to the latest version allows you to benefit from new features and is highly recommended.

#### **A.** You can click the page link below to check the specific operation in the firmware upgrading tutorial for :

{% content-ref url="/pages/-MVz-o9g8Dc-vlyVuAZj" %}
[Firmware Upgrade](/getting-started/firmware-upgrading)
{% endcontent-ref %}

#### **B.** You can also refer to the following steps:

1\. Insert the microSD card into your computer.

2\. [Download the latest firmware file](https://keyst.one/firmware?locale=en). You can choose either the multi-coin firmware or the BTC-only one based on your needs.

{% hint style="danger" %}
**Important Note:** Please be aware that once the device upgrades from a multi-coin firmware version to a BTC-Only firmware, switching back to the multi-coin one is impossible.
{% endhint %}

<figure><img src="/files/1QybsjieFIyEApcFQtKy" alt="Keystone-New-GetStarted-8"><figcaption></figcaption></figure>

<figure><img src="/files/Hh0Mu6wyfacCCAqiB9QZ" alt="Keystone-New-GetStarted-8"><figcaption></figcaption></figure>

3\. Unzip the downloaded package and copy the "update.zip" file to the root directory of your microSD card.

{% hint style="info" %}
**Tip:** Please read [How to upgrade firmware](#foreword) for more details if you are not sure about the specific operation.
{% endhint %}

<figure><img src="/files/loIF29GfEMASxWvMnmaA" alt="Keystone-New-GetStarted-8"><figcaption></figcaption></figure>

4\. Take out the microSD card from your PC and insert it into the Keystone.

the&#x20;

5\. Press \[Update Now] > Check the sha256 and then select \[Update Now] > Enter the password to start updating.

<figure><img src="/files/2Cswbs2RaMxfIQghgPPh" alt="Keystone-New-GetStarted-10"><figcaption></figcaption></figure>

{% hint style="info" %}
**Tip:** If your microSD card isn’t recognized, it might not be in FAT32 format. If so, please format your microSD card and try again.

&#x20;([How to Format a MicroSD Card to FAT32?](https://support.keyst.one/getting-started/firmware-upgrading#iv.-how-to-format-a-microsd-card-to-fat32))
{% endhint %}

## Step 4. Creating or Importing a Wallet&#x20;

**Preparation:** Recovery phrase paper or metal tablet.

{% hint style="danger" %}
**Caution:**

1. Performing the following steps in public places or with others around is NOT recommended.
2. Be sure to write down and store your recovery phrase (seed or secret words) in secure locations.
   {% endhint %}

### 1. Create a Wallet&#x20;

If you do not have a recovery phrase or need to generate a new recovery phrase, please select \[Create Wallet].

a. Tap \[Create Wallet], then enter the password and tap \[Confirm], then tap \[Create a Wallet with Single Backup] > \[I UNDERSTAND] (please carefully read the prompts on your Keystone device).

<figure><img src="/files/kynxUCntOTHjDkjxG64Z" alt="Keystone-New-GetStarted-11"><figcaption></figcaption></figure>

b. Carefully record the recovery phrase while it is being displayed. You may want to use a metal tablet for more permanence. Then select \[Recovery Phrase Saved] > \[Next Step].

<figure><img src="/files/nzJQevGsuiYO30fst0l2" alt="Keystone-New-GetStarted-12"><figcaption></figcaption></figure>

<figure><img src="/files/1GCTFpTBD27BdkNSxE8i" alt="Keystone-New-GetStarted-13"><figcaption></figcaption></figure>

c. Input the recovery phrase and select \[Confirm] to create the wallet.

<figure><img src="/files/0rpd1LQKQ8mqcGijKWyH" alt="Keystone-New-GetStarted-14"><figcaption></figcaption></figure>

### 2. Import Wallet&#x20;

If you already have a recovery phrase, you can select \[Import Wallet]. We still recommend users create a new recovery phrase since using an old recovery phrase would also import any associated risks with it (examples include having entered your recovery phrase on a mobile phone connected to the internet or taking/saving pictures of the recovery phrase on a mobile phone, etc).

a. Tap \[Import Wallet], then enter password and tap \[Confirm] > \[Import a Wallet with Single Backup], then select recovery phrase length and tap \[Next].

<figure><img src="/files/lyc48libi94es9xYG8Sv" alt="Keystone-New-GetStarted-13"><figcaption></figcaption></figure>

b. Enter your recovery phrase. Tap \[Import Wallet] to finish importing your wallet.

![](/files/dF12tvmBIRsXqhusheF2)

**Tip:** Keystone supports importing 12/18/24-word recovery phrases and generating 24-word recovery phrases by default.

{% hint style="info" %}
**Did you know?**&#x20;

The recovery phrase entails complete ownership of the cryptocurrency. If your Keystone is lost or stolen, the recovery phrase is the only way to retrieve your assets. Please make sure you have physically backed up your recovery phrase instead of saving it as photo or other format on any device which may connect to the internet. Air-gapped mobile phones, air-gapped laptops, and USB sticks have [larger attack surfaces](https://blog.keyst.one/air-gapped-computers-and-phones-vs-hardware-wallets-whats-the-difference-458888cdd97) so we strongly advise against using them to save your recovery phrase.&#x20;
{% endhint %}

## Step 5. Choose the Proper Companion App and **Add Assets**

Once you have successfully created/imported a wallet on your Keystone device, you can select a companion software wallet. This allows you to view your balance and create transactions.

1\. Select a proper companion software wallet based on your needs. In this tutorial, we’ll be selecting the \[Keystone Companion App] and show you how to pair your Keystone device with the Keystone Companion App in Step 6.

2\. Select the \[Cryptocurrency] you want to manage and tap the \[√] icon on the top right corner of the screen.

![](/files/5avndeUFiw5vVONBQ17C)

{% hint style="info" %}
**Did you know?**&#x20;

1. The Keystone hardware wallet only supports the display of main-chain cryptocurrencies. Please [add and manage Tokens through the Keystone mobile app](https://support.keyst.one/basic-features/adding-tokens-on-the-mobile-app).&#x20;
2. If you upgrade Keystone to the BTC-Only firmware version, you will only be able to manage bitcoin in the Asset page and will not be able to switch back.
   {% endhint %}

[How to add tokens on the Keystone mobile app?](https://support.keyst.one/basic-features/adding-tokens-on-the-mobile-app)

[Which tokens are supported?](#foreword)&#x20;

## Step 6. Sync with the Keystone Companion App&#x20;

If the firmware version of your Keystone is BTC-Only version, you can also use [Electrum](https://support.keyst.one/3rd-party-wallets/bitcoin-wallets/electrum), [Wasabi Wallet](https://support.keyst.one/3rd-party-wallets/bitcoin-wallets/wasabi), [Bluewallet](https://support.keyst.one/3rd-party-wallets/bitcoin-wallets/bluewallet), [BTCPay Server](#foreword), [Specter](https://support.keyst.one/3rd-party-wallets/bitcoin-wallets/specter), [Sparrow](#foreword) or [Casa](https://support.keyst.one/3rd-party-wallets/bitcoin-wallets/casa) as a watch-only wallet in place of the Keystone companion app.

If you choose to pair your Keystone device with the Keystone Companion App, please [download Keystone Companion App](#foreword). Pairing is easy, please follow the steps below:

1\. Press \[Display QR Code] on the Keystone device to display the QR Code for syncing purposes.

<figure><img src="/files/WrE39jvHX0PotcvGrrc7" alt="Keystone-New-GetStarted-14"><figcaption></figcaption></figure>

2\. Open the Keystone Companion App and tap \[Bind]. Scan the QR code displayed on the Keystone hardware wallet.

<figure><img src="/files/WYv1hDGyj1W02DFDweCK" alt="Keystone-New-GetStarted-15"><figcaption></figcaption></figure>

3\. If you have difficulty scanning the QR code, please tap \[Difficulty scanning?...] and try again.

![](/files/uAfG3tMUDacyxpaifVEt)

{% hint style="info" %}
**Tips:**

1. If a transaction is large, the number of QR codes shown will increase. Please keep scanning until the whole process is finished.
2. Problems scanning? Please [submit a request](https://keyst.one/request) to us. Our admins will reply to you ASAP.
   {% endhint %}

**For more details about syncing with the Keystone Companion App, please refer to the  below:**

{% content-ref url="/pages/-MVyOy-t8rfzqoaEeCAD" %}
[Keystone Mobile App Syncing](/getting-started/syncing-with-the-keystone-vault-mobile-app)
{% endcontent-ref %}

That’s all!&#x20;

We hope this guide will be useful when you first time setting up your Keystone!


# Firmware Upgrade

To improve the stability of your Keystone Pro/Essential device, upgrade its firmware by following these steps:

## Prepare your device and computer <a href="#id-2qlf16d20tb" id="id-2qlf16d20tb"></a>

1. Finish or skip the [initial setup](https://keyst.one/get-started).
2. Ensure your Keystone wallet battery is above **70%**.
3. [Download the firmware upgrade package](https://keyst.one/firmware) on your computer.
4. Use a MicroSD memory card (default FAT32 format and not exceeding 512GB) and a card reader (if needed).

## Upgrade the firmware <a href="#id-8mhefhz9xrco" id="id-8mhefhz9xrco"></a>

Upgrading the firmware is a simple process that can be completed in just a few steps.

1. [Format the MicroSD memory card to FAT32 format](#format-the-microsd-memory-card-to-fat32-format)
2. [Download the firmware version](#download-the-firmware-version)
3. [Click confirm to start the upgrade](#click-confirm-to-start-the-upgrade)

### Format the MicroSD memory card to FAT32 format

1. Insert the MicroSD memory card into the Keystone device. Gently **press** the SD card into the card slot **until you hear a click** to confirm it is properly inserted.
2. On the homepage, click "Menu" > "Settings" > "System Settings" > "Format TF Card" > "Confirm" > Format successful.

<figure><img src="/files/TSClKGlp5nUt4odiy6rx" alt=""><figcaption></figcaption></figure>

### Download the firmware version

1. Insert the MicroSD memory card into the card reader.
2. Download the appropriate version and save the **"update.zip"** file onto the root directory of your MicroSD card.

{% hint style="info" %}
Ensure that the only file on your MicroSD card is the "update.zip" file. Remove any other files such as "M-10.2" or "B-3.4" to allow the device to read the file directly.
{% endhint %}

<figure><img src="/files/0jOG77JzubWkRA7ngG42" alt=""><figcaption></figcaption></figure>

For instance, if you downloaded M-10.2, unzip the file by double-clicking on "M-10.2". Then, locate the unzipped "M-10.2" folder and move the "update.zip" file to the root directory of your MicroSD card.

<figure><img src="/files/h5ZRnW589EvUfSNuByAv" alt=""><figcaption></figcaption></figure>

#### Are you having difficulties with the "update.zip"? Take a look at this gif for assistance.

<figure><img src="/files/sbsm5g1fk0d8zRt9SeCw" alt=""><figcaption></figcaption></figure>

### Click confirm to start the upgrade

1. Insert the MicroSD memory card into the Keystone device.
2. Compare the SHA256 and upgrade. If an "update" pop-up appears within 30 seconds, make sure to verify the SHA256 provided on the device with the one found on the official website.&#x20;

{% hint style="info" %}
\*The SHA256 hash provided in the picture is for package M-10.2.
{% endhint %}

<figure><img src="/files/s4kKnmsgbQCsNRjezO8i" alt=""><figcaption></figcaption></figure>

<figure><img src="/files/xx0y6nL7QcnfkSvGlAQg" alt=""><figcaption></figcaption></figure>

3. If the pop-up doesn't appear, you can access the menu button and navigate to \[Settings], then tap \[Version]. If that doesn't work, try restarting the device and attempting again.

<figure><img src="/files/McDpKeuZJjJkcP1TVRlH" alt=""><figcaption></figcaption></figure>

## Unable to upgrade the firmware?&#x20;

Please consider the following troubleshooting steps:

1. Insert the MicroSD card correctly by gently pressing it into the card slot until you hear a click, ensuring it is properly inserted.
2. Make sure that the only file on your MicroSD card is the "update.zip" file. Remove any other files like "M-10.2" or "B-3.4" to allow the device to directly read the intended file.
3. If the "Firmware Update" info doesn't appear, restart the device.
4. Verify that your MicroSD card is formatted to FAT32 and does not exceed 512GB in size.
5. If the problem persists, try using a different MicroSD card. We typically recommend using SanDisk Ultra cards.
6. Double-check that you have downloaded the correct file. If your terminal version is "BTC-Only," ensure that you have downloaded the "Multi-coin to BTC-Only" version.

<figure><img src="/files/51seTZUzjzmmJzrvVJ3q" alt=""><figcaption></figcaption></figure>

These steps should help you identify and resolve any issues preventing the firmware upgrade's success.


# How to Format a MicroSD Card to FAT32?

Keystone has the function of formatting a microSD card to FAT32. This article will show you how to format a microSD card to FAT32 with Keystone.

## I. Steps

1\. Insert the microSD card into the Keystone and turn the device on.

2\. A pop-up box prompts that the microSD card needs to be formatted first. Tap \[Format Now].

<figure><img src="/files/-McwpZxSHULNgRY3P6jX" alt="Keystone-SDcardFormat-1"><figcaption></figcaption></figure>

**You can also trigger the formatting operation in the system settings.**

1\. Tap \[Menu] icon at the top left of the main page > \[Settings] > \[System Settings].

<figure><img src="/files/-MYJYf_XOZndclfiaoVb" alt="Keystone-SDcardFormat-"><figcaption></figcaption></figure>

2\. Tap \[Format Card] > Tap \[confirm] > Formatted successfully.

<figure><img src="/files/-MYJYkdpS_AC52N_YX9-" alt="Keystone-SDcardFormat-3"><figcaption></figcaption></figure>


# Verify the SHA256 Checksum of the Firmware Update File

The Keystone firmware enables verification of the SHA256 checksum of the firmware update file.

You can verify the SHA256 checksum of the firmware update file with the Keystone firmware through the **2 available options** provided below.

1. &#x20;Go to the [official website](https://keyst.one/firmware) and choose the version you need. Follow the hints and download the firmware upgrade file (e.g. M-10.2)

<figure><img src="/files/Y5NOHM8Mh18SMdVNdzNO" alt="Keystone-checksum-1"><figcaption></figcaption></figure>

2. Unzip the firmware file "M-10.2" and extract the "update.zip" file.

<figure><img src="/files/6VFG2oG5zgoJvaePWkbI" alt="Keystone-checksum-2"><figcaption></figcaption></figure>

3. **2 options** to verify the SHA256 checksum

{% tabs %}
{% tab title="Veriftied by Keystone" %}

1. Insert the microSD card into the Keystone and activate the device.
2. Verify that the "sha256" value displayed on the Keystone matches the one displayed on the official website.

<figure><img src="/files/F0ix2u7AOD8esootWUaA" alt="Keystone-checksum-3"><figcaption></figcaption></figure>
{% endtab %}

{% tab title="Veriftied by 3rd party tools" %}

1. Use the adb/command line tool on your PC or Terminal on Mac to run the following command:

Windows PowerShell/Command Prompt: certutil -hashfile file\_path/file\_name SHA256

MacOS Terminal: shasum -a 256 /file\_path/file\_name

Linux: sha256sum /file\_path/file\_name

2. Check whether the obtained SHA256 matches the SHA256 checksum displayed on our official website.
   {% endtab %}
   {% endtabs %}


# Getting Started with M-10.0 or newer for Beginners

M-10.0 update connectivity with multi-chain on popular software wallets such as MetaMask, Keplr, Safe, BlueWallet, and more, thereby enhancing the user experience with ease.

This tutorial will show you how to use the Keystone Hardware Wallet version M-10.0 **or newer**, which has a new user interface design. We will use the Keystone Companion App to guide you through connecting software wallets, signing transactions, and managing your assets.

#### You'll learn how to:

* [Connect your software wallet](#_c1cioyl1msoj)
* [Sign transactions](#sending-cryptocurrencies-sign-transactions): This section will explain the process of signing transactions, which is similar to sending your cryptocurrencies.
* [Receive Cryptocurrencies](#receiving-cryptocurrencies)
* [Add/display more assets on Keystone](#add-display-more-assets-on-keystone)
* [Add/display more addresses on Keystone](#add-display-more-addresses-on-keystone)

By following this tutorial, you'll be able to easily manage your digital assets using Keystone Hardware Wallet and the Keystone Companion App. It's designed for beginners, so don't worry if you're new to this!

{% hint style="warning" %} <mark style="color:red;">**Warning:**</mark>&#x20;

* Never import software wallet recovery phrases into hardware wallets.&#x20;
* Store recovery phrases offline in hardware wallets and backup them in multiple locations.&#x20;
* Regularly update the hardware wallet firmware and use two-factor authentication and password protection to enhance security.&#x20;
* If the recovery phrase is compromised, transfer funds to a new address and generate a new recovery phrase.
  {% endhint %}

### Preparation: <a href="#jt8mfwp7y0t0" id="jt8mfwp7y0t0"></a>

1. Finish the [initial setup](https://keyst.one/get-started).
2. Before you begin, make sure your Keystone device is updated to Firmware version M-10.0 (Multi-Coin) **or later**.\
   If you need assistance updating your firmware, refer to the “How to [upgrade your firmware](/getting-started/firmware-upgrading)” tutorial.
3. Additionally, you need to install the software wallet you want to use. Check the “[Supported Wallets and Coins](https://keyst.one/supported-wallets-and-assets)” page for a compatible wallet.

{% hint style="info" %}
To obtain the Keystone Companion App, simply search for "Keystone Hardware Wallet" on either the Google Store or Apple Store.
{% endhint %}

#### Here are the functions of these buttons to familiarize yourself with before starting.

<figure><img src="/files/UoJo7ize0P7EAVK13o9Q" alt="Keystone-function button"><figcaption></figcaption></figure>

### To connect the software wallet with Keystone Hardware Wallet <a href="#c1cioyl1msoj" id="c1cioyl1msoj"></a>

#### On Keystone: <a href="#bwknvghc78qj" id="bwknvghc78qj"></a>

1. Hold your Keystone Hardware Wallet and tap \[Connect Software Wallet].
2. Select the software wallet you want to connect with.
3. Select the assets you want to manage.
4. Tap \[Confirm] and a QR code will appear.

<figure><img src="/files/frdSVahOPnowYTnCBVe3" alt="Keystone-Connect"><figcaption></figcaption></figure>

#### On your software wallet: <a href="#id-189yta22083z" id="id-189yta22083z"></a>

1. Find the import or connect option and select \[Keystone Hardware Wallet].
2. Scan the QR code with your camera and follow the on-screen instructions to complete the pairing process.

To sync your Keystone Hardware Wallet, you can tap on the "bind" or  "scan" button within the Keystone Companion App, for instance.

<figure><img src="/files/DhXcjj72EMhEQf8duVQj" alt="Keystone-connect-1"><figcaption></figcaption></figure>

That's it! You're now ready to securely manage your digital assets using your Keystone Hardware Wallet and your software wallet.

### Sending Cryptocurrencies/Sign transactions

To send a transaction using your Keystone Hardware Wallet is easy.

**Tap the scan button** on Keystone Hardware Wallet to **sign any transaction** on its compatible software wallet. Here are the steps:

1. Open your software wallet (such as Keystone Companion App) and start a transaction.

<figure><img src="/files/89DDSL3UeMmsdeLEEN82" alt="Keystone-send-1"><figcaption></figcaption></figure>

2. Enter the recipient's address and amount, and confirm the transaction.

<figure><img src="/files/apAgKskpQuXOZ4yIrZvs" alt="Keystone-send-2"><figcaption></figcaption></figure>

3. Hold your **Keystone Hardware Wallet** and tap the scan button to view the transaction details.
4. Enter your password and a QR code will appear.

<figure><img src="/files/jQzqKgTWLaEBEehFNLFy" alt="Keystone-send-2"><figcaption></figcaption></figure>

5. On **Keystone Companion App**, tap \[Scan the QR code on Keystone] to scan the QR code.

That’s it! Once the transaction is signed, it will be broadcasted to the network for processing.

### Receiving Cryptocurrencies

1. Confirm that you have selected the correct cryptocurrency before proceeding to receive it.
2. On the main page, select the **corresponding coin** you wish to receive and tap on it.
3. Tap the address field to generate a **QR code** that can be scanned by your software wallet to receive your cryptocurrency.

<figure><img src="/files/K5Ie0H0NXYY6wPT1xJLe" alt="Keystone-receive"><figcaption></figcaption></figure>

### Add/display more assets on Keystone

To add or display more assets on your Keystone device is quite simple.

1. Hold your Keystone device and tap the "..." icon on the main page.
2. Select "Manage Assets" to see the assets list.
3. Choose the assets you want to display on the main page by selecting them.
4. Once you've made your selection, check them to add them to the main page.

That's it! Your selected assets will now be displayed on the main page.

<figure><img src="/files/XhPJjmrJZuRxVGpzjE5b" alt="Keystone-add assest"><figcaption></figcaption></figure>

### Add/display more addresses on Keystone

1. Tap a coin to view its address.
2. Tap the "..." icon in the top-right corner.
3. Select "Add Address" to choose the number of accounts to display.

{% hint style="info" %}
**Tips:**

1. You can add up to 9 addresses at once. To add more, tap "Add Address" again.
2. Note that if you want to add token addresses, you need to do so from the main coin page. This feature is not available on the token page yet.\
   For example, to add more BNB addresses, go to the ETH page to add them.
   {% endhint %}

That's it! You've added more addresses to your Keystone device.

<figure><img src="/files/degQGD66wGxLPsmULB6F" alt="Keystone-add address"><figcaption></figcaption></figure>


# Keystone Mobile App Syncing

{% hint style="info" %}
Important Note: Please follow the updated tutorial if the firmware version is newer than M-9.8.
{% endhint %}

## I. **What is the purpose of the** Keystone Mobile Ap&#x70;**?**

As you might already know, the Keystone Hardware Wallet is completely offline and 100% air-gapped, which means it is not connected to the blockchain so it cannot show you how many coins you have not created any transactions on it.&#x20;

This is where the app comes into play. The Keystone Mobile App is designed to be paired with the Keystone Hardware Wallet to easily view all of your coins and create transactions.

Users can easily pair their Keystone devices with the Keystone Mobile APP via a QR code so your APP would have all of your public addresses associated with your device. The addresses sync up with the blockchain and allow you to view your balances and create transactions.&#x20;

## II. Operation

**Preparation:** Download the Keystone Mobile App from Google Store or App Store

1\. Open the Keystone mobile app and tap \[Bind]. Scan the QR code displayed on the Keystone hardware wallet.

<figure><img src="/files/-Mb5thCaFhjBlRHVp6E9" alt="Keystone-AppSyncing-1"><figcaption></figcaption></figure>

**Tips:**

1\) If you have already initialized your device, Please touch the \[•••] icon > \[Connect Software Wallet] to show the QR code.

<figure><img src="/files/ImMUmaLzdG1R6BiUxNip" alt="Keystone-AppSyncing-2"><figcaption></figcaption></figure>

2\) If the data is large, the number of QR codes will increase. Please keep scanning until the process finishes. If you have problems scanning due to the size of the QR code presented, please touch the QR code and use the "zoom in/out" tool to help with the scanning process. If you still have problems with scanning, please[ submit a request](https://keyst.one/request) to us. Our support staff will reply to you ASAP.

<figure><img src="/files/-Mcrionb9qEjHDhyUzCX" alt="Keystone-AppSyncing-3"><figcaption></figcaption></figure>

3\) The Multi-coin firmware version now also supports creating XRP Toolkit, polkadot{.js}, MetaMask PoC Version, SushiSwap, Yearn Finance, Zapper and Gnosis Safe watch-only wallet. Instructions below:

{% content-ref url="/pages/-MW7Ls6ikl8Tq3m-5m7O" %}
[XRP Toolkit (XRP)](/3rd-party-wallets/other-coins-keystone/xrptoolkit)
{% endcontent-ref %}

{% content-ref url="/pages/-MW7KrOU8RvqtPJ9vrZr" %}
[Polkadot{.js} (DOT/KSM)](/3rd-party-wallets/eth-and-web3-wallets-keystone/polkadot.js-polkadot-kusama-with-kesytone)
{% endcontent-ref %}

{% content-ref url="/pages/-MVzjClzDuQFACnCeQ1h" %}
[MetaMask](/3rd-party-wallets/eth-and-web3-wallets-keystone/bind-metamask-with-keystone)
{% endcontent-ref %}

{% content-ref url="/pages/-MVzj8TOa\_mCPGFJp8Lo" %}
[MetaMask & DeFi](/3rd-party-wallets/eth-and-web3-wallets-keystone/bind-metamask-with-keystone/how-to-use-metamask-keystone-with-defi)
{% endcontent-ref %}

{% content-ref url="/pages/-Mgj80imYuKykt1C7hCw" %}
[SushiSwap](/3rd-party-wallets/defi-dapp-with-keystone/how-to-use-sushiswap-defi-with-keystone)
{% endcontent-ref %}

{% content-ref url="/pages/-Mhr9C9zrEwJs6Fds8uS" %}
[Yearn Finance](/3rd-party-wallets/defi-dapp-with-keystone/yearn-finance)
{% endcontent-ref %}

{% content-ref url="/pages/-Mi0XDX0Qyh72Vm7SaCw" %}
[Zapper](/3rd-party-wallets/defi-dapp-with-keystone/zapper)
{% endcontent-ref %}

{% content-ref url="/pages/-MhrWcnEIG8SD47bOj9d" %}
[Safe](/3rd-party-wallets/defi-dapp-with-keystone/gnosis-safe)
{% endcontent-ref %}

4\) The BTC-Only firmware version now also supports the creation of Electrum wallet, Wasabi Wallet, Bluewallt, BTCPay Server, Specter and Sparrow watch-only wallets. Instructions are provided below:

{% content-ref url="/pages/-MVyPRneulZeH1WoxoaV" %}
[Electrum](/3rd-party-wallets/bitcoin-wallets/electrum)
{% endcontent-ref %}

{% content-ref url="/pages/-MVyPYuZK6BMVgx3ND0l" %}
[Wasabi Wallet](/3rd-party-wallets/bitcoin-wallets/wasabi)
{% endcontent-ref %}

{% content-ref url="/pages/-MW7JjU4MJsyCBlEQdIq" %}
[Enhance the security of BlueWallet](/3rd-party-wallets/bitcoin-wallets/bluewallet)
{% endcontent-ref %}

{% content-ref url="/pages/-MVyPfx1gnjhrcoPt9AF" %}
[BTCPay Server](/3rd-party-wallets/bitcoin-wallets/btcpayserver)
{% endcontent-ref %}

{% content-ref url="/pages/-MW7JyMLhkbyPQnAGzj9" %}
[Specter](/3rd-party-wallets/bitcoin-wallets/specter)
{% endcontent-ref %}

{% content-ref url="/pages/-MVyPn\_yLMfkxVguGxt6" %}
[Sparrow Wallet](/3rd-party-wallets/bitcoin-wallets/sparrow)
{% endcontent-ref %}


# Receiving Cryptocurrency

Both Keystone hardware wallet and the Keystone mobile app support displaying receiving addresses. If you wish to minimize use of your hardware wallet, you can have your receiving addresses displayed on the mobile app.

## I. Keystone **Hardware Wallet**

1\. Tap \[Assets] on the main page.

<figure><img src="/files/5NXsJlT5FiYVZOcqUHUF" alt="Keystone-FundsReceiving-1"><figcaption></figcaption></figure>

2\. Tap an address to display address details including the QR code and the derivation path.

<figure><img src="/files/-MXfi8bKGYOJhdPOoIh5" alt="Keystone-FundsReceiving-2"><figcaption></figcaption></figure>

[How can I create new addresses to receive cryptocurrency?](https://support.keyst.one/basic-features/adding-multiple-addresses)

Because token addresses are the same as main-chain addresses, you can use the main-chain address to receive tokens of the same cryptocurrency. For example, you can use ETH addresses to receive USDT-ERC20. [Add Tokens](https://support.keyst.one/basic-features/adding-tokens-on-the-mobile-app) on the mobile app to help with management.

## II. Keystone **Mobile App**

1\. Go to the corresponding wallet and tap \[Cryptocurrency] > \[Receive].

<figure><img src="/files/-MXknPdTiQUjDDGZ3iPc" alt="Keystone-FundsReceiving-3"><figcaption></figcaption></figure>

2\. Tap \[Address] to change the receiving address.

<figure><img src="/files/-MXfihGPMkXsjuInnbuP" alt="Keystone-FundsReceiving-4"><figcaption></figcaption></figure>

3\. There are 2 ways to share address information to a sender: (Please use addresses displayed on the Keystone device to verify receiving addresses, or scan the QR code format of the address displayed on the Keystone device when receiving.)

a. Hold down on the address to copy it to the clipboard.

b. Show the address’s QR code to the sender.

<figure><img src="/files/fWIOoDy94Rw8JePzT5D9" alt="Keystone-FundsReceiving-5"><figcaption></figcaption></figure>

## **III. Receive Mining Proceeds**

1\. If you use the Keystone hardware wallet’s addresses to receive BTC, LTC, DASH, or BCH mining proceeds, you may receive a large amount of small transactions. Transaction data and transaction fees will increase with the number of UTXOs sent at the same time.

2\. We suggest you use the HD wallet to generate mining proceeds receiving addresses, and regularly transfer to your hardware wallet. For example, if you receive 100 transactions of 0.0001 BTC, we recommend you send them in 1 transaction of 0.1 BTC to your hardware wallet address.


# Sending Cryptocurrency

Keystone uses a mobile app to complete operations which require network connection including balance updates, transaction fee calculation, transaction broadcasting, and viewing transaction details on a blockchain explorer. The Keystone hardware wallet signs transactions offline and transmits signing information to the mobile app.

## **I. Preperation**

1\. Keystone Hardware Wallet ([Getting started in 5 steps](https://support.keyst.one/getting-started/setting-up-keystone-in-5-steps)).

2\. Keystone Mobile App ([Download and install](https://keyst.one/companion-app)).

3\. [Sync with the mobile app](https://support.keyst.one/getting-started/syncing-with-the-keystone-vault-mobile-app).

## **II. Instructions（e.g. Send ETH）**

### 1. Creating Transactions with the Keystone Mobile App

a. Choose an Asset and tap \[Send].

<figure><img src="/files/-MXkbCIN4I6s3JR8oYip" alt="Keystone-FundsSending-1"><figcaption></figcaption></figure>

b. Choose a sending address.

<figure><img src="/files/-MXfCiaUdFHyx_9gUG3U" alt="Keystone-FundsSending-2"><figcaption></figcaption></figure>

c. Enter a receiving address and sending amount. (Please enter a tag if required.)

<figure><img src="/files/2MQftn8H350EoMp8U3Gi" alt="Keystone-FundsSending-3"><figcaption></figcaption></figure>

d. Adjust the transaction fee. (Fees are charged by miners. If it’s an urgent transaction, it is suggested you set a higher fee.)

<figure><img src="/files/-MXfCytnh8w2W_AD_eIW" alt="Keystone-FundsSending-4"><figcaption></figcaption></figure>

e. Tap \[Send] and \[Confirm] after confirming the transaction details. Transaction information will be displayed in QR code format. (Do not exit this page.)

<figure><img src="/files/-MaXqI3oGWOMie8s_nLF" alt="Keystone-FundsSending-5"><figcaption></figcaption></figure>

### 2. Signing Transactions with the Keystone Hardware Wallet

a. Tap \[Scan] on the top right of the main page. Scan the QR code displayed on the mobile app.

<figure><img src="/files/-MaXtegTuTlwcQwbqUwW" alt="Keystone-FundsSending-6"><figcaption></figcaption></figure>

b. Keystone will obtain the transaction information once it is finished scanning the QR code.

c. Confirm the transaction information and tap \[Sign].

<figure><img src="/files/cFzQ0JDl92m0cwSQQvZR" alt="Keystone-FundsSending-7"><figcaption></figcaption></figure>

d. Verify with your password or fingerprint. The signing information will be displayed in QR code format.

<figure><img src="/files/-MXfUkXaW5ASZJVFcemW" alt="Keystone-FundsSending-8"><figcaption></figcaption></figure>

### 3. Broadcasting Transactions with the Keystone Mobile App

a. Tap \[Scan QR code on Keystone] on the mobile app. Scan the QR code displayed on the Keystone.

<figure><img src="/files/-MahBsEeJU6Xh61PkVbZ" alt="Keystone-FundsSending-9"><figcaption></figcaption></figure>

b. Tap \[Broadcast] after scanning.

<figure><img src="/files/YiFL6Cw5c6Xa1mPpBiXg" alt="Keystone-FundsSending-10"><figcaption></figcaption></figure>

c. If the receiving address hasn’t been saved in your address book, the mobile app will jump to the address book after you broadcast your transaction. You can decide whether you want to save the receiving address to the address book.

<figure><img src="/files/-MXf_NPCrpA9XtwripUA" alt="Keystone-FundsSending-11"><figcaption></figcaption></figure>

d. Go to the cryptocurrency page to check the status of the broadcasted transaction.

<figure><img src="/files/-MXf_UTIcbzwSX77v9oM" alt="Keystone-FundsSending-12"><figcaption></figcaption></figure>

### 4. ETH RBF (Replace-By-Fee)

In ETH every pending transaction is not final and could be replaced with higher fee. Keystone APP supports RBF for ETH and ERC20.

&#x20;Tap \[Cryptocurrency] > \[Accelerate] and adjust the gas price, and then tap  \[Accelerate].

<figure><img src="/files/-MdoHfDyjX_Qt4EN-hZg" alt="Keystone-FundsSending-13"><figcaption></figcaption></figure>


# Password

In addition to the recovery phrase and Passphrase, the other options are a text password, pattern unlock, and fingerprint sensor (sensor only available on the Keystone Pro model):&#x20;

* The text password can be used to unlock the screen, signs transactions and enter your Passphrase Wallet.&#x20;
* The pattern unlock can be used to unlock the screen and also be used to reset the text password.&#x20;
* The fingerprint sensor can be used to unlock screen, signs transactions and enter the Passphrase Wallet. It may also be used to reset the system password.

## Important note

After 12 incorrect attempts using the pattern unlock option, users will be required to unlock their devices with the text password.&#x20;

After 5 incorrect attempts to unlock your device with the text password option, the device will automatically wipe itself of all data.

If your device is wiped in this way, please be advised that your Keystone can only be restored with the recovery phrase. The system password can also only be reset by entering the recovery phrase.&#x20;

{% hint style="info" %}
If both the text password and recovery phrase are lost, all assets will be irretrievable. This is a preventative measure against theft.
{% endhint %}


# Setting Pattern Lock

## I. **Pattern Password Permissions**

Pattern unlock can be used to unlock the device. Keystone won’t show pattern unlock tracing marks so as to prevent your pattern from being seen.

{% hint style="warning" %}
The device will require the main password after 12 incorrect pattern unlock attempts, and will be automatically wiped after 5 incorrect main password attempts.
{% endhint %}

## **II. Setting Up Pattern Unlock**

1\. Tap the \[Menu] icon at the top left of the main page on Keystone.

<figure><img src="/files/SvHTLXrwLocdsGp9Xx9D" alt="Keystone-SettingPattenLock-1"><figcaption></figcaption></figure>

2\. Tap \[Settings] and turn on \[Set Pattern Lock].

<figure><img src="/files/-MXkXkHXsRKX9ADeawzL" alt="Keystone-SettingPattenLock-2"><figcaption></figcaption></figure>

3\. Enter your main password to draw a pattern and confirm it.

<figure><img src="/files/-MXkXnVDT2z4wJT1PGal" alt="Keystone-SettingPattenLock-3"><figcaption></figcaption></figure>

## **III. Deleting a Pattern Unlock**

1\. Tap the \[Menu] icon at the top left of the main page on the Keystone.

<figure><img src="/files/FZCz5tZddLKo4tU5VQ9q" alt="Keystone-SettingPattenLock-4"><figcaption></figcaption></figure>

2\. Tap \[Settings] and toggle off the \[Set Pattern Lock] switch.

<figure><img src="/files/-MYJhs9wFIG6GaTZOmdk" alt="Keystone-SettingPattenLock-5"><figcaption></figcaption></figure>

&#x20;[ Forgot Your Pattern Password ?](https://support.keyst.one/basic-features/password/forgot-or-reset-a-pin-or-password)


# Fingerprint Settings（Pro only)

Use the Keystone Pro’s fingerprint function in public places like cafes or airports. Doing so can prevent the password from being captured by cameras or onlookers.

## **I. Fingerprint Permissions**

&#x20;\- Unlock device (optional)

&#x20;\- Enter Passphrase Wallet (optional)&#x20;

&#x20;\- Sign transactions (optional)

## **II. Adding Fingerprints**

1\. Tap the \[Menu] icon on the top left of the main page >\[Settings] > \[Fingerprint Settings].

<figure><img src="/files/-MXkXZ8ecfnxUm34_Mbr" alt="Keystone-FingerprintSetting-1"><figcaption></figcaption></figure>

2\. Input your password to enter the fingerprint settings page.

<figure><img src="/files/-MXHEzinYwTYLx6ahaEW" alt="Keystone-FingerprintSetting-2"><figcaption></figcaption></figure>

3\. Tap \[Start Registration]. If a fingerprint has already been added, tap \[+Add Fingerprint]. Place your finger on the fingerprint sensing area and remove it when you feel a vibration. Repeat until the enrollment process is fully complete.

<figure><img src="/files/-MXHF1MKzNF-cr20pl-E" alt="Keystone-FingerprintSetting-3"><figcaption></figcaption></figure>

4\. Tap \[Edit Name] to modify the fingerprint name for easy management or tap \[Done] to proceed with the default fingerprint name.

<figure><img src="/files/-MYJzTe_x449897sTRDq" alt="Keystone-FingerprintSetting-5"><figcaption></figcaption></figure>

## **III. Deleting Fingerprints**

1\. Go to the fingerprint settings page, and select the fingerprint you want to delete.

2\. Tap \[Delete Fingerprint] >\[Confirm].

<figure><img src="/files/-MYJzXcEAcaINREeZMBg" alt="Keystone-FingerprintSetting-6"><figcaption></figcaption></figure>

## **IV. Set Fingerprint Permissions**

1\. Go to the fingerprint settings page.

2\. Toggle \[Unlock Device].

3\. Toggle \[Enter Passphrase Wallet].

4\. Toggle \[Sign Transactions].

<figure><img src="/files/-MYJzaJZHibqJIIZZMIf" alt="Keystone-FingerprintSetting-7"><figcaption></figcaption></figure>


# Forgot or Reset a Password or Pin

## I. **Forgotten Mobile App PIN Code**

If you forget the PIN code you set for your Keystone mobile app, please uninstall the app, [reinstall](https://keyst.one/companion-app) it, and [bind your Keystone ](https://support.keyst.one/getting-started/syncing-with-the-keystone-vault-mobile-app)again. If you were using an HD wallet at the same time, please make sure you have recorded the recovery phrase for this wallet before uninstalling the app.

## **II. Resetting the PIN Code of the Keystone Mobile App**

1\. Open the Keystone mobile app and go to the \[Settings] page. Then tap \[PIN Unlock].

<figure><img src="/files/FsA1vGq22qTbRIIxy0Ra" alt="Keystone-App-PIN Restting-1"><figcaption></figcaption></figure>

2\. Tap \[Reset PIN].&#x20;

<figure><img src="/files/Bqj4oqrrpAnZlxb5oXeV" alt="Keystone-App-PIN Restting-2"><figcaption></figcaption></figure>

3\. You will be able to set a new PIN after entering your old PIN.

<figure><img src="/files/qFmrzRH1uPaTtY9SWvYs" alt="Keystone-App-PIN Restting-3"><figcaption></figcaption></figure>

## **III. Forgotten Keystone Pattern Unlock**

1\. Tap \[Switch to password unlock] and enter your password to unlock the Keystone.

<figure><img src="/files/-MXeuxrPpEkNc4HNLvEH" alt="Keystone-PatternLock Restting-1"><figcaption></figcaption></figure>

2\. Go to the Settings page. Toggle \[Set Pattern Lock] off, then on.

<figure><img src="/files/-MXkZid2eAJilCGrMsFA" alt="Keystone-PatternLock Restting-2"><figcaption></figcaption></figure>

3\. Enter your password to set a new pattern to unlock.

<figure><img src="/files/-MXkZfYhf39aW8sfs8Fj" alt="Keystone-PatternLock Restting-3"><figcaption></figcaption></figure>

## **IV. Forgotten Keystone Main Password**

If you forget the Keystone main password, tap \[Forgot password?]. You can reset your password after verifying your recovery phrase. If both password and recovery phrase are lost, the assets in the corresponding HW wallet will not be retrievable.

<figure><img src="/files/-MXeyJjE0ndApDlm_SSP" alt="Keystone-PatternLock Restting-4"><figcaption></figcaption></figure>

{% hint style="warning" %}
**Caution**: The device will require the main password after 12 incorrect pattern unlock attempts, and will automatically wipe the device after 5 incorrect main password attempts.
{% endhint %}

<figure><img src="/files/8dbx8fbB7Aghm3u9WNWP" alt="Keystone-PatternLock Restting-5"><figcaption></figcaption></figure>

## **V. Resetting the** Keystone **Main Password**

1\. Tap the \[Menu] icon on the top left of the main page.&#x20;

<figure><img src="/files/RiyUJA8hOJTnbqplpj69" alt="Keystone-PatternLock Restting-6"><figcaption></figcaption></figure>

2\. Then tap \[Settings] > \[Change Password].

<figure><img src="/files/FlA8coR25q1Ximnn8Y7I" alt="Keystone-PatternLock Restting-7"><figcaption></figcaption></figure>

3\. Enter your old password to reset the main password.

<figure><img src="/files/-MXf0PuB5aYPVL-23yPQ" alt="Keystone-PatternLock Restting-8"><figcaption></figcaption></figure>


# Add Multiple Addresses

Keystone is a multi-chain hardware wallet compatible with BIP32/39/44. Users can add multiple addresses under each Asset. The device supports adding up to nine new addresses at a time in batches. The Keystone mobile app can add new addresses one at a time. It is recommended you use the Keystone Hardware Wallet to generate addresses in batches then synchronize with the Keystone mobile app.

## **Adding Multiple Addresses**

### 1. Keystone Hardware Wallet

a. When you add an asset, Keystone will create a default address.

<figure><img src="/files/1Fefju8Jkco1r9q6w9BW" alt="Keystone-AddAddress-1"><figcaption></figcaption></figure>

b. Tap \[Asset] to enter the address list.

<figure><img src="/files/-MXfutRnqcAthgc6qfmx" alt="Keystone-AddAddress-2"><figcaption></figcaption></figure>

c. Tap the \[+] icon on the top right of the address list.

<figure><img src="/files/wWqlH0U5Y6kApLjyICkV" alt="Keystone-AddAddress-3"><figcaption></figcaption></figure>

d. Set the number of the addresses you need and tap \[Confirm].

<figure><img src="/files/-MXfv23oefh9w_2sTFOr" alt="Keystone-AddAddress-4"><figcaption></figcaption></figure>

e. Tap the edit icon to customize the address name.

<figure><img src="/files/-MXfv9qWAnhvW0OLUy3N" alt="Keystone-AddAddress-5"><figcaption></figcaption></figure>

### 2. Keystone Mobile App

Syncing with the Keystone device will transfer all addresses to the mobile app. To add new addresses directly on the app, do the following:

a. Tap \[Asset] to enter the cryptocurrency page.

<figure><img src="/files/-MYK9FLFFGV4lxGK95Rz" alt="Keystone-AddAddress-6"><figcaption></figcaption></figure>

b. Tap the wallet icon on the top right to enter the address list.

<figure><img src="/files/-MXjP7L_tpP3nxGJ7KsD" alt="Keystone-AddAddress-7"><figcaption></figcaption></figure>

c. Tap \[+ Add Address]. Input the address name and tap \[Confirm].

<figure><img src="/files/-MXjQ5bpESmA3rcbnC28" alt="Keystone-AddAddress-8"><figcaption></figcaption></figure>


# Add Tokens on the Mobile APP

Keystone supports BTC、ETH、USDT、BCH、XRP、TRON、CTC、DASH、DOT、KSM. For ease of management, the Keystone hardware wallet will only display main-chain Assets. This will not affect your ability to sign Token transactions. Users can add and manage Tokens on the Keystone mobile app.

1\. Tap the \[+] icon on the "Assets" page.

<figure><img src="/files/J2lDoSvJfUN4MnG0M3Ni" alt="Keystone-AddTokens-1"><figcaption></figcaption></figure>

2\. Toggle the switch icon beside each Token to add or delete.

<figure><img src="/files/XYe3nRQ02EkZAvyR8MKV" alt="Keystone-AddTokens-2"><figcaption></figcaption></figure>

3\. Go back to the "Assets" page and check.

<figure><img src="/files/p4UyIIJfx7MvU892rpWE" alt="Keystone-AddTokens-3"><figcaption></figcaption></figure>

&#x20;[Which Tokens are Supported by Keystone?](https://keyst.one/keystone-supported-crypto-assets)


# Add labels to Address

The Keystone mobile app supports an address book function, as well as binding multiple Keystone Wallets. You can customize the names of your sending addresses and receiving addresses in your address book and hardware wallets.

## **I. Customizing Sending Address Names**

1\. Tap \[cryptocurrency]. Tap \[Wallet] on the top right of the page.

<figure><img src="/files/-MYKFLgzXBddVn4BWcjB" alt="Keystone-AddLabels-1"><figcaption></figcaption></figure>

2\. Select the address you need to edit and enter the address page.

<figure><img src="/files/-MYKFi5XK4X0zNQrAn60" alt="Keystone-AddLabels-2"><figcaption></figcaption></figure>

3\. Tap the name of the address. Tap \[Done] when finished editing.

<figure><img src="/files/-MYKFo0LE778Nv-nxCl5" alt="Keystone-AddLabels-3"><figcaption></figcaption></figure>

## **II. Customizing Receiving Address Names in the Address Book**

1\. Tap \[Settings] > \[Address Book] > \[Add Now].

<figure><img src="/files/-Mb_VUKqcn51bLQjp5-K" alt="Keystone-AddLabels-5"><figcaption></figcaption></figure>

3\. Select an "Asset",  then input the address and choose an address name. Tap \[Add Now].

<figure><img src="/files/-MYNhk7lwy3x_OcDPeY-" alt="Keystone-AddLabels-6"><figcaption></figcaption></figure>

4\. Tap and hold, then slide to the left to edit the address name again or delete it.

<figure><img src="/files/-MYNhx64IfBK5x9DrdgZ" alt="Keystone-AddLabels-7"><figcaption></figcaption></figure>

## **III. Customize Hardware Wallet Names**

1\. Tap the \[Menu] icon at the top left of the main page. Tap \[...] and go to the wallet management page.

<figure><img src="/files/-Mam-BZDzgS3oXdzvT5z" alt="Keystone-AddLabels-8"><figcaption></figcaption></figure>

2\. Tap \[Change Wallet Name] and rename.

<figure><img src="/files/-MamEiPJKrjTMDUUqjme" alt="Keystone-AddLabels-9"><figcaption></figcaption></figure>


# View Transaction Details

Keystone is an offline device which only records transaction signatures. Even if a transaction isn’t broadcasted, the Keystone will record its signing history. You can tap \[Cryptocurrency], then \[SIGNATURES] to view detailed signing information.

<figure><img src="/files/-MXkqSZ6pUPhbU32af7_" alt="Keystone-TransactionView-1"><figcaption></figcaption></figure>

The keystone mobile app records all details of broadcasted transactions. You can tap \[Cryptocurrency] and select transactions to view their detailed information. You can also tap \[View more...] at the bottom to view more details on a blockchain explorer.

<figure><img src="/files/-MdGoXgw1dcOYzeok0i-" alt="Keystone-TransactionView-2"><figcaption></figcaption></figure>


# Set System Settings

Tap the \[Menu] icon on the top left of the assets page > \[Settings] > \[System Settings].

<figure><img src="/files/-MYOQ_Ln3nZIIvlLjWQW" alt="Keystone-SystemSettings-1"><figcaption></figcaption></figure>

### **1.Language**

\- Choose \[English] or \[中文] for the system language.

<figure><img src="/files/-MXky8TyVqoH6RGESlPb" alt="Keystone-SystemSettings-2"><figcaption></figcaption></figure>

### **2. Screen Brightness**

\- Use the slider to adjust the screen brightness.

<figure><img src="/files/-MXkyF-bqY68SLry4Xqm" alt="Keystone-SystemSettings-3"><figcaption></figcaption></figure>

### **3. Screen Timeout Length**

\- Tap \[Time] to set the screen timeout length.

<figure><img src="/files/-MXkyHn01gZogAptB2-t" alt="Keystone-SystemSettings-4"><figcaption></figcaption></figure>

### **4. Vibrate On / Off**

\- Tap \[Vibrate On / Off] to set the vibrate.

<figure><img src="/files/-MXkyLTxSb0Oj66Q64rc" alt="Keystone-SystemSettings-5"><figcaption></figcaption></figure>

### **5. Format Card**

\- Tap \[Format Card] , then \[Confirm].

<figure><img src="/files/-MXl1AcnrS8KnjpSOZfO" alt="Keystone-SystemSettings-6"><figcaption></figcaption></figure>


# Wipe the Device

Once the device is wiped, all user data on the Keystone will be erased, but the firmware version won’t be rolled back. There are two ways you can wipe the device.

### **1. If you still have your password**

a. Tap the \[Menu] icon at the top left of the main page > \[Settings] > \[Wipe Device].

<figure><img src="/files/-MXl6ozUHRKeHA6m-DCT" alt="Keystone-Wipe Device-1"><figcaption></figcaption></figure>

b. Entering your password allows you to wipe the device.

<figure><img src="/files/-MXl6ukRKJQw1c02Of4f" alt="Keystone-Wipe Device-2"><figcaption></figcaption></figure>

### **2. You forgot your password**

The device will require the main password after 12 incorrect pattern unlock attempts, and will be automatically wiped after 5 incorrect main password attempts.


# Bitcoin Wallets

One of the core design principles of the Keystone Hardware Wallet is to be **compatible** with as many software wallets as possible.

By integrating with different bitcoin wallets, the Keystone Hardware Wallet can be used for various purposes:

{% content-ref url="/pages/-MkpBGPcelERWFQflli\_" %}
[Casa](/3rd-party-wallets/bitcoin-wallets/casa)
{% endcontent-ref %}

Casa is a key management protocol. You can check [here](https://keys.casa/keystone) for more related tutorial and details.

{% content-ref url="/pages/-MW7JjU4MJsyCBlEQdIq" %}
[Enhance the security of BlueWallet](/3rd-party-wallets/bitcoin-wallets/bluewallet)
{% endcontent-ref %}

BlueWallet creates seamless UX with Keystone on the mobile devices.

{% content-ref url="/pages/-MW7JyMLhkbyPQnAGzj9" %}
[Specter](/3rd-party-wallets/bitcoin-wallets/specter)
{% endcontent-ref %}

Specter emphasizes on a full node connection and multi-sig.

{% content-ref url="/pages/-MVyPn\_yLMfkxVguGxt6" %}
[Sparrow Wallet](/3rd-party-wallets/bitcoin-wallets/sparrow)
{% endcontent-ref %}

Sparrow is one of the best bitcoin wallets for multi-sig.

{% content-ref url="/pages/-MVyPfx1gnjhrcoPt9AF" %}
[BTCPay Server](/3rd-party-wallets/bitcoin-wallets/btcpayserver)
{% endcontent-ref %}

BTCPay Server provides any merchant the function to receive Bitcoin without any middle-man.

{% content-ref url="/pages/-MVyPRneulZeH1WoxoaV" %}
[Electrum](/3rd-party-wallets/bitcoin-wallets/electrum)
{% endcontent-ref %}

Electrum the one of the earliest software wallets for bitcoin.

{% content-ref url="/pages/-MVyPYuZK6BMVgx3ND0l" %}
[Wasabi Wallet](/3rd-party-wallets/bitcoin-wallets/wasabi)
{% endcontent-ref %}

Wasabi Wallet emphasizes on maximizing privacy when sending & receiving bitcoin.

{% content-ref url="/pages/IGQTcrQZo0SkoaxNWL9V" %}
[Nunchuk](/3rd-party-wallets/bitcoin-wallets/nunchuk)
{% endcontent-ref %}

Nunchuk is a safe and advanced self-custody solution for bitcoin.

{% content-ref url="/pages/vuBbbtkDZYqOZsrjZhfh" %}
[Simple Bitcoin Wallet](/3rd-party-wallets/bitcoin-wallets/simple-bitcoin-wallet)
{% endcontent-ref %}

Simple Bitcoin Wallet is an open-source and autonomous wallet for Android devices.


# Casa

Firmware version B-2.0 (BTC-Only) or newer allows you to use Casa V 3.6.0 or newer with your Keystone Essential or Pro hardware wallets.‌ Detailed instructions provided below explains how to directly interact with Casa to create a 2-out-of-3 multi-signature wallet between your Keystone hardware wallet, Casa's Mobile Key and Casa's Recovery Key as the 3 participant co-signers. This tutorial also explains how to execute a 2-out-of-3 multisig transaction.

## I. Preparation

1\. Setup your Keystone Essential or Pro. ([Getting started in 5 steps](https://support.keyst.one/getting-started/setting-up-keystone-in-5-steps))

2\. [Firmware](https://keyst.one/firmware?locale=en) versions B-2.0 (BTC-Only) or newer running on Keystone Essential or Pro.

&#x20;   (Please read[ How to upgrade firmware](https://support.keyst.one/getting-started/firmware-upgrading) for more details.)

3\. A Smartphone with Casa V3.6.0 or newer downloaded and logged in with your Casa account.

&#x20;   (Tips: Smartphone requires iOS 14.1 or up and Android 6.0 or up.)

4\. A MicroSD card (FAT32 format with capacity NOT exceeding 512GB).

&#x20;   ([How to Format a MicroSD Card to FAT32?](https://support.keyst.one/getting-started/firmware-upgrading/how-to-format-a-microsd-card-to-fat32))

## II. Creating a 2/3 multisig wallet on Casa

1\. Run the Casa V3.6.0 or newer on your smartphone and log into your Casa account.

2\. Go to the “BASIC MULTSIG” interface and select \[Begin Basic Multisig Setup] > \[I Understand] to enter the page so you can create a 2/3 multi-signature wallet. Then, select \[Set Up Mobile Key] > \[Continue] to successfully add Casa's mobile key as the first multi-signature participant.&#x20;

{% hint style="info" %}
Note: Please be advised that this tutorial is setting up Casa's mobile key as the first participant but advanced users can also consider adding another hardware wallet key as the first participant to have a total of 2 hardware wallet keys and 1 Casa recovery key.
{% endhint %}

<figure><img src="/files/zOsHKA0PWeMYNcJ62Yaa" alt="Keystone-Casa-1"><figcaption></figcaption></figure>

3\. Turn your Keystone hardware wallet on.

4\. Select the \[Menu] icon > \[Multisig Wallet] > then select \[Casa Mode] > \[CONFIRM] > \[Continue] > \[Continue, It’s Ready]. Your Keystone hardware wallet will display a QR code to pair with Casa.

<figure><img src="/files/fLspZ3XznjfacbYQMQPB" alt="Keystone-Casa-2"><figcaption></figcaption></figure>

<figure><img src="/files/R2e0u20876qv5ysKEzA8" alt="Keystone-Casa-3"><figcaption></figcaption></figure>

5\. In the Casa app: select \[Set Up Hardware Key] > then select \[Keystone] > \[Continue] > \[Continue, It’s Set Up]&#x20;

<figure><img src="/files/mj0K6X50aPXVgIjMCkZA" alt="Keystone-Casa-4"><figcaption></figcaption></figure>

6\. Select \[Continue], then use your smartphone's camera to scan the QR code displayed on your Keystone. Your Keystone hardware wallet should now be successfully added as the second multi-signature participant.

<figure><img src="/files/AIfa0kEaQHncVrTYGDD0" alt="Keystone-Casa-5"><figcaption></figcaption></figure>

7\. Select \[Set Up Recovery Key] and set the security questions to add the third multi-signature participant. Doing so would complete the creation of your 2/3 multisig wallet. (please be advised that this Casa recovery key feature is available in the Casa security plans from the gold or above.)  You can now begin making multisig transactions at this point.

<figure><img src="/files/pOOKTqOMnyusbGUDK4Yv" alt="Keystone-Casa-6"><figcaption></figcaption></figure>

## III. Receiving bitcoin to your  2/3 multisig address

1\. Go to the Casa multisig wallet and select \[Receive] to display your receiving address (please be advised this address is a "nested segwit" address, and not a Legacy and Native SegWit address). Please copy the address provided or scan the QR code for it.

<figure><img src="/files/RGListkozPcA57TGm9wM" alt="Keystone-Casa-7"><figcaption></figcaption></figure>

## VI. Sending a 2/3 multisig transaction

### 1. Create a 2/3 multisig transaction on Casa

1\) Open the Casa app on your smartphone to enter your multisig wallet.

2\) Select \[Send] to open the remittance interface.

<figure><img src="/files/lspNQ0BhEOLjRBnXkr6j" alt="Keystone-Casa-8"><figcaption></figcaption></figure>

3\) Configure the desired amount, then select \[Choose Recipient] to input the receiving address by scanning the provided QR code or entering the address. You can also set the transaction fee as well.

<figure><img src="/files/-Mkq0Z15rk01hxDtAU7t" alt="Keystone-Casa-9"><figcaption></figcaption></figure>

4\) Check all the transaction details before swiping up to confirm. The Mobile Key will begin signing the transaction automatically once you've swiped upwards. Select \[Continue Signing] when the first signature is added.

<figure><img src="/files/XOZLj2qZtT4AXAAuxS4e" alt="Keystone-Casa-10"><figcaption></figcaption></figure>

### 2. Sign multisig transaction with Keystone

1\) Select \[Tap to add a new signature] > \[Sign with Keystone Instead]. Casa will display the unsigned transaction information in a dynamic QR code format.

<figure><img src="/files/kOZfrZa0wEHDRnsvnc36" alt="Keystone-Casa-11"><figcaption></figcaption></figure>

2\) On your Keystone hardware wallet: Select \[Multisig Wallet] > \[Casa Mode], then select the \[scan] icon and scan the QR code displayed on Casa.

<figure><img src="/files/9kJEoIx4mxc1cXyB4GeL" alt="Keystone-Casa-12"><figcaption></figcaption></figure>

3\) Select \[Sign] > verify your transaction with your password or fingerprint > then press \[Confirm] to show the signed transaction data in QR code format.

<figure><img src="/files/H9X78VINOJpREkxWGD3U" alt="Keystone-Casa-13"><figcaption></figcaption></figure>

4\) Back on Casa: Select \[Continue, It’s Scanned], then scan the QR code displayed on your Keystone to transmit the signed transaction data.

<figure><img src="/files/-Mkq0o3yz8FQ3KbSFX6k" alt="Keystone-Casa-14"><figcaption></figcaption></figure>

### 3. Broadcasting Transactions with Casa

1\) Select \[Complete Transaction] to broadcast the transaction.

<figure><img src="/files/B0wuYx4FbFOggmu9VaYd" alt="Keystone-Casa-15"><figcaption></figcaption></figure>

{% hint style="info" %}
**Tip:** Please check [here](https://keys.casa/keystone) for more related tutorials and details.
{% endhint %}


# Enhance the security of BlueWallet

Securing your Bitcoins more effectively by augmenting the security of BlueWallet using a Keystone Wallet.

With firmware versions V1.1.1 (BTC-Only) or newer, you can set BlueWallet V6.2.0 or newer as a watch-only wallet that functions as the companion app for Keystone Essential or Pro.

## **I. Preparation**

1\. [Firmware](https://keyst.one/firmware?locale=en) version V1.1.1 (BTC-Only) or newer running on Keystone Essential or Pro.

&#x20;   (Please read[ How to upgrade firmware](https://support.keyst.one/getting-started/firmware-upgrading) for more details.)

2\. MicroSD card (≤512GB; Default FAT32 format).

{% content-ref url="/pages/-MclpVfjNf9WvY0094y4" %}
[How to Format a MicroSD Card to FAT32?](/getting-started/firmware-upgrading/how-to-format-a-microsd-card-to-fat32)
{% endcontent-ref %}

3\. Smartphone with the BlueWallet V6.2.0 or later downloaded.

## II. Creating a BlueWallet Watch-Only Wallet (BTC-Only)

1\. On the Keystone hardware Wallet, touch \[Menu] > \[Settings] > \[Watch-Only Wallet]. You can also set up a watch-only wallet during initialization.&#x20;

<figure><img src="/files/-Mec3BBtFnD6E8ES8Gaq" alt="Keystone-BlueWallet-1"><figcaption></figcaption></figure>

2\. Select \[BlueWallet], then tap \[Confirm] and enter the wallet.

<figure><img src="/files/-Mec3EVZ_Nd_hkmzmpj3" alt="Keystone-BlueWallet-2"><figcaption></figcaption></figure>

3\. Tap the \[•••] icon, then select \[Export Wallet]. Show the QR code to display the information required for pairing with BlueWallet (includes the wallet XPUB, Keystone's fingerprint, and derivation path).&#x20;

<figure><img src="/files/-Mec3HQBsD48AeKw1xtQ" alt="Keystone-BlueWallet-3"><figcaption></figcaption></figure>

4\. On the BlueWallet app, go to the wallets interface and touch \[Add now], then tap \[Import wallet].

<figure><img src="/files/-Mec3vAHNL3YSsKHckqp" alt="Keystone-BlueWallet-5"><figcaption></figcaption></figure>

5\. Tap \[Scan or import a file], then use your smartphone's camera to scan the QR code displayed on Keystone.

<figure><img src="/files/-Mec403zRJrStlVDczKY" alt="Keystone-BlueWallet-6"><figcaption></figcaption></figure>

6\. BlueWallet can now be used as the watch-only wallet for Keystone.&#x20;

<figure><img src="/files/-Mec44LgFfDJ0mPiYSkt" alt="Keystone-BlueWallet-7"><figcaption></figcaption></figure>

## III. Sending and Receiving Bitcoin with BlueWallet

### **A. Receiving Bitcoin**

You can use receiving addresses displayed by either the Keystone hardware Wallet or BlueWallet to receive bitcoin.&#x20;

1\. Displaying Address on Keystone

&#x20;1\) Enter your BlueWallet interface on Keystone, then select a receiving address to display it as a QR code.

<figure><img src="/files/-MecgToPIq1wcw953mdW" alt="Keystone-BlueWallet-8"><figcaption></figcaption></figure>

2\. Displaying Addresses on BlueWallet

1\) Go to the corresponding wallet, and tap \[Receive] to display the receiving address.

<figure><img src="/files/-MecgatIUhvME6PakAXC" alt="Keystone-BlueWallet-9"><figcaption></figcaption></figure>

### **B. Sending Bitcoin**

#### 1. Using BlueWallet to Create Transactions

1\) Open the BlueWallet app on your smartphone, and find the wallet that has been paired with Keystone.

2\) Tap \[Send] to enter the sending interface.

<figure><img src="/files/-MecvL10L_0ZybEP3Dvs" alt="Keystone-BlueWallet-10"><figcaption></figcaption></figure>

3\) Configure the receiving address, amount, transaction fees, and notes.&#x20;

4\) Tap \[Next] to display the unsigned transaction information in a dynamic QR code format.

<figure><img src="/files/-MecuULeGFias47o4LKv" alt="Keystone-BlueWallet-11"><figcaption></figcaption></figure>

#### 2. Using Keystone Hardware Wallet to Sign Transactions

1\) Tap the \[scan] icon on Keystone and use the hardware wallet device camera to scan the QR code displayed on BlueWallet.

<figure><img src="/files/-MecwOO0qOFvI_WD1X37" alt="Keystone-BlueWallet-12"><figcaption></figcaption></figure>

2\) Tap \[Sign], and input your device password to obtain the signed transaction information (awaiting broadcast).

<figure><img src="/files/-Mecwe5JEiQDCfNuxoPL" alt="Keystone-BlueWallet-13"><figcaption></figcaption></figure>

#### 3. Using BlueWallet to Broadcast Transactions

1\) Tap \[Scan Signed Transaction], and use your smartphone camera to scan the QR code displayed on Keystone to transmit the signed transaction data.

2\) Once you have entered the broadcasting interface on BlueWallet, tap \[Send Now] to broadcast the transaction.

<figure><img src="/files/-MecwliTobm-miRvJG4f" alt="Keystone-BlueWallet-14"><figcaption></figcaption></figure>

Instructions recommended:

{% content-ref url="/pages/-Mf6cBoOINjuvhnOeRyQ" %}
[BlueWallet 2/3 PSBT Multi-sig: BlueWallet + Keystone + ColdCard](/3rd-party-wallets/bitcoin-wallets/bluewallet/bluewallet-2-3-psbt-multi-sig-bulewallet-keystone-and-coldcard)
{% endcontent-ref %}

{% content-ref url="/pages/-MewiPrgoLeQoXde14j1" %}
[BlueWallet 2/3 PSBT Multi-sig: Keystone + ColdCard + SeedPicker](/3rd-party-wallets/bitcoin-wallets/bluewallet/bluewallet-2-3-psbt-multi-sig)
{% endcontent-ref %}


# BlueWallet 2/3 PSBT Multi-sig: BlueWallet + Keystone + ColdCard

Keystone firmware versions V1.1.1 (BTC-Only) or newer support PSBT Muti-signature functions. Detailed instructions below explain how to create a 2-of-3 PSBT Multi-signature wallet with BlueWallet, Keystone and ColdCard as 3 participant co-signers. Bluewallet V6.2.0 (or newer) can and will be used as both a watch-only coordinating wallet and a participant co-signer.

## I. Preparation

1\. [Firmware](https://keyst.one/firmware?locale=en) version V1.1.1 (BTC-Only) or newer running on either a Keystone Essential or Pro.&#x20;

&#x20;   (Please read[ How to upgrade firmware](https://support.keyst.one/getting-started/firmware-upgrading) for more details.)

2\. ColdCard upgraded to firmware version V2.1.0 or newer.

3\. Smartphone with the BlueWallet V6.2.0 (or newer) downloaded.

4\. Log in to your iCloud Drive on an online PC/Mac.

{% hint style="info" %}
**Note:** If you are using an Android based system, you can choose alternative cloud storage applications such as Google Drive. We still recommend saving to the local folder on your device, then copying it over with a data cable. This way, the online drive provider won’t see your file or transaction.
{% endhint %}

5\. MicroSD card (≤512GB; Default FAT32 format).

{% hint style="info" %}
**Tip:** Keystone can format microSD cards to FAT32. ([Tutorial](https://support.keyst.one/getting-started/firmware-upgrading/how-to-format-a-microsd-card-to-fat32))
{% endhint %}

## II. Creating a 2/3 multisig wallet with BlueWallet, Keystone and ColdCard

### 1. Export Coldcard’s XPUB to a microSD card

1\) Insert the microSD card into your Coldcard.

2\) \[Settings] > \[Multisig Wallets] > \[Export XPUB].

<figure><img src="/files/03ZAeUIgjPmKohcI6xNY" alt="Keystone-BlueWallet-MultiSig-1"><figcaption></figcaption></figure>

3\) Confirm(√) to save the XPUB of the recovery phrase as a .json file to the microSD card.

4\) Take out the microSD card from Coldcard and insert it into a PC/Mac..

5\) Log in to your iCloud Drive on an online PC/Mac. Click \[Upload] icon > Select the XPUB file of the Coldcard (e.g. ccxp-5271C071.json) in the microSD card and click \[Open] > Upload successfully.

<figure><img src="/files/-Mf6dZRdazeXZ-aycRuy" alt="Keystone-BlueWallet-MultiSig-2"><figcaption></figcaption></figure>

<figure><img src="/files/o8Hcdy1GPT8J7sQ5Yu7K" alt="Keystone-BlueWallet-MultiSig-3"><figcaption></figcaption></figure>

<figure><img src="/files/LHvoLUYYFn2rR1UIsZ1K" alt="Keystone-BlueWallet-MultiSig-4"><figcaption></figcaption></figure>

### 2. Creating a 2/3 multisig wallet on BlueWallet

1\) Run the BlueWallet app on your smartphone.

2\) Go to the wallets interface and touch \[Add now] > set \[Name] > pick \[Vault] > Select \[Let's start] to enter the page so you can import the co-signer's XPUB.&#x20;

<figure><img src="/files/2kYHnTCyvF9hTxA8iPBQ" alt="Keystone-BlueWallet-MultiSig-5"><figcaption></figcaption></figure>

3\) Select \[Vault Key 1] > \[Create New]. Press \[Done] after safely backing up your recovery phrase. You can see the first Vault Key has been created by BlueWallet.

<figure><img src="/files/-Mf6fEkBy-lzxPllwG35" alt="Keystone-BlueWallet-MultiSig-6"><figcaption></figcaption></figure>

4\) Turn your Keystone on.&#x20;

5\) Keystone: Select \[Menu] >  \[Multisig Wallet] > \[•••] button on the top right corner > \[ Show/Export XPUB ]. Keystone will show the XPUB in QR code format.

<figure><img src="/files/-Mf6fIySEGI8b5Jcc8td" alt="Keystone-BlueWallet-MultiSig-7"><figcaption></figcaption></figure>

6\) BlueWallet: Select \[Vault Key 2] > \[Import] > \[Scan or import file], then use your smartphone's camera to scan the QR code displayed on Keystone. Doing so would successfully import Keystone's XPUB.

<figure><img src="/files/-Mf6iRYvGpUPGL2b2bey" alt="Keystone-BlueWallet-MultiSig-8"><figcaption></figcaption></figure>

7\) Select \[Vault Key 3] > \[Import] > \[Scan or import file] , then select the \[Files] icon on the bottom left > Find the XPUB file in your iCloud Drive and select it. Doing so would successfully import the Coldcard's XPUB.

<figure><img src="/files/NKpRnTSyx2ttptlxukLX" alt="Keystone-BlueWallet-MultiSig-9"><figcaption></figcaption></figure>

<figure><img src="/files/PnmJDCPHrBK3BGcptjNi" alt="Keystone-BlueWallet-MultiSig-10"><figcaption></figcaption></figure>

8\) Select \[Create] and the 2/3 multisig wallet would be successfully created.

<figure><img src="/files/iPTMwiNaG3bPQNQ15bLM" alt="Keystone-BlueWallet-MultiSig-11"><figcaption></figcaption></figure>

### 3. Importing a multisig wallet to Keystone as a co-signer

1\) BlueWallet: Go to the corresponding wallet and select the \[•••] button on the top right corner, then select the \[Export Coordination Setup] option to reveal a dynamic QR code.

<figure><img src="/files/-Mf6jW0O-p-H1Jgu5X5c" alt="Keystone-BlueWallet-MultiSig-12"><figcaption></figcaption></figure>

2\) Keystone: Select \[Menu] > \[Multisig Wallet] > \[Import Multisig Wallet] > then select the \[scan] icon on the top right corner and scan the QR code displayed on BlueWallet > select \[Confirm] to successfully join  the multisig wallet as a co-signer.

<figure><img src="/files/-Mf6jLDeNCNlLMQk2faP" alt="Keystone-BlueWallet-MultiSig-13"><figcaption></figcaption></figure>

<figure><img src="/files/wt8AMzsuDRC6u6FYf50j" alt="Keystone-BlueWallet-MultiSig-14"><figcaption></figcaption></figure>

## III. Receiving bitcoin to the 2/3 multisig address

You can use receiving addresses displayed with either the Keystone or BlueWallet to receive bitcoin.

1\. Keystone: Enter the \[Multisig Wallet] and select \[Addresses] to display the receiving addresses.

<figure><img src="/files/36zoxfiJI4kVJI5Gmg65" alt="Keystone-BlueWallet-MultiSig-15"><figcaption></figcaption></figure>

2\. BlueWallet: Go to the corresponding wallet and select \[Receive] to display the receiving address.

<figure><img src="/files/RmHDUr4geCrdH0tRQUNq" alt="Keystone-BlueWallet-MultiSig-16"><figcaption></figcaption></figure>

## IV. Sending bitcoin from the 2/3 multisig wallet

### 1. Create a 2/3 multisig transaction on BlueWallet

1\) Go to the corresponding wallet and select \[Send].

<figure><img src="/files/SRTVIAhIgR5yJOLU7o7u" alt="Keystone-BlueWallet-MultiSig-16"><figcaption></figcaption></figure>

2\) Configure the receiving address, amount, transaction fees, and notes. Select \[Next] and enter the signature page. You can see the first signature has been automatically signed by BlueWallet.

<figure><img src="/files/ldcPwOUBug2WokfJJuXa" alt="Keystone-BlueWallet-MultiSig-17"><figcaption></figcaption></figure>

### 2. Partially sign multisig transaction with Keystone

1\) Bluewallet: Select \[Vault Key 2] > \[Provide signature]  to display the partially signed transaction information in QR code format.

<figure><img src="/files/r13BuD4B4TqNu4Rb2W9f" alt="Keystone-BlueWallet-MultiSig-18"><figcaption></figcaption></figure>

2\) Keystone: Enter \[Multisig Wallet] > select the \[scan] icon and scan the QR code displayed on BlueWallet.

<figure><img src="/files/UeGYUdVys7dIimoMydV5" alt="Keystone-BlueWallet-MultiSig-19"><figcaption></figcaption></figure>

3\) Select \[Sign] > Enter your password > then Press \[Confirm] to show the signed transaction data in QR code format.

<figure><img src="/files/giY6XJWz5AYJVPZktTvy" alt="Keystone-BlueWallet-MultiSig-20"><figcaption></figcaption></figure>

4\) BlueWallet: Select \[Scan or import file], then scan the QR code displayed on Keystone to transmit the signed transaction data.

<figure><img src="/files/bWVjbJPsd2kp7ikHd3cn" alt="Keystone-BlueWallet-MultiSig-21"><figcaption></figcaption></figure>

### 3. Broadcasting Transactions with BlueWallet

1\) Select \[Confirm] to enter the broadcasting interface on BlueWallet, then select \[Send now] to broadcast the transaction.

<figure><img src="/files/GWB3ZJsQJLQ128YPyMAf" alt="Keystone-BlueWallet-MultiSig-22"><figcaption></figcaption></figure>

That’s all!

We hope this guide is useful when you decide to use a 2-out-of-3 multi-sig wallet in the future for protecting your funds in a multi-sig setup!

Instructions recommended:

{% content-ref url="/pages/-MewiPrgoLeQoXde14j1" %}
[BlueWallet 2/3 PSBT Multi-sig: Keystone + ColdCard + SeedPicker](/3rd-party-wallets/bitcoin-wallets/bluewallet/bluewallet-2-3-psbt-multi-sig)
{% endcontent-ref %}


# BlueWallet 2/3 PSBT Multi-sig: Keystone + ColdCard + SeedPicker

Keystone firmware versions V1.1.1 (BTC-Only) or newer support PSBT Muti-signature functions. Detailed instructions below will explain how to create a 2-of-3 PSBT Multi-signature wallet with Keystone, ColdCard and a[ SeedPicker](http://seedpicker.net/) as 3 participant co-signers. Bluewallet V6.2.0 (or newer) will be used as a watch-only wallet.

## **I.** Preparation

1\. [Firmware](https://keyst.one/firmware?locale=en) version V1.1.1 (BTC-Only) or newer running on Keystone Essential or Pro models.

&#x20;   (Please read[ How to upgrade firmware](https://support.keyst.one/getting-started/firmware-upgrading) for more details.)

2\. ColdCard upgraded to firmware version V2.1.0 or later.

3\. <http://seedpicker.net/> run on an offline PC/Mac.&#x20;

4\. Smartphone with the BlueWallet V6.2.0 or later downloaded.

5\. Log in to your iCloud Drive on an online PC/Mac.&#x20;

{% hint style="info" %}
**Note：**&#x49;f you are using an Android based system, you can choose alternative cloud storage applications such as Google Drive. We still recommend saving your data to a local folder on your device, then copying it over with a data cable. This way, the online drive provider won’t see your file or transaction.
{% endhint %}

6\. MicroSD card (≤512GB; Default FAT32 format).

{% hint style="info" %}
**Tips**: Keystone can format microSD cards to FAT32. ([Tutorial](https://support.keyst.one/getting-started/firmware-upgrading/how-to-format-a-microsd-card-to-fat32))
{% endhint %}

## II. Creating a  2/3 multisig wallet with Keystone, ColdCard and seed picker ([http://seedpicker.net/](https://seedpicker.net/calculator/last-word.html))

### - Export the required XPUB to a microSD card

#### 1. Export ColdCard’s XPUB to a microSD card

1\) Insert the microSD card into your ColdCard.

2\) \[Settings] > \[Multisig Wallets] > \[Export XPUB].

<figure><img src="/files/R5IpzSnOwqV2lIj0ZDDb" alt="Keystone-BlueWallet-MultiSig-1"><figcaption></figcaption></figure>

3\) Confirm(√) > save the XPUB  of the recovery phrase as a .json file to the microSD card.

4\) Take out the microSD card from ColdCard.

#### 2. Export [http://seedpicker.net/](https://seedpicker.net/calculator/last-word.html)’s XPUB to a microSD card

1\) Insert the microSD card into your PC/Mac.

2\) Click \[Download] to save the XPUB of the recovery phrase created by SeedPicker as a .json file to the microSD card.

<figure><img src="/files/aXvxik5wzlnEg7E5FeAv" alt="Keystone-BlueWallet-MultiSig-2"><figcaption></figcaption></figure>

<figure><img src="/files/julsSyNgckYeKJdjifF8" alt="Keystone-BlueWallet-MultiSig-3"><figcaption></figcaption></figure>

3\) After the previous steps, you will receive 2 files in your microSD card.

&#x20;    Let’s check what’s in the microSD card:

<figure><img src="/files/-MexR0-bfZ4DEyqIiJ8p" alt="Keystone-BlueWallet-MultiSig-4"><figcaption></figcaption></figure>

### - Creating a 2/3 multisig wallet on Keystone

1\. Insert the microSD card containing the XPUB of the ColdCard and the SeedPicker into your Keystone, then turn the device on.

2\. Navigate the Keystone directory from \[Menu] > \[Multisig Wallet] > \[Create Multisig Wallet] > then Set the “Co-Signers”, “Signers” and “Address Type”, then Press \[Confirm] to enter the page for importing the XPUB of the co-signers. You can see the first XPUB has been filled No.1.

<figure><img src="/files/WAbsFZgsGGvbU16DJBwV" alt="Keystone-BlueWallet-MultiSig-5"><figcaption></figcaption></figure>

3\. Select the \[microSD card] icon in the bottom right corner of NO.2, then select and open the XPUB file of the ColdCard (e.g. shown as “ccxp-5271C071.json”).

<figure><img src="/files/5NXqLkSsjl60OVH8Pjkl" alt="Keystone-BlueWallet-MultiSig-6"><figcaption></figcaption></figure>

4\. Select the \[microSD card] icon in the bottom right corner of NO.3, then select and open the XPUB file of SeedPicker (e.g. shown as ‘’seedpickerxp-c5cac506.json”).

<figure><img src="/files/eSs9SIhlcet3nNTCIV6C" alt="Keystone-BlueWallet-MultiSig-7"><figcaption></figcaption></figure>

5\. Select the \[Create] button to reveal the QR code (The QR code is used for importing the multisig wallet to BlueWallet).

<figure><img src="/files/F0JDHcsaKFzHIfWdtv4o" alt="Keystone-BlueWallet-MultiSig-8"><figcaption></figcaption></figure>

6\. Select the \[touch here to export the file with microSD] option > then press \[Export]. Save the multisig wallet file to the microSD card to import the multisig wallet to the ColdCar&#x64;**.**

<figure><img src="/files/-MewjXXToFizP1lrx-h-" alt="Keystone-BlueWallet-MultiSig-9"><figcaption></figcaption></figure>

### - Importing the multisig wallet to BlueWallet and creating the watch-only coordinator

1\. Run the BlueWallet app on your smartphone and go to the wallet's interface and select \[Add now], then select \[Vault], and press the \[Import wallet] button.

<figure><img src="/files/8sZRyHIcU2DJeX3rfqSV" alt="Keystone-BlueWallet-MultiSig-10"><figcaption></figcaption></figure>

2\. Select \[Scan or import a file], then use your smartphone's camera to scan the QR code displayed on Keystone.

<figure><img src="/files/igDviumO06mSf3iq4LIs" alt="Keystone-BlueWallet-MultiSig-11"><figcaption></figcaption></figure>

3\. BlueWallet can now be used as the watch-only coordinator for the multisig wallet.

<figure><img src="/files/WDGJEAnUohg2hZmv81s3" alt="Keystone-BlueWallet-MultiSig-12"><figcaption></figcaption></figure>

### - Importing the multisig wallet to ColdCard as a co-signer

1\. Pull out the microSD card from Keystone and insert it into ColdCard.

2\. ColdCard: \[Settings] > \[Multisig Wallets] > \[Import from SD] > Pick the multisig wallet file (.txt) > Confirm(√) and complete the import.

<figure><img src="/files/rtCR6dzlGIueTTMAptuE" alt="Keystone-BlueWallet-MultiSig-13"><figcaption></figcaption></figure>

<figure><img src="/files/jPQEQeaZIPGtx2Y72wbQ" alt="Keystone-BlueWallet-MultiSig-14"><figcaption></figcaption></figure>

## III. Receiving bitcoin to the 2/3 multisig address

You can use receiving addresses displayed by either the Keystone hardware wallet or BlueWallet to receive bitcoin.

1\. Keystone: Enter the \[Multisig Wallet] on Keystone and touch \[Addresses] to display the receiving addresses.

<figure><img src="/files/-MexTeiKgRlO__vYXPPa" alt="Keystone-BlueWallet-MultiSig-15"><figcaption></figcaption></figure>

2\. BlueWallet: Go to the corresponding wallet and touch \[Receive] to display the receiving address.

<figure><img src="/files/-MexTqIS7xQfhGkJCfzZ" alt="Keystone-BlueWallet-MultiSig-16"><figcaption></figcaption></figure>

## IV. Sending bitcoin from the 2/3 multisig wallet

Generate the multisig transaction on the watch-only coordinator wallet (Bluewallet) by scanning the unsigned multisig transaction data or exporting the unsigned multisig transaction file to a microSD card (for the Keystone) and iCloud Drive (for the Coldcard).&#x20;

### 1. Create a 2/3 multisig transaction on BlueWallet

1\) Open the BlueWallet app on your smartphone, then find and select the multisig wallet.

2\) Select \[Send] to open the remittance interface.

<figure><img src="/files/ZtmMdIhwyju9UBN00jOJ" alt="Keystone-BlueWallet-MultiSig-17"><figcaption></figcaption></figure>

3\) Input the receiving address, amount, transaction fees, and notes, and select \[Next].

<figure><img src="/files/DzHH7bM1rCDMpP003czt" alt="Keystone-BlueWallet-MultiSig-18"><figcaption></figcaption></figure>

### 2. Partial signing of multisig transactions with the Keystone

1\)BlueWallet: under \[Vault Key 1], select \[Provide signature] to display the unsigned transaction information in a dynamic QR code format.

<figure><img src="/files/REULvaX8Pqkssusp54NZ" alt="Keystone-BlueWallet-MultiSig-19"><figcaption></figcaption></figure>

2\) Keystone: Enter the concerning \[Multisig Wallet], then select the \[scan] icon and scan the QR code displayed by BlueWallet.

<figure><img src="/files/Et72BX38euNgXTVg5Pik" alt="Keystone-BlueWallet-MultiSig-20"><figcaption></figcaption></figure>

3\) Select \[Sign], then Enter your password, and then select \[Confirm] to show the signed transaction data in QR code format.

<figure><img src="/files/v4Mq62pt4aKPdvpKW0kR" alt="Keystone-BlueWallet-MultiSig-21"><figcaption></figcaption></figure>

4\) BlueWallet: Select \[Scan or import file] on BlueWallet, then scan the QR code displayed on Keystone to transmit the signed transaction data.

<figure><img src="/files/QL9q2bbOSzsuegnOIi8l" alt="Keystone-BlueWallet-MultiSig-22"><figcaption></figcaption></figure>

### 3. Partially sign multisig transactions with ColdCard

1\) Log into your iCloud Drive on an online PC/Mac and insert the microSD card into your PC/Mac.

{% hint style="info" %}
**Note**: If you are using an Android-based system, you can choose alternative cloud storage applications such as Google Drive. We still recommend saving it to the local folder on your device then copying it over with a data cable. This way, the online drive provider won’t see your file or transaction.
{% endhint %}

2\) BlueWallet: Under \[Vault Key 2], select \[Provide signature] > \[Share] > \[Save to Files] > \[iCloud Drive] and finally the \[Save] save button on the top right corner.

<figure><img src="/files/-MexY36V-BybJjRPKhQ7" alt="Keystone-BlueWallet-MultiSig-24"><figcaption></figcaption></figure>

3\) Open the iCloud Drive on the PC/Mac and download the unsigned transaction file and save it to the root directory of a microSD card.

<figure><img src="/files/WC7LR3anbIbtUhc20kHZ" alt="Keystone-BlueWallet-MultiSig-24"><figcaption></figcaption></figure>

<figure><img src="/files/ygXEjJi5f7fqrUI8HAiz" alt="Keystone-BlueWallet-MultiSig-25"><figcaption></figcaption></figure>

4\) Take out the microSD card from the PC/Mac and insert it into the ColdCard.

5\) ColdCard: \[Ready To Sign] > \[Select transaction file] > Confirm(√).

<figure><img src="/files/kEQOBCKKofIedG2USbSJ" alt="Keystone-BlueWallet-MultiSig-26"><figcaption></figcaption></figure>

6\) Take out the microSD card from the ColdCard and insert it into your PC/Mac.

7\) Save the partially signed multisig transaction file to the microSD card.

<figure><img src="/files/N0f0xX6ook885Pm8D88F" alt="Keystone-BlueWallet-MultiSig-27"><figcaption></figcaption></figure>

8\) Open the iCloud Drive on the PC/Mac, and upload the partially signed multisig transaction file to your iCloud Drive.

<figure><img src="/files/uCtYsg5dQftJyNdulx7R" alt="Keystone-BlueWallet-MultiSig-28"><figcaption></figcaption></figure>

9\) BlueWallet: Select \[Scan or import file] on Bluewallet > select the \[+Files] icon on the bottom left and find the partially signed multisig transaction file in iCloud Drive, select it to successfully sign.

<figure><img src="/files/vLZn69FiCPvqCxqQXJmo" alt="Keystone-BlueWallet-MultiSig-29"><figcaption></figcaption></figure>

### 4. Broadcasting Transactions with BlueWallet

1\) Touch \[Confirm] to enter the broadcasting interface on BlueWallet, then touch \[Send now] to broadcast the transaction.

<figure><img src="/files/-Mf1NZrrEcXSvs6Pcxc6" alt="Keystone-BlueWallet-MultiSig-30"><figcaption></figcaption></figure>

That’s all!

We hope this guide is useful when you decide to use a 2-out-of-3 multi-sig wallet for protecting your funds in a multi-sig setup!

Instructions recommended:

{% content-ref url="/pages/-Mf6cBoOINjuvhnOeRyQ" %}
[BlueWallet 2/3 PSBT Multi-sig: BlueWallet + Keystone + ColdCard](/3rd-party-wallets/bitcoin-wallets/bluewallet/bluewallet-2-3-psbt-multi-sig-bulewallet-keystone-and-coldcard)
{% endcontent-ref %}


# Specter

With firmware versions V1.1.1 (BTC-Only) or newer, you can set Specter V1.4.6 or newer as a watch-only wallet that functions as the companion app for Keystone Essential or Pro.

## **I. Preparation**

1\. [Firmware](https://keyst.one/firmware?locale=en) version V1.1.1 (BTC-Only) or newer running on Keystone Essential or Pro.&#x20;

&#x20;  (Please read[ How to upgrade firmware](https://support.keyst.one/getting-started/firmware-upgrading) for more details.)

2\. Specter V1.4.6 or newer installed and running on PC/Mac.&#x20;

3\. MicroSD card (FAT32 format, capacity not exceeding 512 GB).

{% content-ref url="/pages/-MclpVfjNf9WvY0094y4" %}
[How to Format a MicroSD Card to FAT32?](/getting-started/firmware-upgrading/how-to-format-a-microsd-card-to-fat32)
{% endcontent-ref %}

## II. Creating a Specter Watch-Only Wallet (BTC-Only)

### A. **Add Keystone Device on Specter**

1\. Click \[+ Add new device] > Select your device type \[Keystone] and enter the name.

<figure><img src="/files/-MdQifdK3ebcDB3w1E9N" alt="Keystone-Specter-1"><figcaption></figcaption></figure>

<figure><img src="/files/-MdQip2TPmNbqCl_IIfz" alt="Keystone-Specter-2"><figcaption></figcaption></figure>

2\. You can choose to use a QR code or import a .json file to get the Xpub of the recovery phrase imported to Keystone.

#### - Option 1: Via QR code

1\) Keystone > \[Menu] > \[Watch-Only Wallet] > Select \[Generic Wallet] and Touch \[Confirm] > Touch \[•••] > Select \[Export Wallet] and show the QR code.

<figure><img src="/files/-MdQjvbFOeywwk_yP9nG" alt="Keystone-Specter-3"><figcaption></figcaption></figure>

2\) Specter > click \[Scan QR Code], then scan the QR code shown on Keystone.

<figure><img src="/files/-MdQk8zdWAjyoIMk5VlQ" alt="Keystone-Specter-4"><figcaption></figcaption></figure>

<figure><img src="/files/-MdQkPrVnFXmLhafV4de" alt="Keystone-Specter-5"><figcaption></figcaption></figure>

#### - Option 2: Via File

1\) Insert the microSD card into Keystone > Touch \[Menu] > \[Watch-Only Wallet] > Select \[Generic Wallet] > Touch \[•••] > Select \[Export Wallet] > Touch \[touch here…] > \[Export].

<figure><img src="/files/-MdQkT5y_gz9n80Og-RJ" alt="Keystone-Specter-6"><figcaption></figcaption></figure>

2\) Take out the MircoSD card from your Keystone and insert it into a PC/Mac.

3\) On Specter: Click on \[Uplaod from SD Card], then select and open the \[p2wpkh-pubkey.txt] file exported from Keystone.

<figure><img src="/files/-MdQkvNjnrBkbDwt_20W" alt="Keystone-Specter-7"><figcaption></figcaption></figure>

<figure><img src="/files/-MdQl8fP9taQWkBBpmi9" alt="Keystone-Specter-8"><figcaption></figcaption></figure>

<figure><img src="/files/-MdQld76-kG7LmilGEYn" alt="Keystone-Specter-9"><figcaption></figcaption></figure>

3\. Click \[Continue], add Keystone successfully.

<figure><img src="/files/-MdQlgzj66u1fs9hA2D5" alt="Keystone-Specter-10"><figcaption></figcaption></figure>

<figure><img src="/files/-MdQlmT2QculHdsEcVhb" alt="Keystone-Specter-11"><figcaption></figcaption></figure>

### &#x20;B. **Add** Keystone **Simple Wallet on Specter**

1\. Click \[+ Add new wallet] on Specter and select \[Single key wallet].

<figure><img src="/files/-MdQlwIYBmQT3gwbL5Ml" alt="Keystone-Specter-12"><figcaption></figcaption></figure>

2\. Select the \[Keystone] device and click \[Continue].

<figure><img src="/files/-MdQmQZaFHhKrwPJcUx_" alt="Keystone-Specter-13"><figcaption></figcaption></figure>

3\. Set the wallet name and click \[Create wallet].&#x20;

<figure><img src="/files/-MdQnAmKLtE3IBqRLa2n" alt="Keystone-Specter-14"><figcaption></figcaption></figure>

4\. Add Keystone simple wallet successfully.

<figure><img src="/files/-MdQo95r6hgU3Aueekqr" alt="Keystone-Specter-15"><figcaption></figcaption></figure>

## III. Sending and Receiving Assets with Specter Wallet

### **A. Receiving Assets**

1\. On Keystone: Touch \[Addresses] to display the receiving addresses.

<figure><img src="/files/-MdV598Cbw7nKJCXmBst" alt="Keystone-Specter-16"><figcaption></figcaption></figure>

2\. On Specter: Select your wallet (e.g. Keystone Single Sig Wallet) > Click on \[Receive] to display the receiving address.

<figure><img src="/files/-MdV5CWCMj3t-cdvfdpI" alt="Keystone-Specter-17"><figcaption></figcaption></figure>

### **B. Sending Assets**

#### 1. Create a Transaction with Specter

1\) Select your wallet (e.g. Keystone Single Sig Wallet) > Click one \[Send] > \[New] > Input the recipient address and amount > \[Create unsigned transaction].

<figure><img src="/files/-MdVlgJvfdh4kuYqzZmq" alt="Keystone-Specter-18"><figcaption></figcaption></figure>

2\) Create the transaction successfully.

<figure><img src="/files/-MdVly2XOgGVaBZu8hM0" alt="Keystone-Specter-19"><figcaption></figcaption></figure>

#### 2. Sign with Keystone Hardware Wallet

You can choose to sign the transaction on Keystone via a QR code or MircroSD card.

#### - Option 1: Via QR code

1\) On Specter: Click on \[Keystone] > \[Sign with QR codes] > Specter displays the unsigned transaction data inr a QR code format.

<figure><img src="/files/-MdVm2dUZ8ExjIV2osIn" alt="Keystone-Specter-20"><figcaption></figcaption></figure>

<figure><img src="/files/-MdVm64Vsb2ERf1aDX5J" alt="Keystone-Specter-21"><figcaption></figcaption></figure>

<figure><img src="/files/-MhNfbtqnBgRYJgdLf5D" alt="Keystone-Specter-22"><figcaption></figcaption></figure>

2\) Keystone > Press the \[Scan] icon > Scan the QR code shown on the Specter interface > \[Sign] > Enter the password and press \[Confirm].

<figure><img src="/files/-MdVmHQnySmYtVNCm7DW" alt="Keystone-Specter-23"><figcaption></figcaption></figure>

<figure><img src="/files/-MdVn9ZRjt1bLZfDjw0B" alt="Keystone-Specter-24"><figcaption></figcaption></figure>

3\) On Specter: Click on \[Scan signed transaction] > Scan the QR code shown on Keystone.

<figure><img src="/files/-MdVnD4h6ZV1eMDSem-y" alt="Keystone-Specter-25"><figcaption></figcaption></figure>

<figure><img src="/files/-MdVnFueuxyAfwA8oJBl" alt="Keystone-Specter-26"><figcaption></figcaption></figure>

{% hint style="info" %}
**OPTIONAL:** If your computer device has no camera, You can also sign transactions with the mircoSD card file.
{% endhint %}

#### - Option 2: Via mircoSD card file

1\) On Specter: Click on \[Keystone] > \[Sign with SD Card file] > \[save transaction to file] >  click \[Save] to save the unsigned transaction file to a MicroSD card.

<figure><img src="/files/-MdVrREGdU4gdJYoMWrQ" alt="Keystone-Specter-27"><figcaption></figcaption></figure>

<figure><img src="/files/-MdVrDmW-SJhR6xPLCpv" alt="Keystone-Specter-28"><figcaption></figcaption></figure>

<figure><img src="/files/-MdVrX8ch-8kdYES8Df7" alt="Keystone-Specter-29"><figcaption></figcaption></figure>

<figure><img src="/files/-MdVs8ULnFqY1A3Et2qp" alt="Keystone-Specter-30"><figcaption></figcaption></figure>

2\) Take out the MircoSD card from a PC/Mac and insert it into your Keystone.

3\) On Keystone: Press the \[microSD card] icon > Select and open the unsigned transaction file > \[Sign] > Password verification > Press \[touch here...] to export signed transaction file to MicroSD card.

<figure><img src="/files/-MdVsieHRLWAmSPkhrsK" alt="Keystone-Specter-31"><figcaption></figcaption></figure>

<figure><img src="/files/-MdVsmsUSj8KITfuVXjT" alt="Keystone-Specter-32"><figcaption></figcaption></figure>

<figure><img src="/files/-MdVsq7aCGMD7ZCRZmO8" alt="Keystone-Specter-33"><figcaption></figcaption></figure>

4\) Take out the microSD card from your Keystone and insert it into PC/Mac.

5\) On Specter: Click on \[Upload signed transaction], then select and open the signed transaction file exported from Keystone.

<figure><img src="/files/-MdVt-cFDHqGwJWp8Wcr" alt="Keystone-Specter-34"><figcaption></figcaption></figure>

<figure><img src="/files/-MdVt6O6DfnDw4ox-KqF" alt="Keystone-Specter-35"><figcaption></figcaption></figure>

#### 3. Broadcast transaction on Specter

Keystone signed successfully and you can choose to broadcast the transaction immediately or later.

<figure><img src="/files/-MdVtBTgM10safiQYZyO" alt="Keystone-Specter-36"><figcaption></figcaption></figure>

&#x20;

Instructions recommended:

{% content-ref url="/pages/-MdoHp2fqzi1CxYQkWJ8" %}
[Specter 2/3 PSBT Multi-Sig](/3rd-party-wallets/bitcoin-wallets/specter/specter-2-3-multi-sig)
{% endcontent-ref %}

{% content-ref url="/pages/-MVzjfEvgSZoZrQ-hfoG" %}
[Specter 2/2 PSBT Multi-Sig](/3rd-party-wallets/bitcoin-wallets/specter/cobo-vault-+-coldcard-+-specter)
{% endcontent-ref %}


# Specter 2/2 PSBT Multi-Sig

Keystone firmware versions V1.1.1 (BTC-Only) or newer support PSBT Multi-signature functions. Detailed instructions below will explain how to create a 2-out-of-2 PSBT Multi-signature wallet with the Keystone Wallet and Coldcard as 2 participant co-signers. We will use here Specter V1.4.6 as the watch-only coordinator.

2/2 PSBT Multi-sig is not a good quorum. This tutorial is just for the purpose of showing how to use Keystone and Coldcard to set up your multi-sig wallet with Specter. Learn more about picking a good quorum: <https://btcguide.github.io/quorum>

## I. **Preparation**

1\. [Firmware](https://keyst.one/firmware?locale=en) version V1.1.1(BTC-Only) or newer running on Keystone Essential or Pro. Create recovery phrase A.&#x20;

&#x20;  (Please read[ How to upgrade firmware](https://support.keyst.one/getting-started/firmware-upgrading) for more details.)

2\. Coldcard upgraded to firmware version V2.1.0 or later. Create recovery phrase B.

3\. Specter (V1.4.6 or later) installed and running on PC/Mac.

4\. MicroSD card (≤512GB; Default FAT32 format).

{% content-ref url="/pages/-MclpVfjNf9WvY0094y4" %}
[How to Format a MicroSD Card to FAT32?](/getting-started/firmware-upgrading/how-to-format-a-microsd-card-to-fat32)
{% endcontent-ref %}

## **II. Add device on Specter**

{% hint style="info" %}
**Tip**: If you want to switch to \[Test Net], please go to Keystone > \[Settings] > \[Blockchain] > \[Test Net]. Then continue with the following steps.
{% endhint %}

### 1. Add Keystone on Specter

1\) Click \[+ Add new device] > Select your device type \[Keystone] and enter the name.

<figure><img src="/files/-MdQifdK3ebcDB3w1E9N" alt="Keystone-Specter-MultiSig-1"><figcaption></figcaption></figure>

<figure><img src="/files/-MdQip2TPmNbqCl_IIfz" alt="Keystone-Specter-MultiSig-2"><figcaption></figcaption></figure>

2\) You can add Keystone on Specter by QR code or microSD card.

#### - By QR code

1\) Keystone > \[Menu] > \[Multisig Wallet] > press \[•••] icon on the top right > \[Show/ Export XPUB].

<figure><img src="/files/-MdW0b5-HXoXh-JMq8Js" alt="Keystone-Specter-MultiSig-3"><figcaption></figcaption></figure>

2\) Specter > click \[Scan QR Code], then scan the QR code show on Keystone.

<figure><img src="/files/-MdW0ier8C-A7JWwbPjm" alt="Keystone-Specter-MultiSig-4"><figcaption></figcaption></figure>

<figure><img src="/files/-MdWNkYDkUEvPGKqSLwz" alt="Keystone-Specter-MultiSig-5"><figcaption></figcaption></figure>

#### - By microSD card

1\) Insert the microSD card into Keystone > \[Menu] > \[Multisig Wallet] > \[Show/ Export XPUB] > \[Export All] > \[Export].

<figure><img src="/files/-MdWNoWqsZGPZwRUZm96" alt="Keystone-Specter-MultiSig-6"><figcaption></figcaption></figure>

<figure><img src="/files/-MdWNyChVy3FebIf0yWP" alt="Keystone-Specter-MultiSig-7"><figcaption></figcaption></figure>

2\) Take out the microSD card from Keystone and insert it into a PC/Mac.

3\) On Specter: Click on \[Upload from SD Card], then select and open the .json file exported from Keystone.

<figure><img src="/files/-MdWO2TAMze7yOhumarW" alt="Keystone-Specter-MultiSig-8"><figcaption></figcaption></figure>

<figure><img src="/files/-MdWOAzttUoL2j8bfInx" alt="Keystone-Specter-MultiSig-9"><figcaption></figcaption></figure>

3\. Click \[Continue], then add Keystone successfully.

<figure><img src="/files/-MdWONX5d69i5XgSGbQV" alt="Keystone-Specter-MultiSig-10"><figcaption></figcaption></figure>

<figure><img src="/files/-MdWOV-2VsdnofmD_C3f" alt="Keystone-Specter-MultiSig-11"><figcaption></figcaption></figure>

### 2. Add Coldcard on Specter

1\) Click \[+ Add new device] on specter. Select your device type \[ColdCard] and enter the name.

<figure><img src="/files/-MdWP8wU49xWgKsNVImF" alt="Keystone-Specter-MultiSig-12"><figcaption></figcaption></figure>

<figure><img src="/files/-MdWPjjN3s_q9s52UzNK" alt="Keystone-Specter-MultiSig-13"><figcaption></figcaption></figure>

2\) Insert microSD card into ColdCard > \[Settings] > \[Multisig Wallets] > \[Export XPUB] > Get xpubs from Coldcard.

<figure><img src="/files/-MdWQ0VkcG-yH4074mxi" alt="Keystone-Specter-MultiSig-14"><figcaption></figcaption></figure>

3\) Take out the microSD card from Coldcard and insert it into a PC/Mac.

4\) On Specter: Click on \[Upload from SD Card] > Select and open the .json file exported from Coldcard.

<figure><img src="/files/-MdWQ3q2xEPjy-Yl9mNb" alt="Keystone-Specter-MultiSig-15"><figcaption></figcaption></figure>

<figure><img src="/files/-MdWQDDdDhkq2WDd8Ir7" alt="Keystone-Specter-MultiSig-16"><figcaption></figcaption></figure>

5\) Click \[Continue], then add Coldcard successfully.

<figure><img src="/files/-MdWQOUh-S9RzVdKvhkX" alt="Keystone-Specter-MultiSig-17"><figcaption></figcaption></figure>

<figure><img src="/files/-MdWQeraOBIyDd71lsXK" alt="Keystone-Specter-MultiSig-18"><figcaption></figcaption></figure>

## **III. Create watch-only wallet for 2/2 PSBT multisig wallet on Specter**

1\. On Specter: Click \[Create Multisignature wallet]. Pick the devices \[ColdCard], \[Keystone] and click \[Continue].

<figure><img src="/files/-MdWQij5JYzlNdcz8x6w" alt="Keystone-Specter-MultiSig-19"><figcaption></figcaption></figure>

<figure><img src="/files/-MdWQvC80K3R0sIFu63M" alt="Keystone-Specter-MultiSig-20"><figcaption></figcaption></figure>

2\. Set the name, Type the number of needed signatures. Click \[Create wallet].

<figure><img src="/files/-MdWRa2GhiHrUDdWvadO" alt="Keystone-Specter-MultiSig-21"><figcaption></figcaption></figure>

3\. Create a watch-only wallet for 2/2 PSBT multisig wallet successfully.

<figure><img src="/files/-MdWS9N_x5l8RZe_iz-Z" alt="Keystone-Specter-MultiSig-22"><figcaption></figcaption></figure>

## **IV. Create a 2/2 PSBT multisig wallet on Coldcard**

1\. Insert the microSD card into Coldcard with a .json file exported from Keystone in the card.

2\. \[Settings] > \[Multisig Wallets] > \[Create Airgapped].

<figure><img src="/files/-MdWSJkQ4YP5qlEpyWld" alt="Keystone-Specter-MultiSig-23"><figcaption></figcaption></figure>

3\. Set address type (Default-P2WSH) and the number of cosigners (2 of 2).

<div align="left"><figure><img src="/files/-MdWSNXiLuD_IMnnUbOj" alt="Keystone-Specter-MultiSig-24"><figcaption></figcaption></figure></div>

4\. Confirm (√) and complete creating a 2/2 multisig wallet.

<div align="left"><figure><img src="/files/-MdWSQ3NTf1qgRLtGm9T" alt="Keystone-Specter-MultiSig-25"><figcaption></figcaption></figure></div>

5\. You will get a file named “export-CC-2-of-2.txt” on your microSD card after the previous step. You will need it to import multisig wallet to Keystone.

<div align="left"><figure><img src="/files/-MdWU5UXmpxCbx8bZNRJ" alt="Keystone-Specter-MultiSig-26"><figcaption></figcaption></figure></div>

**Tips：**&#x49;f you didn’t get the file, please export manually by following instructions:

1\. Insert the microSD card into Coldcard.

2\. \[Settings]> \[Multisig Wallets] > \[2/2: CC-2-of-2] > \[Coldcard Export] > \[Coldcard Export] > Export-CC-2-of-2.txt.

<div align="left"><figure><img src="/files/-MdWUEJK30CxIY1MOYuj" alt="Keystone-Specter-MultiSig-27"><figcaption></figcaption></figure></div>

<div align="left"><figure><img src="/files/-MdWUHhdCQl2N5-xzJ4v" alt="Keystone-Specter-MultiSig-28"><figcaption></figcaption></figure></div>

## **V. Import 2/2 PSBT multisig wallet to** Keystone

1\. Insert the microSD card into Keystone with the “export-CC-2-of-2.txt”  file exported from Coldcard in the card.

2\. \[Menu] > \[Multisig Wallet] > \[Import Multisig Wallet].

<figure><img src="/files/-MdWULvJAd1Z8kFy5CcC" alt="Keystone-Specter-MultiSig-29"><figcaption></figcaption></figure>

3\. Select file “export-CC-2-of-2.txt” > \[Understood] > Check the wallet Info and touch \[Confirm].

<figure><img src="/files/-MdWURDDC4ZSQddISZRv" alt="Keystone-Specter-MultiSig-30"><figcaption></figcaption></figure>

## **VI. Receiving bitcoin to the 2/2 multisig address**

1\. On Keystone: Touch \[Addresses] to display the receiving addresses.

<figure><img src="/files/-MduW9nb1e6RSdu9OuWh" alt="Keystone-Specter-MultiSig-31"><figcaption></figcaption></figure>

2\. On Specter: Select your Multisig Wallet > Click on \[Receive] to display the receiving address.

<figure><img src="/files/-MduWD47S_F3QJwN3QbF" alt="Keystone-Specter-MultiSig-32"><figcaption></figcaption></figure>

## **VII. Sending a 2/2 PSBT multisig transaction**

### 1. Create an unsigned transaction on Specter

1\) On Specter: Select your Multisig Wallet > Click on \[Send] > Input the recipient address and amount > \[Create unsigned transaction].

<figure><img src="/files/-Md_TYryUGRbLSi9wlw7" alt="Keystone-Specter-MultiSig-33"><figcaption></figcaption></figure>

### 2. Sign with Keystone

{% hint style="info" %}
**Tips:** You can choose to sign the transaction on Keystone via QR code or File.
{% endhint %}

#### - Option 1: Via QR code

1\) On Specter: Click on \[Keystone] > \[Sign with QR codes] > Specter displays the unsigned transaction data in a QR code format.

<figure><img src="/files/-Md_oRYW3ax8WwdLw0YK" alt="Keystone-Specter-MultiSig-33"><figcaption></figcaption></figure>

<figure><img src="/files/-Md_ontVPdynQao9gAVz" alt="Keystone-Specter-MultiSig-34"><figcaption></figcaption></figure>

<figure><img src="/files/-Md_V-Ff8CcaDrbzwPdj" alt="Keystone-Specter-MultiSig-35"><figcaption></figcaption></figure>

2\) On Keystone: Press the \[Scan] icon > Scan the QR code shown on Specter interface > \[Sign] > Password verification. The device will then show the signed transaction data in QR code format.

<figure><img src="/files/-Md_V9723_m92qhyX4zl" alt="Keystone-Specter-MultiSig-36"><figcaption></figcaption></figure>

3\) On Specter: Click on \[Scan signed transaction] > scan the QR code shown on Keystone > Keystone signed successfully

<figure><img src="/files/-Md_tqEZPTjO-yZQkq_O" alt="Keystone-Specter-MultiSig-37"><figcaption></figcaption></figure>

<figure><img src="/files/-Md_ttBGW08vds8FkL-i" alt="Keystone-Specter-MultiSig-38"><figcaption></figcaption></figure>

<figure><img src="/files/-Md_tLCpOWos2OufU6tH" alt="Keystone-Specter-MultiSig-39"><figcaption></figcaption></figure>

{% hint style="info" %}
**Tips:** If you have difficulty on QR code scanning, please tap the QR code to adjust the density of the QR code and retry.&#x20;
{% endhint %}

<figure><img src="/files/-MjlcKD_1Gt_Lp1zUnRq" alt="Keystone-Specter-MultiSig-40"><figcaption></figcaption></figure>

#### - By File

1\) On Specter: Click on \[Keystone] > \[Sign with SD Card file] > \[save transaction to file] > \[Save] (save the unsigned transaction file to microSD card).

<figure><img src="/files/-Md_oyhDDtpwkVMeG6oV" alt="Keystone-Specter-MultiSig-41"><figcaption></figcaption></figure>

<figure><img src="/files/-Md_pkk7NS432O1IdgWh" alt="Keystone-Specter-MultiSig-42"><figcaption></figcaption></figure>

<figure><img src="/files/-Md_q7OLa9cqxbsmCPic" alt="Keystone-Specter-MultiSig-43"><figcaption></figcaption></figure>

<figure><img src="/files/-Md_WoMjQKA_BGP9mioc" alt="Keystone-Specter-MultiSig-44"><figcaption></figcaption></figure>

2\) Take out the microSD card from PC/Mac and insert it into your Keystone.

3\) On Keystone: Press the \[microSD card] icon > Select and open the unsigned transaction file > \[Sign] > Password verification > Press \[touch here...] to export partially signed transaction file to microSD card.

<figure><img src="/files/-Md_WrOT0yCMJO_6cEAM" alt="Keystone-Specter-MultiSig-45"><figcaption></figcaption></figure>

<figure><img src="/files/-Md_Wvsl0fa5h_i3weQ-" alt="Keystone-Specter-MultiSig-46"><figcaption></figcaption></figure>

4\) Take out the microSD card from your Keystone and insert it into PC/Mac.

5\) On Specter: Click on \[Upload signed transaction] > Select and open the partially signed transaction file exported from Keystone > Keystone signed successfully.

<figure><img src="/files/-Md_sZNl-EZiSRZ48gwV" alt="Keystone-Specter-MultiSig-47"><figcaption></figcaption></figure>

<figure><img src="/files/-Md_sb7pQrcH12S4WyAr" alt="Keystone-Specter-MultiSig-48"><figcaption></figcaption></figure>

<figure><img src="/files/-Md_tLCpOWos2OufU6tH" alt="Keystone-Specter-MultiSig-49"><figcaption></figcaption></figure>

### 3. Sign with Coldcard

1\) Insert the microSD card into PC/Mac.

2\) On Specter: Click on \[ColdCard] > \[Sign with SD card file] >  \[save transaction to file] > \[Save] (save the unsigned transaction file to microSD card).

<figure><img src="/files/-Md_u9GGDUOMGcC8M21T" alt="Keystone-Specter-MultiSig-50"><figcaption></figcaption></figure>

<figure><img src="/files/-Md_udECVfplB2-Iw41K" alt="Keystone-Specter-MultiSig-51"><figcaption></figcaption></figure>

<figure><img src="/files/-Md_ugCfHcTsnG7WJGZT" alt="Keystone-Specter-MultiSig-52"><figcaption></figcaption></figure>

<figure><img src="/files/-Md_UBkqprpgCm2yKwj7" alt="Keystone-Specter-MultiSig-53"><figcaption></figcaption></figure>

2\) Pull out the microSD card from PC/Mac and insert it into your Coldcard.

3\) On Coldcard: \[Ready To Sign] > \[OK] > export partially signed transaction file to microSD card.

<figure><img src="/files/-Md_UST20XmOoJXoBw4s" alt="Keystone-Specter-MultiSig-54"><figcaption></figcaption></figure>

4\) Pull out the microSD card from your Coldcard and insert it into PC/Mac.&#x20;

5\) On Specter: Click on \[Load signed transaction] > Select and open the partially signed transaction file exported from Coldcard > Coldcard signed successfully.

<figure><img src="/files/-Md_vipq-bNYSbbOcvRJ" alt="Keystone-Specter-MultiSig-55"><figcaption></figcaption></figure>

<figure><img src="/files/-Md_wnMNB1XjJIu719k8" alt="Keystone-Specter-MultiSig-56"><figcaption></figcaption></figure>

### 4. Broadcast transaction on Specter

1\) You can choose to broadcast the multisig transaction immediately or later.

<figure><img src="/files/-Md_lqpC2BF3eVuhHde1" alt="Keystone-Specter-MultiSig-57"><figcaption></figcaption></figure>

&#x20;Instructions recommended:&#x20;

{% content-ref url="/pages/-MdoHp2fqzi1CxYQkWJ8" %}
[Specter 2/3 PSBT Multi-Sig](/3rd-party-wallets/bitcoin-wallets/specter/specter-2-3-multi-sig)
{% endcontent-ref %}

{% content-ref url="/pages/-MVzkNA9fM7149fj\_rNu" %}
[Delete Multisig Wallet](/advanced-features/multi-signature/delete-multisig-wallet)
{% endcontent-ref %}


# Specter 2/3 PSBT Multi-Sig

Keystone firmware versions V1.1.1 (BTC-Only) or newer support PSBT Multi-signature functions. Detailed instructions below will explain how to create a 2-out-of-3 PSBT Multi-signature wallet with the Keystone Wallet, Coldcard and a [SeedPicker](http://seedpicker.net/) as 3 participant co-signers. We will use here Specter V1.4.6 as the watch-only coordinator.

## I. **Preparation**

1\. [Firmware](https://keyst.one/firmware?locale=en) version V1.1.1 (BTC-Only) or newer running on Keystone Essential or Pro models. Create recovery phrase A.

&#x20;  (Please read[ How to upgrade firmware](https://support.keyst.one/getting-started/firmware-upgrading) for more details.)

2\. Coldcard upgraded to firmware version V2.1.0 or newer.&#x20;

3\. <http://seedpicker.net/> run on an offline PC/Mac.

3\. Specter (V1.4.6 or newer) installed and running on PC/Mac.

4\. MicroSD card (≤512GB; default FAT32 format).

{% content-ref url="/pages/-MclpVfjNf9WvY0094y4" %}
[How to Format a MicroSD Card to FAT32?](/getting-started/firmware-upgrading/how-to-format-a-microsd-card-to-fat32)
{% endcontent-ref %}

## **II. Your devices on Specter**

{% hint style="info" %}
**Tips:** If you want to switch to \[Test Net], please go to Keystone > \[Settings] > \[Blockchain] > \[Test Net]. Then continue with the following steps.
{% endhint %}

### 1. Adding Keystone to Specter

1\) Click \[+ Add new device], select your device type \[Keystone] , then enter the name.

<figure><img src="/files/-MdQifdK3ebcDB3w1E9N" alt="Keystone-Specter-ColdCard-1"><figcaption></figcaption></figure>

<figure><img src="/files/-MdQip2TPmNbqCl_IIfz" alt="Keystone-Specter-ColdCard-2"><figcaption></figcaption></figure>

2\) You can add Keystone on Specter by QR code or microSD card.

#### - By QR code

1\) On Keystone: Touch \[Menu] > \[Multisig Wallet] > Press \[•••] icon on the top right > \[Show/ Export XPUB].

<figure><img src="/files/-MdW0b5-HXoXh-JMq8Js" alt="Keystone-Specter-ColdCard-3"><figcaption></figcaption></figure>

2\) On Specter: Click on \[Scan QR Code], then scan the QR code shown on Keystone.

<figure><img src="/files/-MdW0ier8C-A7JWwbPjm" alt="Keystone-Specter-ColdCard-4"><figcaption></figcaption></figure>

<figure><img src="/files/-MdWNkYDkUEvPGKqSLwz" alt="Keystone-Specter-ColdCard-5"><figcaption></figcaption></figure>

#### - By microSD card

1\) Insert the microSD card into Keystone, then touch \[Menu] > \[Multisig Wallet] > \[Show/ Export XPUB] > \[Export All] > \[Export].

<figure><img src="/files/-MdWNoWqsZGPZwRUZm96" alt="Keystone-Specter-ColdCard-6"><figcaption></figcaption></figure>

<figure><img src="/files/-MdWNyChVy3FebIf0yWP" alt="Keystone-Specter-ColdCard-7"><figcaption></figcaption></figure>

2\) Take out the microSD card from your Keystone and insert it into PC/Mac.

3\) On Specter: Click on \[Upload from SD Card] > Select and open the .json file exported from Keystone.

<figure><img src="/files/-MdWO2TAMze7yOhumarW" alt="Keystone-Specter-ColdCard-8"><figcaption></figcaption></figure>

<figure><img src="/files/-MjhvhcpyJ5MqYZ3Fjsm" alt="Keystone-Specter-ColdCard-9"><figcaption></figcaption></figure>

4\) Click \[Continue] to add Keystone.&#x20;

<figure><img src="/files/-MdWONX5d69i5XgSGbQV" alt="Keystone-Specter-ColdCard-10"><figcaption></figcaption></figure>

<figure><img src="/files/-MdWOV-2VsdnofmD_C3f" alt="Keystone-Specter-ColdCard-11"><figcaption></figcaption></figure>

### 2. Adding Coldcard on Specter

1\) Click \[+ Add new device] on Specter, then select your device type \[ColdCard] and enter the name.

<figure><img src="/files/-MdWP8wU49xWgKsNVImF" alt="Keystone-Specter-ColdCard-12"><figcaption></figcaption></figure>

<figure><img src="/files/-MdWPjjN3s_q9s52UzNK" alt="Keystone-Specter-ColdCard-13"><figcaption></figcaption></figure>

2\) Insert the microSD card into Coldcard > \[Settings] > \[Multisig Wallets] > \[Export XPUB] > Get xpubs from Coldcard.

<figure><img src="/files/-MdWQ0VkcG-yH4074mxi" alt="Keystone-Specter-ColdCard-14"><figcaption></figcaption></figure>

3\) Take out the microSD card from your Coldcard and insert it into PC/Mac.

4\) On Specter: Click on \[Upload from SD Card], then select and open the .json file exported from Coldcard.

<figure><img src="/files/-MdWQ3q2xEPjy-Yl9mNb" alt="Keystone-Specter-ColdCard-14"><figcaption></figcaption></figure>

<figure><img src="/files/-MjhxVrPMYqfNPhImGY3" alt="Keystone-Specter-ColdCard-15"><figcaption></figcaption></figure>

5\) Click \[Continue] to add Coldcard.

<figure><img src="/files/-MdWQOUh-S9RzVdKvhkX" alt="Keystone-Specter-ColdCard-16"><figcaption></figcaption></figure>

<figure><img src="/files/-MdWQeraOBIyDd71lsXK" alt="Keystone-Specter-ColdCard-17"><figcaption></figcaption></figure>

### 3. Adding Paper Wallet on Specter

By using a software-generated paper wallet, you eliminate the need to buy a third hardware wallet (you may later have to buy a hardware wallet if you need to use this key for emergency recovery purposes).

In this tutorial, we chose to use [SeedPicker](http://seedpicker.net/) to generate the third recovery phrase.

{% hint style="warning" %}
**Warning: This is the highest risk step in our multisig setup**. **Follow the instructions closely to drastically improve your security.**
{% endhint %}

1\) Insert the microSD card into your PC/Mac.

2\) [SeedPicker](http://seedpicker.net/) run on an offline PC/Mac, and create a new recovery phrase. Then click \[Download] to save the Xpub of the recovery phrase created by [SeedPicker](http://seedpicker.net/) as a .json file to the microSD card.

<figure><img src="/files/-McOFbh4m3av95qPbWYP" alt="Keystone-Specter-ColdCard-18"><figcaption></figcaption></figure>

<figure><img src="/files/-MjclCzq9ZGzUaoUG0S8" alt="Keystone-Specter-ColdCard-19"><figcaption></figcaption></figure>

3\) Click \[+ Add new device] on specter. Select your device type \[Other] and enter the name. For this tutorial, we will name the device "Paper Wallet".

<figure><img src="/files/-Mdp9V-9n2Vx9mM7opF1" alt="Keystone-Specter-ColdCard-20"><figcaption></figcaption></figure>

<figure><img src="/files/-Mdp9Y5N1g2AQ9O655a7" alt="Keystone-Specter-ColdCard-21"><figcaption></figcaption></figure>

4\) Click \[Upload from SD Card], then select and open the .json file exported from [SeedPicker](http://seedpicker.net/).

<figure><img src="/files/-MdpH4lMoPMnsOppRBuC" alt="Keystone-Specter-ColdCard-22"><figcaption></figcaption></figure>

<figure><img src="/files/-MdpH7sEG1liF6eDYsvO" alt="Keystone-Specter-ColdCard-23"><figcaption></figcaption></figure>

5\) Click \[Continue] to add "Paper Wallet".

<figure><img src="/files/-MdpIq-cJS_1Pur8t4FT" alt="Keystone-Specter-ColdCard-24"><figcaption></figcaption></figure>

<figure><img src="/files/-MdpJ5CHrPjJ4K1fLOAc" alt="Keystone-Specter-ColdCard-25"><figcaption></figcaption></figure>

## **III. Creating a watch-only wallet for 2/3 PSBT multisig wallet on Specter**

1\. Specter > Click \[Create Multisignature wallet]. Pick the concerning devices \[ColdCard] \[Keystone] \[Paper Wallet] and click \[Continue].

<figure><img src="/files/-Mdq4AsOQFG4Z_nXO9I6" alt="Keystone-Specter-ColdCard-26"><figcaption></figcaption></figure>

<figure><img src="/files/-Mdq487M2ttDgukxcbzO" alt="Keystone-Specter-ColdCard-27"><figcaption></figcaption></figure>

2\. Set the Name, Type and number of needed signatures, then click \[Create wallet].

<figure><img src="/files/-Mdq4GONMXDDV6u-0flp" alt="Keystone-Specter-ColdCard-28"><figcaption></figcaption></figure>

3\. Create the watch-only wallet for 2/3 PSBT multisig wallet.

<figure><img src="/files/-Mdq4WS8FIJuh9QMGdP8" alt="Keystone-Specter-ColdCard-29"><figcaption></figcaption></figure>

## **IV. Importing the 2/3 PSBT multisig wallet to** Keystone

1\. On Specter: Select your multisig wallet (e.g. Bob's Multisig Wallet) > Click on \[Settings] > \[Export] > \[Show Keystone QR Code].

<figure><img src="/files/-Mdq4_7Xyu5xQzD6EBxG" alt="Keystone-Specter-ColdCard-30"><figcaption></figcaption></figure>

<figure><img src="/files/-Mdq4bWGA_b3dqNq51cf" alt="Keystone-Specter-ColdCard-31"><figcaption></figcaption></figure>

2\. On Keystone: Touch \[Menu] > \[Multisig Wallet] > \[Import Multisig Wallet] > Touch \[Scan] icon > \[Understood] > Check the wallet info and touch \[Confirm] > Import successful.

<figure><img src="/files/-Mdq4eQI5Agv-o0NqvUR" alt="Keystone-Specter-ColdCard-32"><figcaption></figcaption></figure>

<div align="left"><figure><img src="/files/-Mdq4oTk27yyI1Xdp0Y5" alt="Keystone-Specter-ColdCard-33"><figcaption></figcaption></figure></div>

## &#x56;**. Importing the 2/3 PSBT multisig wallet to Coldcard**

1\. Insert the microSD card into PC/Mac.

2\. Click on \[Save ColdCard file] on Specter to save the .txt file to the microSD card.

<figure><img src="/files/-MjcPywZqqStoaBfN9T3" alt="Keystone-Specter-ColdCard-34"><figcaption></figcaption></figure>

<figure><img src="/files/-MjcQ2MspfUNc-7B905-" alt="Keystone-Specter-ColdCard-35"><figcaption></figcaption></figure>

3\. Take out the microSD card from PC/Mac and insert it into Coldcard.

4\. On Coldcard: \[Settings] > \[Multisig Wallets] > \[Import from SD].

<figure><img src="/files/-Mdq3oouGAbETc5iM_dk" alt="Keystone-Specter-ColdCard-36"><figcaption></figcaption></figure>

5\. Select .txt file exported from Specter (e.g.Bob's Multisig Wallet) >  Confirm(√) and complete the import of the 2/3 multisig wallet.

<figure><img src="/files/-Mdq3siPx9ofml3yPROD" alt="Keystone-Specter-ColdCard-37"><figcaption></figcaption></figure>

## VI. **Receiving bitcoin to the 2/3 multisig addresses**

1\. For Keystone, touch \[Addresses] to display the receiving addresses.

<figure><img src="/files/-Mdq5kaRhs6BQdvG_6me" alt="Keystone-Specter-ColdCard-38"><figcaption></figcaption></figure>

2\. On Specter: Select your multisig wallet (e.g. Bob's Multisig Wallet), then click on the  \[Receive] tab on the top to display the receiving address.

<figure><img src="/files/-Mdq5oHFErSPHsYIxRMf" alt="Keystone-Specter-ColdCard-39"><figcaption></figcaption></figure>

## **VII. Sending a 2/3 PSBT multisig transaction**

### 1. Creating an unsigned transaction on Specter

1\) On Specter: Select your Multisig Wallet (e.g. Bob's Multisig Wallet) > Click one \[Send] > Input the recipient address and amount > \[Create unsigned transaction].

<figure><img src="/files/-Mdtz2_RdOO2rIeopfMt" alt="Keystone-Specter-ColdCard-40"><figcaption></figcaption></figure>

<figure><img src="/files/-Mdtz5t6pr-l7TxVzgA6" alt="Keystone-Specter-ColdCard-41"><figcaption></figcaption></figure>

### 2. Signing with Keystone

**Tips:** You can sign transactions with Keystone by scanning the QR code or by file transfer.

#### - Option 1: Via QR Code

1\) On Specter: Click on \[Keystone] > \[Sign with QR codes] > Specter displays the unsigned transaction data as a QR code format.

<figure><img src="/files/-Mdtz9jUwoGDLeq8-Sxe" alt="Keystone-Specter-ColdCard-42"><figcaption></figcaption></figure>

<figure><img src="/files/-MdtzQay0bIKExYm6n7m" alt="Keystone-Specter-ColdCard-43"><figcaption></figcaption></figure>

<figure><img src="/files/-MdtzVeFNwt8wBfLTrCB" alt="Keystone-Specter-ColdCard-44"><figcaption></figcaption></figure>

2\) On Keystone: Press the \[Scan] icon > Scan the QR code shown on Specter interface > \[Sign] > Password verification. The device will then show the signed transaction data in QR code format.

<figure><img src="/files/-MdtzZroUoTybPyYe0j4" alt="Keystone-Specter-ColdCard-45"><figcaption></figcaption></figure>

3\) On Specter: Click on \[Scan signed transaction] > Scan the QR code shown on Keystone > Keystone signed successfully.

<figure><img src="/files/-MdtzoU3mIXUY-ZMCjiL" alt="Keystone-Specter-ColdCard-46"><figcaption></figcaption></figure>

<figure><img src="/files/-Mdtzs_BhiQNc6NVxBBz" alt="Keystone-Specter-ColdCard-47"><figcaption></figcaption></figure>

<figure><img src="/files/-Mjhy2wLLZjnzoc2Sz6-" alt="Keystone-Specter-ColdCard-48"><figcaption></figcaption></figure>

{% hint style="info" %}
**Tips:** If you have difficulty on QR code scanning, please tap the QR code to adjust the size of the QR code on Keystone and retry.&#x20;
{% endhint %}

<figure><img src="/files/-MjcZgPdRbwUGlbxBRTU" alt="Keystone-Specter-ColdCard-49"><figcaption></figcaption></figure>

#### -  Option 2: Via File

1\) Insert the microSD card into PC/Mac.

2\) On Specter: Click on \[Keystone] > \[Sign with SD Card file] >\[Save transaction to file ] > \[Save] (save the unsigned transaction file to microSD card).

<figure><img src="/files/-Mdtz9jUwoGDLeq8-Sxe" alt="Keystone-Specter-ColdCard-50"><figcaption></figcaption></figure>

<figure><img src="/files/-Mdu-7H3l17GO5UU84Vi" alt="Keystone-Specter-ColdCard-51"><figcaption></figcaption></figure>

<figure><img src="/files/-Mdu-EP6H6r0GQTG086E" alt="Keystone-Specter-ColdCard-52"><figcaption></figcaption></figure>

<figure><img src="/files/-Mdu-HhZ8C77XLI-LhRL" alt="Keystone-Specter-ColdCard-53"><figcaption></figcaption></figure>

3\) Take out the microSD card from PC/Mac and  insert it into Keystone.

4\) Press the "microSD card" icon > Select and open the unsigned transaction file > \[Sign] > Password verification > press \[touch here...] to partially export the signed transaction file to the microSD card.

<figure><img src="/files/-Mdu-Ml1a3F_OcHoUlbA" alt="Keystone-Specter-ColdCard-54"><figcaption></figcaption></figure>

<figure><img src="/files/-Mdu-PDPaUTSbXpemoJx" alt="Keystone-Specter-ColdCard-55"><figcaption></figcaption></figure>

5\) Take out the microSD card from your Keystone and insert it into PC/Mac.

6\) On Specter: Click on \[Upload the signed transaction] > Select and open the partially signed transaction file exported from Keystone > Keystone signed successfully.

<figure><img src="/files/-Mdu-SEFl0akJDk7iq8F" alt="Keystone-Specter-ColdCard-56"><figcaption></figcaption></figure>

<figure><img src="/files/-Mdu-UuiqAs6ZTLBmaXC" alt="Keystone-Specter-ColdCard-57"><figcaption></figcaption></figure>

<figure><img src="/files/-MdtzyWOQ_R2PBSY68zT" alt="Keystone-Specter-ColdCard-58"><figcaption></figcaption></figure>

### 3. Signing with Coldcard

1\) Insert the microSD card into PC/Mac > Specter > \[ColdCard] > \[Sign with SD card file] >  \[save transaction to file] > \[Save] (save the unsigned transaction file to the microSD card).

<figure><img src="/files/-Mdu-jDgt39tv7tw4FJ4" alt="Keystone-Specter-ColdCard-59"><figcaption></figcaption></figure>

<figure><img src="/files/-Mdu-pM6bejFZzO0zfZf" alt="Keystone-Specter-ColdCard-60"><figcaption></figcaption></figure>

<figure><img src="/files/-Mdu0-EVURBfuHPgHZNz" alt="Keystone-Specter-ColdCard-61"><figcaption></figcaption></figure>

<figure><img src="/files/-Mjc4Y2TXwJNDU4q2LTR" alt="Keystone-Specter-ColdCard-62"><figcaption></figcaption></figure>

3\) Take out the microSD card from PC/Mac and insert it into your Coldcard.

4\) On Coldcard: \[Ready To Sign] > \[OK] > Export the partially signed transaction file to the microSD card.

<figure><img src="/files/-Mdu06tFQrwBn3PgMKvI" alt="Keystone-Specter-ColdCard-63"><figcaption></figcaption></figure>

5\) Take out the microSD card from your Coldcard and insert it into PC/Mac.

6\) On Specter: Click on \[Load signed transaction] > Select and open the partially signed transaction file exported from Coldcard > Coldcard signed successfully.

<figure><img src="/files/-Mdu09bDDCeHlpevCsQw" alt="Keystone-Specter-ColdCard-64"><figcaption></figcaption></figure>

<figure><img src="/files/-Mdu0CF2h6j_GZkK4Vuo" alt="Keystone-Specter-ColdCard-65"><figcaption></figcaption></figure>

### 4. Broadcast transaction on Specter

1\) You can choose to broadcast the multisig transaction immediately or later.

<figure><img src="/files/-Mdu0cV3HCdSupCQlGZv" alt="Keystone-Specter-ColdCard-66"><figcaption></figcaption></figure>

That’s all!

We hope this guide will be useful when you decide to use a 2-out-of-3 multi-sig wallet in the future for protecting your funds in a multi-sig setup!


# Sparrow Wallet

With firmware versions V1.1.1 (BTC-Only) or newer, you can set Sparrow V1.4.2 or newer as a watch-only wallet that functions as the companion app for Keystone Essential or Pro.

## I. **Preparation**

1\. [Firmware](https://keyst.one/firmware?locale=en) version V1.1.1 (BTC-Only) or newer running on Keystone Essential or Pro.&#x20;

&#x20;  (Please read[ How to upgrade firmware](https://support.keyst.one/getting-started/firmware-upgrading) for more details.)

2\. PC/Mac with Sparrow Wallet V1.4.2 or newer installed and set up.

3\. MicroSD card (FAT32 format with capacity **NOT** exceeding 512GB).

{% content-ref url="/pages/-MclpVfjNf9WvY0094y4" %}
[How to Format a MicroSD Card to FAT32?](/getting-started/firmware-upgrading/how-to-format-a-microsd-card-to-fat32)
{% endcontent-ref %}

## II. Create a Sparrow Watch-only Wallet (BTC-Only)

1\. In the Keystone hardware wallet, go to \[Settings], touch \[Watch-Only Wallet], select \[Sparrow Wallet], then touch \[Confirm].

<figure><img src="/files/-MbjO5jWT0RDpkk7oy9A" alt="Keystone-Sparrow-1"><figcaption></figcaption></figure>

2\. Touch \[•••] button on the top right of the screen, then select \[Export Wallet] and show the QR code .

<figure><img src="/files/-MbjTBxa0ckOyK7WFqHh" alt="Keystone-Sparrow-2"><figcaption></figcaption></figure>

3\. Sparrow Wallet: Create a new wallet, and then go to \[Settings] and click on \[Airgapped Hardware Wallet] to import Keystone Xpub.

<figure><img src="/files/-McJ9rzPt6gRxMqV3FXI" alt="Keystone-Sparrow-3"><figcaption></figcaption></figure>

<figure><img src="/files/-McJAIPL3FjV4fz3gxNo" alt="Keystone-Sparrow-4"><figcaption></figcaption></figure>

4\. Here users can choose import Keystone Xpub by QR code or microSD card.

#### &#x20;- Via QR code:&#x20;

① Click on \[Scan...] on Sparrow Wallet and scan the QR code shown on the Keystone.

<figure><img src="/files/-McJBCTNGwD80s992xgg" alt="Keystone-Sparrow-5"><figcaption></figcaption></figure>

<figure><img src="/files/-McJCfRixDsxd3jHQGUJ" alt="Keystone-Sparrow-6"><figcaption></figcaption></figure>

#### - Via microSD card

① Insert the microSD card into Keystone and go through the previous step 1-2. Touch \[touch here to export the file with microSD] > \[Export].

<figure><img src="/files/-McJEn8DfQ71jSydNo3U" alt="Keystone-Sparrow-7"><figcaption></figcaption></figure>

② Take out the microSD card from the Keystone and insert into your PC/Mac.&#x20;

③ Click on \[Import File…] on Sparrow Wallet, then select and open the exported file.

<figure><img src="/files/-McJHEpVUTurD5M9pUhO" alt="Keystone-Sparrow-8"><figcaption></figcaption></figure>

<figure><img src="/files/-McJHHnnSNIJrwh3hSYY" alt="Keystone-Sparrow-9"><figcaption></figcaption></figure>

4\. Click \[Apply], then set the wallet password and click \[Set Password]. If there were no errors, you are now paired successfully.

<figure><img src="/files/-McJHpPoTh0zVXwxrZJt" alt="Keystone-Sparrow-10"><figcaption></figcaption></figure>

<figure><img src="/files/-McJHrqvGxy4Pmpi_t57" alt="Keystone-Sparrow-11"><figcaption></figcaption></figure>

<figure><img src="/files/-McJHupTos1I65QjGZOp" alt="Keystone-Sparrow-12"><figcaption></figcaption></figure>

## III. Sending and Receiving Assets with Sparrow Wallet

### **A. Receiving BTC**

Users can choose between the Keystone device or the Sparrow Wallet app to generate receive addresses for BTC. But it’s recommended to use Keystone to view or generate receive addresses due to safety concerns. (This way you can verify that the receiving address is actually correct or not, because the internet-connected instance is prone to malware.)

1\. On Keystone: Touch \[Addresses] to display the receiving addresses. (You can optionally generate more addresses that the device can display for you.)

<figure><img src="/files/-McN5lolERq4Ia2K1r88" alt="Keystone-Sparrow-13"><figcaption></figcaption></figure>

2\. On Sparrow Wallet: Click \[Receive] to display the receiving addresses. (You can also go into the Addresses menu and use any address displayed, but we mainly recommend using the ones via Receive.)

<figure><img src="/files/-McN6-awKvJbI6kdf-Ff" alt="Keystone-Sparrow-14"><figcaption></figcaption></figure>

### **B. Sending BTC**

#### 1. Create a Transaction with Sparrow Wallet

1\) Run Sparrow Wallet. Click \[Send] and set the receive address, label, amount, and fee. Click \[Create Transaction].

<figure><img src="/files/-McN6520pwBhnzjoBR4Q" alt="Keystone-Sparrow-15"><figcaption></figcaption></figure>

2\) Click on \[Finalize Transaction for Signing].

<figure><img src="/files/-McN6HwAb7f7PT9Wf70v" alt="Keystone-Sparrow-16"><figcaption></figcaption></figure>

<figure><img src="/files/-McN6KU1tjixC82-cti2" alt="Keystone-Sparrow-17"><figcaption></figcaption></figure>

#### 2. Sign with Keystone Hardware Wallet

**Tips:** Here users can choose to sign the transaction via QR code or microSD card.

#### - Via QR code

① Click \[Show QR] on Sparrow Wallet and show the unsigned transaction data in QR code format.

<figure><img src="/files/-McN6Stg3rnymO6B2s0_" alt="Keystone-Sparrow-18"><figcaption></figcaption></figure>

② Touch the \[Scan] icon on the Keystone device, then scan the QR code shown on Sparrow Wallet.

<figure><img src="/files/-McN6W_SlUS3K-LOLfC3" alt="Keystone-Sparrow-19"><figcaption></figcaption></figure>

③ Touch \[Sign] and enter the password to authorize the transaction. The device will then show the signed transaction data in QR code format.

<figure><img src="/files/-McN6ZyclqRUB88gbsU_" alt="Keystone-Sparrow-20"><figcaption></figcaption></figure>

④ Click \[Scan QR] on Sparrow Wallet, then scan the QR code shown on Keystone.

<figure><img src="/files/-McN6doQ2ksEWlffMbDz" alt="Keystone-Sparrow-21"><figcaption></figcaption></figure>

<figure><img src="/files/-McN6lrgwfqKDq1uxLIx" alt="Keystone-Sparrow-22"><figcaption></figcaption></figure>

{% hint style="info" %}
**OPTIONAL:** If your computer device has no camera, you can use the Keystone to scan the QR code displayed on screen and then generate the signed transaction file onto a microSD card. The message to export to the microSD card should display underneath the QR code displayed on the device with underlined text. The specific steps are as follows.
{% endhint %}

#### - Via microSD card

① Insert the microSD card into PC/Mac.&#x20;

② Click \[Save PSBT] on Sparrow Wallet and save the file in the root directory of the microSD card.

<figure><img src="/files/-McN6r1bxkOidDgxfAES" alt="Keystone-Sparrow-22"><figcaption></figcaption></figure>

<figure><img src="/files/-McN6xpwRzYgMwBMgYPd" alt="Keystone-Sparrow-23"><figcaption></figcaption></figure>

③ Take out the microSD card from PC/Mac and insert it into the Keystone.&#x20;

④ Touch the "microSD card" icon on Keystone, then find and open the unsigned transaction file.

<figure><img src="/files/-McN72SnMZqxstUHtCgQ" alt="Keystone-Sparrow-24"><figcaption></figcaption></figure>

⑤ Touch \[Sign] and enter the password to authorize the transaction.

<figure><img src="/files/-McN76H9pCBTNojuRcSq" alt="Keystone-Sparrow-25"><figcaption></figcaption></figure>

⑥ Touch \[touch here to export the file with microSD] > \[Export]. The signed transaction file will be saved to the root directory of the microSD card.

<figure><img src="/files/-McN79X818gddxMhB0rS" alt="Keystone-Sparrow-26"><figcaption></figcaption></figure>

⑦ Take out the microSD card from the Keystone and insert it into your PC/Mac.

⑧ Click on \[Load PSBT] on Sparrow Wallet, then select and open the signed transaction file.

<figure><img src="/files/-McN7DcT_HLo3UUCfCNB" alt="Keystone-Sparrow-26"><figcaption></figcaption></figure>

<figure><img src="/files/-McN7GWfgPgAy-iqvp-O" alt="Keystone-Sparrow-27"><figcaption></figcaption></figure>

#### 3. Broadcast with Sparrow Wallet

&#x20;   Make sure the Sparrow Wallet has connected to the node successfully.

&#x20;   Click \[Broadcast Transaction].

<figure><img src="/files/-McN7Je1Qm1JMjzg0jdr" alt="Keystone-Sparrow-28"><figcaption></figcaption></figure>

&#x20;

Instructions recommended:&#x20;

{% content-ref url="/pages/-MYcJltOZihHVJNT33Jq" %}
[Sparrow Wallet 2/3 PSBT Multi-sig](/3rd-party-wallets/bitcoin-wallets/sparrow/sparrow-2-3-psbt-multi-sig)
{% endcontent-ref %}


# Sparrow Wallet 2/3 PSBT Multi-sig

Keystone firmware versions  V1.1.1 (BTC-Only) or newer supports PSBT Muti-signature functions. This instruction here will show how to create a 2/3 PSBT Multi-signature wallet with Keystone, Coldcard and a [SeedPicker](http://seedpicker.net/) as 3 participant co-signers, we will use here Sparrow V1.4.2 as a watch-only wallet, let’s see it all in detail.

## **I. Preparation**

1\. [Firmware](https://keyst.one/firmware?locale=en) version V1.1.1 (BTC-Only) or newer running on Keystone Essential or Pro. Create recovery phrase A.&#x20;

&#x20;  (Please read[ How to upgrade firmware](https://support.keyst.one/getting-started/firmware-upgrading) for more details.)

2\. Coldcard upgraded to firmware version V2.1.0 or newer. Create recovery phrase B.

3\. [SeedPicker](http://seedpicker.net/) run on an offline PC/Mac. Create recovery phrase C.

4\. Sparrow Wallet V1.4.2 or newer running on an online PC/Mac.

5\. MicroSD card (≤512GB; Default FAT32 format).

{% content-ref url="/pages/-MclpVfjNf9WvY0094y4" %}
[How to Format a MicroSD Card to FAT32?](/getting-started/firmware-upgrading/how-to-format-a-microsd-card-to-fat32)
{% endcontent-ref %}

## **II. Create a 2/3 multisig wallet with** Keyston&#x65;**, Coldcard and** [**S**eedPicker](http://seedpicker.net/)

### -  Export the required Xpub to a microSD card

#### 1. Export Keystone’s Xpub to a microSD card

1\) Insert the microSD card into your Keystone;

2\) Tap \[Menu] > \[Multisig Wallet] > Press the \[•••] button on the top right corner > \[Show/Export Xpub].

<figure><img src="/files/-McOFNdTOMvZNQHWcXxM" alt="Keystone-Sparrow-MultiSig-1"><figcaption></figcaption></figure>

3\) Touch \[Export All] > \[Export] > Save the Xpub of recovery phrase A as a .json file to the microSD card.

<figure><img src="/files/-McOFSapZQKx0kFCMqpI" alt="Keystone-Sparrow-MultiSig-2"><figcaption></figcaption></figure>

#### 2. Export Coldcard’s Xpub to a microSD card

1\) Take out the microSD card from Keystone and insert it into your Coldcard.

2\) On Coldcard: \[Settings] > \[Multisig Wallets] > \[Export XPUB].

<figure><img src="/files/-McOFWXre8gvNJYMHk2z" alt="Keystone-Sparrow-MultiSig-3"><figcaption></figcaption></figure>

3\) Confirm (√) and save the Xpub of recovery phrase B as a .json file (e.g. xxcp-5271C071.json) to MicroSD card.

#### 3. Export [SeedPicker](http://seedpicker.net/)’s Xpub to a microSD card

1\) Take out the microSD card from Coldcard and insert it into your PC/Mac.

2\) Save the Xpub of recovery phrase C as a .json file to the MicroSD card.

<figure><img src="/files/-McOFbh4m3av95qPbWYP" alt="Keystone-Sparrow-MultiSig-4"><figcaption></figcaption></figure>

<figure><img src="/files/-McOFhXszFJVsAAjJLLF" alt="Keystone-Sparrow-MultiSig-5"><figcaption></figcaption></figure>

3\) Edit the [SeedPicker](http://seedpicker.net/)’s Xpub file according to Keystone's Xpub file format. The steps are as follows:

&#x20;   a. Let's see Xpub file template required by Keystone.

<figure><img src="/files/-McOGEo3bBsvMBxDdZsi" alt="Keystone-Sparrow-MultiSig-6"><figcaption></figcaption></figure>

&#x20;  b. "xfp" means the fingerprint.

&#x20;  c. Edit the [SeedPicker](http://seedpicker.net/)’s Xpub file like the template shown above and save it.

<figure><img src="/files/-McOGPOxpdCm1fmCKxh1" alt="Keystone-Sparrow-MultiSig-7"><figcaption></figcaption></figure>

#### 4. After the previous steps, you will get 3 files on your microSD card.&#x20;

&#x20;   Let’s check what’s in the microSD card now:

<figure><img src="/files/-MjbUWTP17dSClVRsffp" alt="Keystone-Sparrow-MultiSig-8"><figcaption></figcaption></figure>

### -  Create a multi-signature wallet on Sparrow Wallet

#### 1. Creating a new wallet

1\) Run Sparrow and click on \[File] > \[New Wallet] > Enter a name for the wallet > \[create a new wallet] > \[Policy Type choose] > choose \[Multi Signature].

<figure><img src="/files/-McOcBIhWuH6FlvUeN1N" alt="Keystone-Sparrow-MultiSig-9"><figcaption></figcaption></figure>

<figure><img src="/files/-McOcJYSpiapr4MMbi1y" alt="Keystone-Sparrow-MultiSig-10"><figcaption></figcaption></figure>

#### 2. Import Xpub to Sparrow Wallet and create three keystores

1\) Insert the microSD card into your PC/Mac.

2\) Choose \[Keystore 1] > \[Airgapped Hardware Wallet] > \[Keystone Multisig] > \[Import File] > Select file “ccxp-748CC6AA.json” > \[Open].

{% hint style="info" %}
**Tips**: Keystone also can be imported by scanning the QR code.
{% endhint %}

<figure><img src="/files/-McOcPN8QmerDQUEtkml" alt="Keystone-Sparrow-MultiSig-11"><figcaption></figcaption></figure>

<figure><img src="/files/-McOcSnOPeY_f7P4VV5s" alt="Keystone-Sparrow-MultiSig-12"><figcaption></figcaption></figure>

<figure><img src="/files/-McOcZCd4Ub3PPEJOYee" alt="Keystone-Sparrow-MultiSig-13"><figcaption></figcaption></figure>

<figure><img src="/files/-McOciA9V7X5J0yMH8kM" alt="Keystone-Sparrow-MultiSig-14"><figcaption></figcaption></figure>

3\) Repeat step (2) to create the other two keystores and when done click on \[Apply].

{% hint style="info" %}
**Note:** When importing the Seedpicker Xpub, we suggest you choose the “Keystone Multisig” option but select the file of Seedpicker Xpub (recovery phrase C), this way the third keystore will show as “Keystone 2”.
{% endhint %}

<figure><img src="/files/-McOcmxHmCTsEh5Grfjd" alt="Keystone-Sparrow-MultiSig-15"><figcaption></figcaption></figure>

<figure><img src="/files/-McOdBe0vnEFWbHeIDx1" alt="Keystone-Sparrow-MultiSig-16"><figcaption></figcaption></figure>

### -  Import the multisig wallet file to Keystone

1\. Export the multisig wallet file (for Keystone) to the microSD card.

<figure><img src="/files/-McOdIxaL4ymvFVw19WS" alt="Keystone-Sparrow-MultiSig-17"><figcaption></figcaption></figure>

<figure><img src="/files/-McOdMU7vNXI5rAB_mZK" alt="Keystone-Sparrow-MultiSig-18"><figcaption></figcaption></figure>

2\. Insert the microSD card into your Keystone.

3\. Touch \[Menu] > \[Multisig Wallets] > \[Import Multisig Wallet].

<figure><img src="/files/-McOdQXIU-1mhflhOS6o" alt="Keystone-Sparrow-MultiSig-19"><figcaption></figcaption></figure>

4\. Select the file “Sparrow Multisig-Keystone.txt”. Check the wallet info and click \[Understood] > \[Confirm].

<figure><img src="/files/-McOdTN4jFb7BLoqkY3H" alt="Keystone-Sparrow-MultiSig-20"><figcaption></figcaption></figure>

### -  Import multisig wallet file to your Coldcard

1\. On Sparrow Wallet: Export the multisig wallet file (for Coldcard) to the microSD card.

<figure><img src="/files/-McOdZITrr9sIK5SH2I-" alt="Keystone-Sparrow-MultiSig-21"><figcaption></figcaption></figure>

<figure><img src="/files/-McOdcmA6ZUyLJ9ObXu5" alt="Keystone-Sparrow-MultiSig-22"><figcaption></figcaption></figure>

2\. Take out the microSD card from PC/Mac and insert it into Coldcard.

3\. On Coldcard: \[Menu] > \[Setting] > \[Multisig Wallets] > \[Import from SD] > Confirm file “Sparrow Multisig-coldcard.txt” > Press “√“  >  Import multisig wallet successfully.

<figure><img src="/files/-McOdgbSeKMBcNse-Ukg" alt="Keystone-Sparrow-MultiSig-23"><figcaption></figcaption></figure>

## **III. Receiving bitcoin to the 2/3 multisig address**

1\. On Sparrow Wallet: Click \[Receive], Sparrow will display the receiving address. (You can also go into the  Addresses menu and use any address displayed, but we mainly recommend using the ones via Receive.)

<figure><img src="/files/-McSbseBgcdIeFuJZtlB" alt="Keystone-Sparrow-MultiSig-24"><figcaption></figcaption></figure>

2\. On Keystone: Touch \[Addresses] to display the receiving addresses.

<figure><img src="/files/-McOdnJY7QkGJgopLaAC" alt="Keystone-Sparrow-MultiSig-25"><figcaption></figcaption></figure>

## **IV. Sending bitcoin from the 2/3 multisig wallet (**&#x4B;eystone **& Coldcard)**

Generate the multisig transaction on a watch-only wallet (Sparrow Wallet) by scanning unsigned multisig transaction data or exporting unsigned multisig transaction files to a MicroSD card.

### 1. Create a multisig transaction on Sparrow Wallet

1\) Click on \[Send] > Set the receive address, Label, amount, and fee > Click on \[Create Transaction].

<figure><img src="/files/-McOdslLT8FGwebkP2l-" alt="Keystone-Sparrow-MultiSig-26"><figcaption></figcaption></figure>

2\) Click on \[Finalize Transaction for Signing].

<figure><img src="/files/-McOdwRYZuqGgdqGt19S" alt="Keystone-Sparrow-MultiSig-27"><figcaption></figcaption></figure>

### 2. Partially sign with Keystone

**Tips:** Here users can choose to sign the transaction via QR code or file.

#### -  Option 1: Via QR code

① On Sparrow Wallet: Click \[Show QR] > Sparrow Wallet displays the unsigned transaction data in a QR code format.

<figure><img src="/files/-McOe-AY8HI4pxoPPorj" alt="Keystone-Sparrow-MultiSig-28"><figcaption></figcaption></figure>

② Touch the scanning icon in the top right corner of the Keystone main page and scan the QR code displayed by Sparrow.

<figure><img src="/files/-McOe2hXV3gJGK_YD7qk" alt="Keystone-Sparrow-MultiSig-29"><figcaption></figcaption></figure>

③ Touch \[Sign] > Enter the password > Tap \[Confirm] and authorize the transaction. The device will then show the signed transaction data in QR code format.

<figure><img src="/files/-McOe5r-kLgazFtYp5bG" alt="Keystone-Sparrow-MultiSig-30"><figcaption></figcaption></figure>

④ Click \[Scan QR] on Sparrow Wallet, then scan the QR code shown on Keystone.

<figure><img src="/files/-McOeATF5gjPfsKnofge" alt="Keystone-Sparrow-MultiSig-31"><figcaption></figcaption></figure>

<figure><img src="/files/-McOeD3tOOliBpXFqtQh" alt="Keystone-Sparrow-MultiSig-32"><figcaption></figcaption></figure>

<figure><img src="/files/-McTOWK4ZAJJX8kIUj8L" alt="Keystone-Sparrow-MultiSig-33"><figcaption></figcaption></figure>

{% hint style="info" %}
**OPTIONAL:** If your computer device has no camera, you can use the Keystone to scan the QR code displayed on screen and then generate the signed transaction file onto a microSD card. The message to export to the microSD card should display underneath the QR code displayed on the device with underlined text. The specific steps are as follows.
{% endhint %}

#### - Option 2: Via file

① Insert the microSD card into PC/Mac.

② Click \[Save PSBT] on Sparrow Wallet and save the file in the root directory of the microSD card.

<figure><img src="/files/-McOf7ou8XQ_MpG56e1U" alt="Keystone-Sparrow-MultiSig-34"><figcaption></figcaption></figure>

<figure><img src="/files/-McOfBGbZDFRi5v9xW5B" alt="Keystone-Sparrow-MultiSig-35"><figcaption></figcaption></figure>

③ Take out the microSD card from PC/Mac and insert it into the Keystone.&#x20;

④ Touch the "microSD card" icon on Keystone, then find and open the unsigned transaction file.

<figure><img src="/files/-McOfFIlIJv-ZdnooLU1" alt="Keystone-Sparrow-MultiSig-36"><figcaption></figcaption></figure>

⑤ Touch \[Sign] and enter the password to authorize the transaction.

<figure><img src="/files/-McOfI-eGHu1iZoYEMqw" alt="Keystone-Sparrow-MultiSig-37"><figcaption></figcaption></figure>

⑥ Touch \[touch here to export the file with microSD] > \[Export]. The signed transaction file will be saved to the root directory of the microSD card.

<figure><img src="/files/-McOfS-8ut01p73lXhTS" alt="Keystone-Sparrow-MultiSig-38"><figcaption></figcaption></figure>

⑦ Take out the microSD card from the Keystone and insert it into your PC/Mac.

⑧ Click \[Load PSBT] on Sparrow Wallet, then select and open the signed transaction file.

<figure><img src="/files/-McOfXQ1uu2NhTq8T6TQ" alt="Keystone-Sparrow-MultiSig-39"><figcaption></figcaption></figure>

<figure><img src="/files/-McOfcgWvpwYF8yIvMUt" alt="Keystone-Sparrow-MultiSig-40"><figcaption></figcaption></figure>

<figure><img src="/files/-McTOrVw76dmf29PrDtn" alt="Keystone-Sparrow-MultiSig-41"><figcaption></figcaption></figure>

### 3. Partially sign with Coldcard

1\) Insert the microSD card into the PC/Mac.

2\) Click \[Save PSBT] on Sparrow Wallet and save the file in the root directory of the microSD card.

<figure><img src="/files/-McTOwyyk-TlMojnv-jh" alt="Keystone-Sparrow-MultiSig-42"><figcaption></figcaption></figure>

<figure><img src="/files/-McOfrqBt2T_neMQHPAz" alt="Keystone-Sparrow-MultiSig-43"><figcaption></figcaption></figure>

3\) Take out the microSD card from the PC/Mac and insert it into the ColdCard.

4\) \[Ready To Sign] > Select transaction file.

<figure><img src="/files/-McOfw62bvwDOsf09rG6" alt="Keystone-Sparrow-MultiSig-44"><figcaption></figcaption></figure>

5\) Confirm and export partially signed multisig transaction files to the microSD card.

<figure><img src="/files/-McOg3A89uB5YVPHL3vr" alt="Keystone-Sparrow-MultiSig-45"><figcaption></figcaption></figure>

6\) Take out the microSD card from the ColdCard and insert it into your PC/Mac.

7\) Click \[Load PSBT] on Sparrow Wallet, then select and open the signed transaction file.

<figure><img src="/files/-McTTQAClL6dioAKFeaR" alt="Keystone-Sparrow-MultiSig-46"><figcaption></figcaption></figure>

<figure><img src="/files/-McTTU1m_4GiuApvAS_f" alt="Keystone-Sparrow-MultiSig-47"><figcaption></figcaption></figure>

### 4. Broadcast with Sparrow Wallet

&#x20;   Make sure the Sparrow Wallet has connected to the node successfully.

&#x20;   Click \[Broadcast Transaction].

<figure><img src="/files/-McTUOZ-LEOXZ-j-hnm3" alt="Keystone-Sparrow-MultiSig-48"><figcaption></figcaption></figure>


# Electrum

You can set Electrum V4.1.2 or newer as a watch-only wallet that functions as the companion app for Keystone Essential or Pro.&#x20;

{% hint style="info" %}
**Tips**: Electrum has released version V4.0 which implemented [PSBT (BIP 174)](https://github.com/bitcoin/bips/blob/master/bip-0174.mediawiki) as a default protocol so if your Electrum is running version V4.0 or newer, please make sure your Keystone has been run with version V1.1.1 (BTC-Only) or newer.
{% endhint %}

## **I. Preparation**

1\. [Firmware](https://keyst.one/firmware?locale=en) version V1.1.1 (BTC-Only) or newer running on Keystone Essential or Pro.

&#x20;  (Please read[ How to upgrade firmware](https://support.keyst.one/getting-started/firmware-upgrading) for more details.)

2\. Electrum wallet V4.1.2 or newer version installed on a personal computer or smartphone.&#x20;

3\. MicroSD card (FAT32 format, capacity **NOT** exceeding 512 GB).

{% content-ref url="/pages/-MclpVfjNf9WvY0094y4" %}
[How to Format a MicroSD Card to FAT32?](/getting-started/firmware-upgrading/how-to-format-a-microsd-card-to-fat32)
{% endcontent-ref %}

## II. Creating an Electrum Watch-Only Wallet (BTC-Only)

1\. Open Electrum on your personal computer or smartphone.

2\. Create a new wallet and select \[Next].

<figure><img src="/files/-MaahyTav5y0TueY6hWO" alt="Keystone-Electrum-1"><figcaption></figcaption></figure>

3\. Select \[Standard wallet], then \[Next].

<figure><img src="/files/-Maai9o_ttDvOSiWNg_n" alt="Keystone-Electrum-2"><figcaption></figcaption></figure>

4\. Select \[Use a master key], then \[Next].

<figure><img src="/files/-MaaiElnHcHMS0u5IXQ6" alt="Keystone-Electrum-3"><figcaption></figcaption></figure>

5\. Select the camera icon in Electrum to scan Keystone's master public key or upload it to Electrum using a microSD card.

**- Option 1: QR Code Scanning**

<figure><img src="/files/-Maaihk7Ptlfhhw6ShLz" alt="Keystone-Electrum-4"><figcaption></figcaption></figure>

① Select Electrum as the watch-only wallet on your Keystone hardware wallet that you've already setup, then touch the \[•••] button on the top right of the screen.

<figure><img src="/files/EuovwxoPlLqJbaujHfx2" alt="Keystone-Electrum-4"><figcaption></figcaption></figure>

② Select \[Export Wallet] and get the public key in both QR code and text format.

<figure><img src="/files/-Mabfdl_QxJzhcbxRsWF" alt="Keystone-Electrum-5"><figcaption></figcaption></figure>

③ On Electrum: Touch the camera icon on the \[Create keystore from a master key] page and align the provided QR code with your camera connected to your device that is running Electrum to scan the QR code.

<figure><img src="/files/-Maajvu8k-ckSS-LGisc" alt="Keystone-Electrum-6"><figcaption></figcaption></figure>

<figure><img src="/files/-MdV4ItFbQ4upYR2nKyR" alt="Keystone-Electrum-7"><figcaption></figcaption></figure>

④ After the master public key has been successfully imported, select \[Next].

<figure><img src="/files/-Maajr0biMMh3B4YWWa6" alt="Keystone-Electrum-8"><figcaption></figcaption></figure>

**- Option 2: MicroSD Data Transmission**

① Insert your microSD card into Keystone.

<figure><img src="/files/CBTG6YPwT2QBCDG0sV5k" alt="Keystone-Electrum-9"><figcaption></figcaption></figure>

② Setup the Keystone and select Electrum as the watch-only wallet. Touch the \[•••] button on the top right of the screen.

<figure><img src="/files/BAPBv6Al0XY6OzkGCAHh" alt="Keystone-Electrum-10"><figcaption></figcaption></figure>

③ Select \[Export Wallet] and get the public key in both QR code and text format.

<figure><img src="/files/-Mabfdl_QxJzhcbxRsWF" alt="Keystone-Electrum-11"><figcaption></figcaption></figure>

④ Select \[touch here to export the file with micoSD], then press \[Export] to export the master public key as a .txt file to your microSD card.

<figure><img src="/files/-MamKmMwyYNt6lKg-q1H" alt="Keystone-Electrum-12"><figcaption></figcaption></figure>

⑤ Take the microSD card out of Keystone and insert it into your personal computer or smartphone running Electrum.

⑥ On Electrum: Select the folder icon on \[Create keystore from a master key] page, then find the master public key .txt file and open it.

<figure><img src="/files/-Maak9hiruv_uat2doPk" alt="Keystone-Electrum-13"><figcaption></figcaption></figure>

<figure><img src="/files/-MW3amoinLhPXdKKFGT4" alt="Keystone-Electrum-14"><figcaption></figcaption></figure>

⑦ After your master public key has been successfully imported, select \[Next].

<figure><img src="/files/-Maajr0biMMh3B4YWWa6" alt="Keystone-Electrum-15"><figcaption></figcaption></figure>

6\. Set a strong wallet password.

<figure><img src="/files/-MaanNKIK7A8GjfLGhuW" alt="Keystone-Electrum-16"><figcaption></figcaption></figure>

7\. Enter the watch-only wallet.

<figure><img src="/files/-MaaqmuOJHk9LN-6BPbz" alt="Keystone-Electrum-17"><figcaption></figcaption></figure>

## III. Sending and Receiving Assets with Electrum Wallet

### **A. Receiving Assets**

1\. On Keystone: Touch \[Addresses] to display the receiving addresses.

<figure><img src="/files/-MabeVLvoEmjrVe_EmcV" alt="Keystone-Electrum-18"><figcaption></figcaption></figure>

2\. On Electrum: Select \[Receive] > \[New Address] to display receiving addresses (you can set receiving amounts).

<figure><img src="/files/-MduqLl-FVQYozD0mNYX" alt="Keystone-Electrum-19"><figcaption></figcaption></figure>

### **B. Sending Assets**

#### 1. Create a Transaction on Electrum

1\) Select \[Send], choose a receiving address, set the transaction fee, and add a memo if required.

<figure><img src="/files/-MabLeVFR2Vja__JPFgT" alt="Keystone-Electrum-20"><figcaption></figcaption></figure>

2\) Select \[Preview] to view the unsigned transaction data.

<figure><img src="/files/-MabLj7vt-5Ig1I2g1xI" alt="Keystone-Electrum-21"><figcaption></figcaption></figure>

<figure><img src="/files/-MabLnGjANICe3ZYkfX9" alt="Keystone-Electrum-22"><figcaption></figcaption></figure>

#### 2. Sign with Keystone Hardware Wallet

**Tips:** Here users can choose to sign the transaction via QR code or file.

**- Option 1: By scanning unsigned transaction data**

① Select \[Export > \[For hardware devices; include xpubs] > \[Show as QR code] > Display the unsigned transaction data as a QR code.

<figure><img src="/files/-MabLy65y1Cn5l1OkVpP" alt="Keystone-Electrum-23"><figcaption></figcaption></figure>

② Touch the scanning icon in the top right corner of the Keystone main page and scan the QR code displayed by Electrum.

<figure><img src="/files/-MabgAjNcitfSZtx8uOd" alt="Keystone-Electrum-24"><figcaption></figcaption></figure>

③ Sign the transaction on Keystone to obtain the signed transaction data.

<figure><img src="/files/-MabXwQtIIyfXMPHWQaq" alt="Keystone-Electrum-25"><figcaption></figcaption></figure>

**- Option 2: Use a microSD card to transmit unsigned transaction data**

① Insert the microSD card into your computer or smartphone.

② On Electrum: Select \[Export] > \[For hardware devices; include xpubs] > Click \[Export to file] and export the unsigned transaction data as a .psbt file to your microSD card’s root directory.

<figure><img src="/files/-MabOGg4AJRiXqdkvDAt" alt="Keystone-Electrum-26"><figcaption></figcaption></figure>

<figure><img src="/files/-MabU7sNaFJxQSg7YZTM" alt="Keystone-Electrum-27"><figcaption></figcaption></figure>

<figure><img src="/files/-MabQU7WaaRMVBLkJXDs" alt="Keystone-Electrum-28"><figcaption></figcaption></figure>

③ Take out the microSD card from your computer or smartphone and insert it into your Keystone.

④ Touch the "microSD card" icon, then find and open the unsigned transaction .psbt file.

<figure><img src="/files/-MabgU-OmGyjYlcn4lAD" alt="Keystone-Electrum-29"><figcaption></figcaption></figure>

⑤ Sign the transaction on Keystone to obtain the signed transaction data.

<figure><img src="/files/-MabXwQtIIyfXMPHWQaq" alt="Keystone-Electrum-30"><figcaption></figcaption></figure>

#### 3. Broadcast with Electrum Wallet

**Tips:** Here users can choose to upload signed transaction data via QR code or file.

**- Option 1: Uploading Signed Transaction Data with QR Code**

① In the Electrum menu bar, select \[Tools]>\[Load transaction]>\[From QR code]. Align the QR code displayed on Keystone with the camera.

<figure><img src="/files/-MabSHkvG-WfTsJ3lZ-Y" alt="Keystone-Electrum-31"><figcaption></figcaption></figure>

<figure><img src="/files/-Mdz1TMkC7mZtV1IxC4w" alt="Keystone-Electrum-32"><figcaption></figcaption></figure>

② After the QR code is recognized, select \[Broadcast] to broadcast the transaction to the blockchain network.

<figure><img src="/files/-Mab_DeEH_I5zBLgFta3" alt="Keystone-Electrum-33"><figcaption></figcaption></figure>

**- Option 2: Upload Signed Transaction Data with a MicroSD card**

① Once you signed the transaction on Keystone, select \[Export] (if the signed transaction displays as a QR code, touch \[export via micoSD] > \[Export]) to export the signed transaction data as a .txt file to your microSD card.

<figure><img src="/files/-Mabc3ShLeA9AKUM1sJ0" alt="Keystone-Electrum-34"><figcaption></figcaption></figure>

② Take the MicroSD card out of your Keystone and insert it into your personal computer or smartphone that is running Electrum.

③ In the Electrum menu bar, select \[Tools] > \[Load transaction] > \[From file], then find the signed transaction file in the microSD card root directory and open it.

<figure><img src="/files/-MabdkY2oFcsHweIhy-4" alt="Keystone-Electrum-35"><figcaption></figcaption></figure>

<figure><img src="/files/-MabdnTLDVpE2CXXOOI8" alt="Keystone-Electrum-36"><figcaption></figcaption></figure>

④ Once the signed transaction data is uploaded to Electrum, select \[Broadcast] to broadcast the transaction to the blockchain network.

<figure><img src="/files/-MabdqfUU6Zq5koCErWZ" alt="Keystone-Electrum-37"><figcaption></figcaption></figure>

{% hint style="info" %}
**Notes:**

1\. Electrum cannot recognize dynamic QR codes, static QR codes that only have the capacity for around 8 inputs, 2 outputs, and corresponding signing data (capacity may be affected by differences in screen resolution and camera on the device used for Electrum). When transaction data is too large to be transmitted via static QR code or Keystone is unable to recognize/display a QR code, please use your own microSD card to transmit transaction data.

2\. Keystone automatically checks and marks the changed address for you as a security measure against phishing attacks on Electrum, which may attempt to insert different addresses that do not belong to you. However, these functions only work for the first 100 changed addresses that Keystone creates by default, and will not continue working for changed addresses that you create after initializing the device. Later, we will add support to manually add an unlimited number of changed addresses to the list that Keystone will check for in Electrum transactions.
{% endhint %}

&#x20;Instructions recommended:

{% content-ref url="/pages/-MW9DogEawYCC7SDn5Ng" %}
[Electrum 2/3 PSBT Multi-sig](/3rd-party-wallets/bitcoin-wallets/electrum/electrum-2-3-psbt-multi-signature)
{% endcontent-ref %}

{% content-ref url="/pages/-MW9CO2vcUxAXuQ5x\_f2" %}
[Electrum 2/2 PSBT Multi-sig](/3rd-party-wallets/bitcoin-wallets/electrum/electrum-2-2-psbt-multi-signature)
{% endcontent-ref %}


# Electrum 2/2 PSBT Multi-sig

Keystone firmware version V1.1.1 (BTC-Only) or newer supports PSBT Muti-signature function. This instruction will show how to create a 2/2 PSBT Multi-signature with Keystone, Coldcard and Electrum V4.1.2 in details.

2/2 PSBT Multi-sig is not a good quorum. This tutorial is just for the purpose of showing how to use Keystone and Coldcard to set up your multi-sig wallet with Electrum. Learn more about picking a good quorum: <https://btcguide.github.io/quorum>

## **I. Preparation**

1\. [Firmware](https://keyst.one/firmware?locale=en) version V1.1.1 (BTC-Only) or newer running on Keystone Essential or Pro.

&#x20;  (Please read[ How to upgrade firmware](https://support.keyst.one/getting-started/firmware-upgrading) for more details.)

2\. Coldcard upgraded to firmware version V2.1.0 or newer.

3\. MicroSD card (≤512GB; Default FAT32 format).

{% content-ref url="/pages/-MclpVfjNf9WvY0094y4" %}
[How to Format a MicroSD Card to FAT32?](/getting-started/firmware-upgrading/how-to-format-a-microsd-card-to-fat32)
{% endcontent-ref %}

4\. Electrum Wallet (V4.1.2 or newer) running on PC/Mac.

{% hint style="info" %}
**Tips**: If you want to switch to \[Test Net], please go to "Keystone > Settings > Blockchain > Test Net" and "Coldcard > Settings > Blockchain > Test Net". Then continue with the following steps.
{% endhint %}

## **II. Create a 2/2 multisig wallet with** Keystone **and Coldcard**

### - Create multisig wallet on Coldcard

1\. Export Keystone's Xpub to a MicroSD card

1\) Insert the MicroSD card into Keystone

2\) Touch \[Menu] > \[Multisig Wallet] > Press the \[•••] button on the top right > \[Show/Export XPUB].

<figure><img src="/files/-MamP3LRZ1hxL6eoPAXx" alt="Keystone-Electrum-MultiSig-1"><figcaption></figcaption></figure>

3\) Touch \[Export All] > \[Export].

<figure><img src="/files/-MabhsG_-LWBH5AEbpGr" alt="Keystone-Electrum-MultiSig-2"><figcaption></figcaption></figure>

2\. Create multisig wallet on Coldcard

1\) Take the MicroSD card from your Keystone and insert it into Coldcard.

2\) \[Settings] > \[Multisig Wallets] > \[Create Airgapped]

<figure><img src="/files/-MabhwutZ_Zs3liQulCG" alt="Keystone-Electrum-MultiSig-3"><figcaption></figcaption></figure>

3\) Set address type (Default-P2WSH) and the number of cosigners (2 of 2).

<figure><img src="/files/-MabhzwDs_0AIP6AAuhf" alt="Keystone-Electrum-MultiSig-4"><figcaption></figcaption></figure>

4\) Confirm (√) and complete creating a 2/2 multisig wallet.

<figure><img src="/files/-Mabi3NlK0qbRuPTYw9R" alt="Keystone-Electrum-MultiSig-5"><figcaption></figcaption></figure>

3\. After the previous steps, you will get 2 files on your microSD card:

1\) “export-CC-2-of-2.txt” - this is for importing multi-sig wallet to Keystone - allows Keystone to check the genuinity of multisig when signing.

2\) “el-CC-2-of-2.json” - this is for creating watch-only wallet on Electrum.

<figure><img src="/files/-Mabi7Nu7kyIdWFd9vMw" alt="Keystone-Electrum-MultiSig-6"><figcaption></figcaption></figure>

**If you didn’t get these two files, please export manually by following the instructions:**

1\) Export the multisig wallet file (for importing multisig wallet to Keystone) to the microSD card.

① Insert the microSD card into Coldcard.

② \[Settings] > \[Multisig Wallets] > \[2/2: CC-2-of-2] > \[Coldcard Export] > Export the “export-CC-2-of-2.txt” file to the microSD card.

<figure><img src="/files/-MabiPJoBpBncBIaN-SA" alt="Keystone-Electrum-MultiSig-7"><figcaption></figcaption></figure>

<figure><img src="/files/-MabiUJIrf9oMzh604xU" alt="Keystone-Electrum-MultiSig-8"><figcaption></figcaption></figure>

2\) Export the multisig wallet file (for creating a watch-only wallet on Electrum) to the microSD card.

① Insert the microSD card into Coldcard.

② \[Settings] > \[Multisig Wallets] > \[2/2: CC-2-of-2] > \[Electrum Export] > Export the “el-CC-2-of-2.json” file to the microSD card.

<figure><img src="/files/-MabiZsrzNDOM6sD_PAa" alt="Keystone-Electrum-MultiSig-9"><figcaption></figcaption></figure>

<figure><img src="/files/-MabicATK2dRiBexJqHm" alt="Keystone-Electrum-MultiSig-10"><figcaption></figcaption></figure>

### - Import multisig wallet file to Keystone

1\. Take out the microSD card from Coldcard and insert it into Keystone.

2\. Tap \[Menu] > \[Multisig Wallets] > \[Import Multisig Wallet].

<figure><img src="/files/-McSOkewEgBJQbJ8btv8" alt="Keystone-Electrum-MultiSig-11"><figcaption></figcaption></figure>

3\. Select file “export-CC-2-of-2.txt” > Click on \[Confirm].

<figure><img src="/files/-McSQ2fk2GUAY2pGcucy" alt="Keystone-Electrum-MultiSig-12"><figcaption></figcaption></figure>

### - Import multisig wallet file to Electrum and create watch-only wallet

1\. Take out the microSD card from Keystone and insert it into PC/Mac.

2\. Run Electrum, then click on \[choose...] > Select file “el-CC-2-of-2.json” > \[Open] > \[Next]> \[No].

<figure><img src="/files/-MabmZIr8vxv7r8jXjzm" alt="Keystone-Electrum-MultiSig-13"><figcaption></figcaption></figure>

<figure><img src="/files/-Mabmc6Byey_zqF61poH" alt="Keystone-Electrum-MultiSig-14"><figcaption></figcaption></figure>

<figure><img src="/files/-MabmiEqYsWca458OhVa" alt="Keystone-Electrum-MultiSig-15"><figcaption></figcaption></figure>

<figure><img src="/files/-McSRux0vVCza8APDpRT" alt="Keystone-Electrum-MultiSig-16"><figcaption></figcaption></figure>

<figure><img src="/files/-McSSbWAJCBJ-a7gIObC" alt="Keystone-Electrum-MultiSig-17"><figcaption></figcaption></figure>

{% hint style="info" %}
**Note:** As Electrum doesn’t have a Keystone plugin (we are working on that), Keystone can’t generate an Electrum skeleton json file. So you have to export the Electrum skeleton json file from Coldcard to set up the watch-only wallet on Electrum.
{% endhint %}

## **IV. Sending bitcoin from the 2/2 multisig address (Keystone & Coldcard)**

### - Generate multisig transaction on watch-only wallet(Electrum) and export unsigned multisig transaction file to MicroSD card.

1\. Click on \[Send] > Enter destination address and amount > \[Pay] > \[Send].

<figure><img src="/files/-McSTBAMhO4WVXc99Jif" alt="Keystone-Electrum-MultiSig-18"><figcaption></figcaption></figure>

<figure><img src="/files/-McSTE0-oXcAgZOU-N3a" alt="Keystone-Electrum-MultiSig-19"><figcaption></figcaption></figure>

2\. Click on \[Export] > \[For hardware device; include xpubs] > \[Export for file] > \[Save].

<figure><img src="/files/-MabnVOnUASRZg3-wHAY" alt="Keystone-Electrum-MultiSig-20"><figcaption></figcaption></figure>

<figure><img src="/files/-MabnYQbGoTeuFLLjyiz" alt="Keystone-Electrum-MultiSig-21"><figcaption></figcaption></figure>

<figure><img src="/files/-Mabnbfv6NocAyL7bLcw" alt="Keystone-Electrum-MultiSig-22"><figcaption></figcaption></figure>

### - Partially sign multisig transactions on Coldcard

1\. Take out the microSD card from PC/Mac and insert it into Coldcard.

2\. \[Ready To Sign] > Select transaction file.

<figure><img src="/files/-MabnfTBSwvecqbYOOXT" alt="Keystone-Electrum-MultiSig-23"><figcaption></figcaption></figure>

3\. Confirm and export partially signed multisig transaction file to microSD card.

<figure><img src="/files/-MabnmX__vo8gh4mJj9o" alt="Keystone-Electrum-MultiSig-24"><figcaption></figcaption></figure>

### - Complete sign multisig transaction on **Keystone**

1\. Take out the microSD card from Coldcard and insert it into Keystone.

2\. Enter Multisig Wallet > Press "MicroSD card" icon on the top right > Select the partially signed transaction file > Confirm transaction details and press \[Sign].

<figure><img src="/files/-Mabo29lZnn0VqhvmLUm" alt="Keystone-Electrum-MultiSig-25"><figcaption></figcaption></figure>

3\. Password Verification > Press \[Export] to export a fully signed multisig transaction file to the microSD card.

<figure><img src="/files/-Mabo68EjLLTsb-diMUj" alt="Keystone-Electrum-MultiSig-26"><figcaption></figcaption></figure>

### - Broadcast multisig transactions with Electrum

1\. Click on \[Tools] > \[Load transaction] > \[From file] > Select fully signed multisig transaction file > \[Open] > \[Broadcast].

<figure><img src="/files/-MaboAl-KUiuKhyqH_DD" alt="Keystone-Electrum-MultiSig-27"><figcaption></figcaption></figure>

<figure><img src="/files/-MaboDomRBzZ7NXjttv_" alt="Keystone-Electrum-MultiSig-28"><figcaption></figcaption></figure>

<figure><img src="/files/-MaboHAUvp1wWLyDU5ze" alt="Keystone-Electrum-MultiSig-29"><figcaption></figcaption></figure>

&#x20;Instructions recommended: [Delete Multisig Wallet on Keystone](https://support.keyst.one/advanced-features/more/delete-multisig-wallet) 、[Electrum 2/3 PSBT Multi-sig](https://support.keyst.one/3rd-party-wallets/bitcoin-wallets/electrum/electrum-2-3-psbt-multi-signature)

{% content-ref url="/pages/-MW9DogEawYCC7SDn5Ng" %}
[Electrum 2/3 PSBT Multi-sig](/3rd-party-wallets/bitcoin-wallets/electrum/electrum-2-3-psbt-multi-signature)
{% endcontent-ref %}

{% content-ref url="/pages/-MVzkNA9fM7149fj\_rNu" %}
[Delete Multisig Wallet](/advanced-features/multi-signature/delete-multisig-wallet)
{% endcontent-ref %}


# Electrum 2/3 PSBT Multi-sig

Keystone firmware version V1.1.1 (BTC-Only) or newer supports PSBT Muti-signature function. This instruction will show how to create a 2/3 PSBT Multi-signature with 2\*Keystone, 1\*Coldcard and Electrum V4.1.2 in details.

## **I. Preparation**

1\. [Firmware](https://keyst.one/firmware?locale=en) version V1.1.1 (BTC-Only) or newer running on Keystone Essential or Pro.

&#x20;  (Please read[ How to upgrade firmware](https://support.keyst.one/getting-started/firmware-upgrading) for more details.)

2\. Coldcard upgraded to firmware version V2.1.0 or newer.

3\. MicroSD card (≤512GB; Default FAT32 format).

{% content-ref url="/pages/-MclpVfjNf9WvY0094y4" %}
[How to Format a MicroSD Card to FAT32?](/getting-started/firmware-upgrading/how-to-format-a-microsd-card-to-fat32)
{% endcontent-ref %}

4\. Electrum Wallet (V4.1.2 or newer) running on PC/Mac.

{% hint style="info" %}
**Tips**: If you want to switch to \[Test Net], please go to "Keystone > Settings > Blockchain > Test Net" and "Coldcard > Settings > Blockchain > Test Net". Then continue with the following steps.
{% endhint %}

## **II. Create a 2/3 multisig wallet with 2\*Keystone and 1\*Coldcard**

### - Create multisig wallet on Coldcard

1\. Export Keystone’s Xpub to microSD card

1\) Insert the microSD card into Keystone.

2\) Touch \[Menu] > \[Multisig Wallet] > Press the \[•••] button on the top right > \[Show/Export XPUB].

<figure><img src="/files/-MamP3LRZ1hxL6eoPAXx" alt="Keystone-Electrum-ColdCard-1"><figcaption></figcaption></figure>

3\) Touch \[Export All] > \[Export].

<figure><img src="/files/-MabtG3SG0ZcK-yyifU1" alt="Keystone-Electrum-ColdCard-2"><figcaption></figcaption></figure>

{% hint style="info" %}
**Tips:**

① Please repeat this step on 2\*Keystone.

② If you were using 1\*Keystone and 2\*Coldcard to create a 2/3 PSBT Muti-signature wallet, please export Xpubs from 1 Keystone and 2 Coldcard (\[Settings] > \[Multisig Wallets] > \[Export XPUB]).
{% endhint %}

2\. Create multisig wallet on Coldcard

1\) Take out the microSD card from Keystone and insert it into Coldcard.

2\) \[Settings] > \[Multisig Wallets] > \[Create Airgapped].

<figure><img src="/files/-MabtJjwWdcDEc_0ETih" alt="Keystone-Electrum-ColdCard-3"><figcaption></figcaption></figure>

3\) Set address type (Default-P2WSH) and the number of cosigner (2 of 3).

<figure><img src="/files/-MabtMiL44l3_EW4WFj_" alt="Keystone-Electrum-ColdCard-4"><figcaption></figcaption></figure>

4\) Confirm (√) and complete creating a 2/3 multisig wallet.

<figure><img src="/files/-MabtPgVQzNclmfsgPWo" alt="Keystone-Electrum-ColdCard-5"><figcaption></figcaption></figure>

3\. After the previous steps, you will get 2 files on your microSD card

1\) “export-CC-2-of-3.txt” - this is for importing multi-sig wallet to Keystone - allows Keystone to check the genuinity of multisig when signing.

2\) “el-CC-2-of-3.json” - this is for creating watch-only wallet on Electrum.

<figure><img src="/files/-MabtTwH_Y-9mttSFJBn" alt="Keystone-Electrum-ColdCard-6"><figcaption></figcaption></figure>

**Tips:** If you didn’t get these two files, please export manually by following instructions:

1\) Export the multisig wallet file (for importing multisig wallet to Keystone) to the microSD card

&#x20;    ① Insert the microSD card into Coldcard.

&#x20;    ② \[Settings] > \[Multisig Wallets] > \[2/3: CC-2-of-3] > \[Coldcard Export] > Export the “export-CC-2-of-3.txt” file to the microSD card.

![](/files/-Mabteu-_EgkVV6NRtie)

![](/files/-Mabti1oOsVIPvFK6eZu)

2\) Export the multisig wallet file (for creating watch-only wallet on Electrum) to the microSD card

&#x20;    ① Insert the microSD card into Coldcard.

&#x20;    ② \[Settings] > \[Multisig Wallets] > \[2/3: CC-2-of-3 > \[Electrum Export] > Export the “el-CC-2-of-3.json” file to the microSD card.

<figure><img src="/files/-MabtlEfUcXz0YmkQsc3" alt="Keystone-Electrum-ColdCard-7"><figcaption></figcaption></figure>

<figure><img src="/files/-Mabto1S0k0SBZ6PfeQC" alt="Keystone-Electrum-ColdCard-8"><figcaption></figcaption></figure>

### - Import multisig wallet file to Keystone

1\. Take out the microSD card from Coldcard and insert it into Keystone.

2\. Touch \[Menu] > \[Multisig Wallets] > \[Import Multisig Wallet].

<figure><img src="/files/-McSOkewEgBJQbJ8btv8" alt="Keystone-Electrum-ColdCard-9"><figcaption></figcaption></figure>

3\. Select file “export-CC-2-of-3.txt” > Touch \[Confirm].

<figure><img src="/files/-McSPbdtrtLXIIpvbWB7" alt="Keystone-Electrum-ColdCard-10"><figcaption></figcaption></figure>

### - Import multisig wallet file to Electrum and create watch-only wallet

1\. Take out the microSD card from Keystone and insert the it into PC/Mac.

2\. Run Electrum and click on \[Choose...] > Select file “el-CC-2-of-3.json” > \[Open] > \[Next] > \[No].

<figure><img src="/files/-Mabu-UwSgvV9nM62mMh" alt="Keystone-Electrum-ColdCard-11"><figcaption></figcaption></figure>

<figure><img src="/files/-Mabu26yMzCZjEnB_26A" alt="Keystone-Electrum-ColdCard-12"><figcaption></figcaption></figure>

<figure><img src="/files/-Mabu53mQAA-p0HonkAp" alt="Keystone-Electrum-ColdCard-13"><figcaption></figcaption></figure>

<figure><img src="/files/-McSUENuf4X-Y-Aa5txb" alt="Keystone-Electrum-ColdCard-14"><figcaption></figcaption></figure>

<figure><img src="/files/-McSUIsLlDJief5ZI_j1" alt="Keystone-Electrum-ColdCard-15"><figcaption></figcaption></figure>

{% hint style="info" %}
**Note:** As Electrum doesn’t have a Keystone plugin (we are working on that), Keystone can’t generate a Electrum skeleton json file. So you have to export the Electrum skeleton json file from Coldcard to set up the watch-only wallet on Electrum.
{% endhint %}

## **III. Sending bitcoin from the 2/3 multisig address (2\***&#x4B;eystone **& 1\*Coldcard)**

### - Generate multisig transaction on watch-only wallet(Electrum) and export unsigned multisig transaction file to MicroSD card.

1\. Click \[Send] > Enter destination address and amount > \[Pay] > \[Send].

<figure><img src="/files/-McSUcKS4OZ4S43oDyZg" alt="Keystone-Electrum-ColdCard-16"><figcaption></figcaption></figure>

<figure><img src="/files/-McSUf1Pv_hsy4B4eJRz" alt="Keystone-Electrum-ColdCard-17"><figcaption></figcaption></figure>

2\. Click \[Export] > \[For hardware device; include Xpubs] > \[Export for file] > \[Save].

<figure><img src="/files/-Mabu_CMtbPVmNLLtCjv" alt="Keystone-Electrum-ColdCard-18"><figcaption></figcaption></figure>

<figure><img src="/files/-Mabubqne2I88nAgr8es" alt="Keystone-Electrum-ColdCard-19"><figcaption></figcaption></figure>

<figure><img src="/files/-MabugH5StMaYaI0eDhU" alt="Keystone-Electrum-ColdCard-20"><figcaption></figcaption></figure>

### - Partially sign multisig transaction on Coldcard

1\. Take out the microSD card from PC/Mac and insert it into Coldcard.

2\. \[Ready To Sign] > Confirm and export partially signed multisig transaction file to microSD card.

<figure><img src="/files/-MabukW_t1-C2O9I22L9" alt="Keystone-Electrum-ColdCard-21"><figcaption></figcaption></figure>

### - Complete sign multisig transation on Keystone&#x20;

1\. Take out the microSD card from Coldcard and insert it into Keystone.

2\. Enter Multisig Wallet > Press "microSD card" icon on the top right > Select the partially signed transaction file > Confirm transaction details and press \[Sign].

<figure><img src="/files/-MabunYMfHGCl1DVTEuc" alt="Keystone-Electrum-ColdCard-22"><figcaption></figcaption></figure>

3\. Password Verification > Press \[Export] to export a fully signed multisig transaction file to the microSD card.

<figure><img src="/files/-MkBZTy8jgsb3mhg9whl" alt="Keystone-Electrum-ColdCard-23"><figcaption></figcaption></figure>

### - Broadcast multisig transaction with Electrum

1\. Click \[Tools] > \[Load transaction] > \[From file] > Select fully signed multisig transaction file > \[Open] > \[Broadcast].

<figure><img src="/files/-MabuveYveubEoKTDYXo" alt="Keystone-Electrum-ColdCard-24"><figcaption></figcaption></figure>

<figure><img src="/files/-Mabuyxv_0IJUKzBJFpN" alt="Keystone-Electrum-ColdCard-25"><figcaption></figcaption></figure>

<figure><img src="/files/-Mabv0uHupi32Krr9t12" alt="Keystone-Electrum-ColdCard-26"><figcaption></figcaption></figure>

Instructions recommended: [Delete Multisig Wallet on Keystone](https://support.keyst.one/advanced-features/more/delete-multisig-wallet)<br>


# Wasabi Wallet

Keystone firmware versions V1.1.1 (BTC-Only) or newer allows you to use Wasabi Wallet V1.1.12.8 or newer as a watch-only wallet.&#x20;

## **I. Preparation**

1\. [Firmware](https://keyst.one/firmware?locale=en) version V1.1.1 (BTC-Only) or newer running on Keystone Essential or Pro.&#x20;

&#x20;  (Please read[ How to upgrade firmware](https://support.keyst.one/getting-started/firmware-upgrading) for more details.)

2\. Computer with [Wasabi Wallet](https://wasabiwallet.io/#download) V1.1.12.8 or newer downloaded.

3\. MicroSD card (FAT32 format with capacity **NOT** exceeding 512GB).

{% content-ref url="/pages/-MclpVfjNf9WvY0094y4" %}
[How to Format a MicroSD Card to FAT32?](/getting-started/firmware-upgrading/how-to-format-a-microsd-card-to-fat32)
{% endcontent-ref %}

## II. Creating a Wasabi Wallet Watch-Only Wallet (BTC-Only)

1\. Insert your microSD card into Keystone.

2\. In the Keystone hardware wallet, go to\[Menu] > \[Settings] > \[Watch-Only Wallet] > \[Wasabi Wallet] > \[Confirm].

<figure><img src="/files/-Mabze1Tm0VHLQJHuttn" alt="Keystone-Wasabi-1"><figcaption></figcaption></figure>

3\. Touch \[•••] > \[Export Wallet] > \[Export]. Your wallet's master public key file will be exported to the microSD card.

<figure><img src="/files/-Me-ESrcmedIriAhiy0A" alt="Keystone-Wasabi-2"><figcaption></figcaption></figure>

4\. Take the microSD card out of Keystone and insert it into your computer.

5\. Open Wasabi Wallet on your computer, select \[Hardware Wallet] > \[Import Coldcard].

<figure><img src="/files/-MagQ-a8IyHDX5Jcl5Cp" alt="Keystone-Wasabi-3"><figcaption></figcaption></figure>

6\. In the root directory of the microSD card, find the Xpub file and click \[Open].

<figure><img src="/files/-MagQ40X_IU1cERWge_F" alt="Keystone-Wasabi-4"><figcaption></figcaption></figure>

7\. Click \[Load Wallet].

<figure><img src="/files/-MagQI1O4bD-kJ2xX_dl" alt="Keystone-Wasabi-5"><figcaption></figcaption></figure>

8\. Wasabi can now be used as the watch-only wallet for Keystone.&#x20;

<figure><img src="/files/-MagQDlSjZjzyrz44aZ_" alt="Keystone-Wasabi-6"><figcaption></figcaption></figure>

<figure><img src="/files/-MagQMs9bYACrOQBpM-7" alt="Keystone-Wasabi-7"><figcaption></figcaption></figure>

## II. Sending and Receiving Assets with Wasabi Wallet

### **A. Receiving Bitcoin**&#x20;

You can use receiving addresses displayed by either the Keystone hardware wallet or Wasabi to receive bitcoin.&#x20;

1\. Displaying Address on Keystone

&#x20;1\) On the Keystone hardware wallet, go to \[Settings] > \[Watch-Only Wallet] > \[Wasabi Wallet].

&#x20;2\) Once you enter your Wasabi Wallet interface on Keystone, touch a receiving address to display it as a QR code.

<figure><img src="/files/-MalQf6JI2DcK9pIykR8" alt="Keystone-Wasabi-8"><figcaption></figcaption></figure>

2\. Displaying Addresses on Wasabi Wallet

1\) Click \[Receive] to display receiving addresses.

<figure><img src="/files/-MalQj_k4cmIgPtxlyIE" alt="Keystone-Wasabi-9"><figcaption></figcaption></figure>

### **B. Sending Bitcoin**

1\. Using Wasabi Wallet to Send Bitcoin

1\) Insert your microSD card into your computer while running Wasabi Wallet.

2\) Click on \[Build Transaction] on the right side navigation bar.

3\) Select the UTXOs you want to use, then configure the receiving address, transaction amount, and transaction fees.

4\) Click \[Build Transaction] in the bottom left of the interface, and check the signed transaction data.&#x20;

<figure><img src="/files/-MalVkqp31GByLdp_WN2" alt="Keystone-Wasabi-10"><figcaption></figcaption></figure>

<figure><img src="/files/-MalVoxW6Yj2pWKRX5BA" alt="Keystone-Wasabi-11"><figcaption></figcaption></figure>

<figure><img src="/files/-MalVt2zCAo8OLZ_1A9a" alt="Keystone-Wasabi-12"><figcaption></figcaption></figure>

5\) Click \[Export Transaction] in the lower right corner to export the PSBT file to your microSD card.

<figure><img src="/files/-MalW4wyFOjVTX4uQyrt" alt="Keystone-Wasabi-13"><figcaption></figcaption></figure>

<figure><img src="/files/-MalWB8QoPbhu2lN9pwc" alt="Keystone-Wasabi-14"><figcaption></figcaption></figure>

<figure><img src="/files/-MalWFZmeqlrefeZh_1T" alt="Keystone-Wasabi-15"><figcaption></figcaption></figure>

2\. Using Keystone Hardware Wallet to Sign Transactions

1\) Take out the microSD card from computer and insert it into Keystone.

2\) Touch "MicroSD card" icon, and open the transaction file.

<figure><img src="/files/-MalevNedETZr7gUwVWa" alt="Keystone-Wasabi-16"><figcaption></figcaption></figure>

3\) Touch \[Sign] and enter your password to sign the transaction.

<figure><img src="/files/-MalezrhF7ZzK56E_RW3" alt="Keystone-Wasabi-17"><figcaption></figcaption></figure>

4\) Touch \[Export] and the signed PSBT transaction file (awaiting broadcast) will be exported to your MicroSD card's root directory.

<figure><img src="/files/-Malf4cUM2M8WiemmGnm" alt="Keystone-Wasabi-18"><figcaption></figcaption></figure>

3\. Using Wasabi to Broadcast Transactions

1\) Take the microSD card out of Keystone and insert it into your computer.

2\) In Wasabi, click \[Open Transaction Broadcaster] > \[Import Transaction]. Find out the signed transaction file under the microSD card and open it. Click \[Broadcast Transaction] to broadcast the transaction.

<figure><img src="/files/-MalgqYz6tiaTybC3upw" alt="Keystone-Wasabi-19"><figcaption></figcaption></figure>

<figure><img src="/files/-MalgtqRgnLOJvNRnPzI" alt="Keystone-Wasabi-20"><figcaption></figcaption></figure>

<figure><img src="/files/-Malhlq5WQROUTH-PrMG" alt="Keystone-Wasabi-21"><figcaption></figcaption></figure>

<figure><img src="/files/-MalhTwWrxtRbH7P74qC" alt="Keystone-Wasabi-22"><figcaption></figcaption></figure>


# BTCPay Server

{% hint style="info" %}
**Announcement：**

**Keystone is already compatible with BTCPay Server but it still hasn’t completed the development of its version to become compatible with our Keystone wallet. When BTCPay Serve releases a compatible version, we will be sure to issue an announcement and update our tutorials accordingly.**
{% endhint %}

With firmware versions V1.1.1 (BTC-Only) or newer running on Keystone Essential or Pro , you can set BTCPayServer as a watch-only wallet that functions as the companion app for Keystone Essential or Pro.

## I. **Preparation：**

1\. [Firmware](https://keyst.one/firmware?locale=en) version V1.1.1 (BTC-Only) or newer running on Keystone Essential or Pro.&#x20;

&#x20;   (Please read[ How to upgrade firmware](https://support.keyst.one/getting-started/firmware-upgrading) for more details.)

2\. Computer/RasberryPi/Server Environment with BTCPayServer installed/enabled.

3\. MicroSD card (FAT32 format with capacity **NOT** exceeding 512GB).

{% content-ref url="/pages/-MclpVfjNf9WvY0094y4" %}
[How to Format a MicroSD Card to FAT32?](/getting-started/firmware-upgrading/how-to-format-a-microsd-card-to-fat32)
{% endcontent-ref %}

## II. Creating a BTCPayServer Watch-Only Wallet (BTC-Only)

1\. In the Keystone hardware wallet, go to \[Settings], touch \[Watch-Only Wallet], select BTCPay Server], then touch \[Next].

2\. Touch \[Display QR Code].

3\. Run BTCPayServer on your computer, click \[STORES > Create a new store]. Set the name of the new store and click \[Create].

4\. Click \[Setup] under "Wallet - BTC". Click \[Import from...] and select \[a QR Code].&#x20;

5\. Scan the QR code shown on the Keystone device and click \[Submit > Confirm].

6\. Select \[WALLETS] tab and check the paired watch-only wallet.

**Tips:** If your device has issues with the camera, you can use a microSD card to create a BTCPay Server watch-only wallet.

1\) Insert the microSD card into the Keystone device. Go to \[Settings], touch \[Watch-Only Wallet], select BTCPay Server], then touch \[Next > Display QR Code].

2\) Touch \[touch here to export the file with microSD > Export]. The file has been saved in the microSD card.

3\) Take out the microSD card out from the Keystone and insert into your device.

4\) Run BTCPayServer on your instance, click \[STORES > Create a new store]. Set the name of the new store and click \[Create].

5\) Click \[Setup] under "Wallet - BTC". Click \[Import from...] and select \[a wallet file(Electrum, Wasabi, Keystone, Coldcard].&#x20;

6\) Click \[Choose File]. Select the txt file exported from the Keystone. Click \[Submit > Confirm].

7\) Select the \[WALLETS] tab and check the paired watch-only wallet.

## III. Sending and Receiving Assets with BTCPayServer

### **A. Receiving BTC**

Users can choose the Keystone or BTCPayServer to receive BTC. But it’s recommended to use Keystone to receive due to safety concerns. (This way you can trustlessly verify that the receiving address is actually correct or not, because the connected instance is prone to malware.)

1\. On Keystone: Touch \[Addresses] to display the receiving addresses.

2\. On BTCPayServer: Click \[WALLETS - Manage - Receive-Generate BTC Address] to display the receiving addresses.

### **B. Sending BTC**

1\. Create a Transaction with BTCPayServer

1\) Run BTCPayServer. Click \[WALLETS > Manage > Send] in each step.

2\) Enter the destination address and amount. Click \[Sign with…] and select \[... a wallet supporting PSBT].

3\) Export unsigned transaction data.

\- Via QR code: Click \[Other actions...] and select \[Show QR]. Show the unsigned transaction data in QR code format.

\- Via microSD card: Click \[Other actions...] and select \[Download]. Save the unsigned transaction data as a .psbt file to the root directory of the microSD card.

2\. Sign with Keystone Hardware Wallet

\- Via QR code

1\) Touch the \[Scan] icon, then scan the QR code shown on BTCPayServer.

2\) Touch \[Sign] and enter the password to authorize.

\- Via microSD card

1\) Insert the microSD card into the Keystone and power on the device.&#x20;

2\) Touch the \[MicroSD card] icon, then find and open the unsigned transaction file.

3\) Touch \[Sign] and enter the password to authorize.

4\) Touch \[touch here to export the file with microSD > Export]. The signed transaction file will be saved to the root directory of the microSD card.

3\. Broadcast with BTCPay Server

\- Via QR code

1\) Click the "camera" icon and scan the QR code shown on the Keystone. Click \[Submit].

2\) Click \[Other actions...] > \[Review]. Confirm the transaction details and click \[Broadcast it] to broadcast the transaction to the blockchain.

\- Via microSD card

1\) Take the microSD out of your Keystone and insert it into the computer/device.

2\) Click \[PSBT > Choose File], find and open the signed transaction file in the root directory of the microSD card. Click \[Decode > Other Actions > Review] in each step. Confirm the transaction details and click \[Broadcast it] to broadcast the transaction to the blockchain.

3\) Optional: Verify your transaction with a block explorer like blockstream.info.


# Nunchuk

Firmware versions B-2.5 (BTC-Only) or newer enables Nunchuk V1.9.0 or newer to be used with the Keystone Essential or Pro hardware wallets.‌ Detailed instructions provided below explains how to directly interact with the Nunchuk iOS App to create a 2-out-of-3 multi-signature wallet that includes the Keystone hardware wallet, ColdCard and Nunchuk's software key as the 3 participant co-signers, as well as how to execute a 2-out-of-3 multisig transaction.

## I. Preparation

1\. Setup your Keystone Essential or Pro. ([Getting started](https://support.keyst.one/getting-started/setting-up-keystone-in-5-steps))

2\. [Firmware](https://keyst.one/firmware?locale=en) versions B-2.5 (BTC-Only) or newer running on Keystone Essential or Pro.&#x20;

&#x20;   (Please read [How to Upgrade Firmware](https://support.keyst.one/getting-started/firmware-upgrading) for more details.)

3\. A Smartphone with Nunchuk V1.9.0 or newer downloaded with a Nunchuk account logged in.&#x20;

&#x20;   (**Tips:** Smartphones require iOS 13.0 or later or up and Android 5.0 or up.)

4\. A MicroSD card (FAT32 format with capacity NOT exceeding 512GB).&#x20;

{% content-ref url="/pages/-MclpVfjNf9WvY0094y4" %}
[How to Format a MicroSD Card to FAT32?](/getting-started/firmware-upgrading/how-to-format-a-microsd-card-to-fat32)
{% endcontent-ref %}

## II. Adding Keys to Nunchuk

### 1. Adding Keystone to Nunchuk

1\) Turn your Keystone hardware wallet on.

2\) Tap \[Menu] > \[Multisig Wallet] > and then the \[•••] button on the top right of the screen > then \[Show/Export XPUB]. Your Keystone hardware wallet will display a QR code to be used to pair with a generic wallet.

<figure><img src="/files/eiTJ1UIVkn4zAb6VJ3nJ" alt="Keystone-Nunchuck-1"><figcaption></figcaption></figure>

3\) Run the Nunchuk V1.9.0 or newer on your smartphone and log into your Nunchuk account.

4\) Go to the “Wallets” interface and select \[Add a key] or \[+] icon on the right side of the "keys" column > \[Add air-gapped key] > \[Continue].

<figure><img src="/files/oLxDtNx5eXpavDyvnkxk" alt="Keystone-Nunchuck-2"><figcaption></figcaption></figure>

5\) Set the \[Key name] and press \[Add key spec via QR], then use your smartphone's camera to scan the QR code displayed on your Keystone device.

<figure><img src="/files/L9Kr4kW4kPh2Gk6V5dSE" alt="Keystone-Nunchuck-3"><figcaption></figcaption></figure>

6\) Press \[Add Key] > \[Done]. Your Keystone should now be successfully added to Nunchuk.

<figure><img src="/files/3WwQpqCqfpJGOq1j6W2D" alt="Keystone-Nunchuck-4"><figcaption></figcaption></figure>

### **2.** Adding ColdCard to Nunchuk

1\) Turn your ColdCard on and insert the microSD card into it.

2\) Select \[Settings] > \[Multisig Wallets] > \[Export XPUB] > confirm (√) to save the XPUB of the recovery phrase as a .json file to the microSD card.

<figure><img src="/files/w3Nf6bX5aCnJRbNdc2hh" alt="Keystone-Nunchuck-5"><figcaption></figcaption></figure>

3\) Take out the microSD card from Coldcard and insert it into a PC/Mac. Then find and open the .json file.

<figure><img src="/files/zjwXt9ebOkD3gOIwiIOA" alt="Keystone-Nunchuck-6"><figcaption></figcaption></figure>

<figure><img src="/files/bIr2cKtURATvOJJhNfXI" alt="Keystone-Nunchuck-7"><figcaption></figcaption></figure>

4\) On Nunchuk: Press \[+] icon on the right side of the "keys" column > \[Add air-gapped key] > \[Continue].

<figure><img src="/files/1zD375T1VNA0inHMSkz8" alt="Keystone-Nunchuck-8"><figcaption></figcaption></figure>

5\) Set your desired name for this key in the \[Key name] space provided.

You would also need to set the \[Key spec] using the Master Key Fingerprint, Path, and XPUB found in the ColdCard’s XPUB file so Nunchuck can properly and successfully read data from your ColdCard:

* [x] ① Open the .json file you exported from ColdCard during step (2) to find the XPUB, Path and Master Key Fingerprint.

<figure><img src="/files/c7NyVaK7TEszsDywG8DQ" alt="Keystone-Nunchuck-9"><figcaption></figcaption></figure>

* [x] ② You need to edit the key spec in a specific order and format: First, the Master Key fingerprint, then the Path (first two in square brackets), and lastly the XPUB. Please see the template example provided below:

> \[5271C071/48'/0'/0'/2']Zpub755NbzNDFus6egJM22CLBqjabHyNV8PEWJHGBkfCSXN2W8HRPKEA2MyxvycgD4AxNMcrTuxSwKYiNJ19h9PLURGZoWyC2Tutr7SWaU1swYK

Notice the first section in square brackets is the Master Key fingerprint “5271C071” followed by the Path, in this case, “/48'/0'/0'/2'”. The remaining key spec data is the XPUB.

After you’ve properly copied the necessary data in the right format and pasted in the \[Key spec] space provided, press \[Add Key] > \[Done]. Your ColdCard should now be successfully added to Nunchuk.

<figure><img src="/files/LTmF8bwxWKcuFS0uIq9z" alt="Keystone-Nunchuck-10"><figcaption></figcaption></figure>

### **3.** Adding Software Key to Nunchuk

1\) Press \[+] icon on the right side of the "keys” column > \[Add software key] > \[Create new seed].

<figure><img src="/files/HQFh1V1YLO9JbN7zjM9N" alt="Keystone-Nunchuck-11"><figcaption></figcaption></figure>

2\) Safely backup your recovery phrase and press \[Continue] > Confirm the recovery phrase and press \[Continue] > Give the key a name and press \[Continue].

<figure><img src="/files/4DvLuf6nJ9u4NndSnTmR" alt="Keystone-Nunchuck-12"><figcaption></figcaption></figure>

3\) Set a passphrase (optional) > press \[Set passphrase] or \[I don’t need a passphrase] > \[Done]. The Nunchuk software key should now be successfully added.

<figure><img src="/files/UfUJPI45NWN4cCW42uPu" alt="Keystone-Nunchuck-13"><figcaption></figcaption></figure>

## **III. Creating a 2/3 Multisig Wallet on Nunchuk**

1\) Go to the wallets interface and select the \[+] icon on the right side in the "Wallets" column. Then select \[Create a wallet] , then set a wallet name (You can customize the address type and wallet type if needed) and touch \[Continue].

<figure><img src="/files/DqVfhhGoybnonYAJ8jFC" alt="Keystone-Nunchuck-14"><figcaption></figcaption></figure>

2\) Configure the keys to the multisig wallet and select the number of signatures required > Touch \[Continue] > confirm the contents in the “Review wallet” page > Touch \[Create a wallet].

<figure><img src="/files/0a7y57TsnjeptwSXOSan" alt="Keystone-Nunchuck-15"><figcaption></figcaption></figure>

3\) You can choose to back up the wallet right now or later, then review the wallet and touch \[Done]. The 2/3 multisig wallet would have now been successfully created.

<figure><img src="/files/XfM1E5wWfP8Iz5TpvqI0" alt="Keystone-Nunchuck-16"><figcaption></figcaption></figure>

## **IV. Importing the 2/3 multisig wallet to Keystone as a co-signer**

1\) Nunchuk: Select the corresponding multisig wallet > select \[View wallet config] > touch the \[•••] button on the top right corner > select \[Show as QR code] option to reveal a dynamic QR code.&#x20;

<figure><img src="/files/4RRr2L83Eay6F7qJsLDX" alt="Keystone-Nunchuck-17"><figcaption></figcaption></figure>

2\) Keystone: Select \[Menu] > \[Multisig Wallet] > \[Import Multisig Wallet] > then select the \[scan] icon on the top right corner and scan the QR code displayed on Nunchuk > select \[Confirm] to successfully make the multisig wallet a co-signer.

<figure><img src="/files/VP120h4A9VmyDWV5zVmm" alt="Keystone-Nunchuck-18"><figcaption></figcaption></figure>

<figure><img src="/files/VTNDGwKMRGXAh4cFHbCJ" alt="Keystone-Nunchuck-19"><figcaption></figcaption></figure>

## **V. Receiving bitcoin to the 2/3 multisig address**

You can use the receiving addresses displayed with either the Keystone or Nunchuk to receive bitcoin.

1\. Keystone: Enter the \[Multisig Wallet] and select \[Addresses] to display the receiving addresses.&#x20;

<figure><img src="/files/Zi4hnC9dqj5Vhp89v8Pm" alt="Keystone-Nunchuck-20"><figcaption></figcaption></figure>

2\. Nunchuk: Go to the corresponding wallet and select \[Receive] to display the receiving address.

<figure><img src="/files/rgwXrPzrVA1xBDsTQbF3" alt="Keystone-Nunchuck-21"><figcaption></figcaption></figure>

## **VI. Sending bitcoin from the 2/3 multisig wallet**

This part of the tutorial will explain how to execute a 2-out-of-3 multisig transaction with Nunchuk on the testnet. Please note that the process is the same for the mainnet.

### **1.** Create a 2/3 multisig transaction on Nunchuk

1\) Go to the corresponding wallet and select \[Send] to enter the remittance interface.

<figure><img src="/files/fVWqiHEofjtq2jEwhA5O" alt="Keystone-Nunchuck-22"><figcaption></figcaption></figure>

2\) Configure your desired amount > touch \[Continue] > input the receiving address and note (optional) > touch \[Continue] > customize the fee if needed > touch \[Continue]. Then view the transaction details and touch \[Confirm and create transaction] to enter the signature page.

<figure><img src="/files/GtuCBGsNmyWuM2GeGaA8" alt="Keystone-Nunchuck-23"><figcaption></figcaption></figure>

### **2.** Sign multisig transaction

1\) Touch the \[Sign] icon on the right side of the software key. You can see that the first signature has been automatically signed by Nunchuck.

<figure><img src="/files/wFtuwKGTh8LlVoX1mXET" alt="Keystone-Nunchuck-24"><figcaption></figcaption></figure>

2\) Touch the \[Sign] icon on the right side of the Keystone key > select \[Export transaction] to display the partially signed transaction information in QR code format.

<figure><img src="/files/jiORpbx8fspFzQS4VorS" alt="Keystone-Nunchuck-25"><figcaption></figcaption></figure>

3\) Keystone: Enter \[Multisig Wallet] > select the \[scan] icon and scan the QR code displayed on Nunchuk.

<figure><img src="/files/YKSLNjLBboKGIul6RiyV" alt="Keystone-Nunchuck-26"><figcaption></figcaption></figure>

4\) Check the transaction details and tap \[Sign] > Enter your password/fingerprint > then Press \[Confirm] to show the signed transaction data in QR code format.

<figure><img src="/files/eN6RgMkS92fgLh7EMLzR" alt="Keystone-Nunchuck-27"><figcaption></figcaption></figure>

5\) Nunchuk: Touch \[←] to return to the signature page. Select \[Import signature] and scan the QR code displayed on Keystone to transmit the signed transaction data.

<figure><img src="/files/rEolDrkGvaIam0LrPPXD" alt="Keystone-Nunchuck-28"><figcaption></figcaption></figure>

### **3.** Broadcasting Transactions with Nunchuk

1\) Press \[Broadcast transaction] to broadcast the transaction. You can view the transaction on a blockchain explorer later for verification purposes if required.

<figure><img src="/files/G0uRsZiXm0loPEVKsOa6" alt="Keystone-Nunchuck-29"><figcaption></figcaption></figure>


# Simple Bitcoin Wallet

Firmware version B-2.5 (BTC-Only) or newer will allow you to set *Simple Bitcoin Wallet* V2.4.23 or newer as a watch-only wallet that functions as the companion app for Keystone Essential or Pro.

## **I. Preparation**

1\. Setup your Keystone Essential or Pro. ([Tutorial](https://support.keyst.one/getting-started/setting-up-keystone-in-5-steps))

2.[ Firmware](https://keyst.one/firmware?locale=en) version B-2.5 (BTC-Only) or newer running on Keystone Essential or Pro.

{% content-ref url="/pages/-MVz-o9g8Dc-vlyVuAZj" %}
[Firmware Upgrade](/getting-started/firmware-upgrading)
{% endcontent-ref %}

3\. Android device with *Simple Bitcoin Wallet* V2.4.23 or later downloaded and logged in with your *Simple Bitcoin Wallet* account.

## **II. Creating a Watch-Only Wallet (BTC-Only) using&#x20;*****Simple Bitcoin Wallet***

1\. On the Keystone hardware wallet, touch \[Menu] > \[Settings] > \[Watch-Only Wallet]. You can also complete this setup for your watch-only wallet during the initialization phase of your keystone device.

<figure><img src="/files/xKANJZ2xrzkFQD0ag6iI" alt="Keystone-SimpleBitcoinWallet-1"><figcaption></figcaption></figure>

2\. Select \[Generic Wallet], then touch \[Confirm] and enter the wallet. Touch the \[•••] icon, then select \[Export Wallet] to show the QR code to display the information required to pair your keystone device with a generic wallet (includes the wallet XPUB, Keystone's fingerprint, and derivation path).

<figure><img src="/files/9fAgLBmoyFvXsGzBslmM" alt="Keystone-SimpleBitcoinWallet-2"><figcaption></figcaption></figure>

3\. Run the *Simple Bitcoin Wallet* app, touch \[Create new wallet], then touch the “setting” icon on the top right corner and press \[Add hardware wallet].

<figure><img src="/files/SsfZGA5lB0rS4YwZEJ9E" alt="Keystone-SimpleBitcoinWallet-3"><figcaption></figcaption></figure>

4\. Use your smartphone's camera to scan the QR code displayed on your Keystone device, then set a label for your hardware wallet and press \[OK]. *Simple Bitcoin Wallet* can now be used as the watch-only wallet for Keystone.

<figure><img src="/files/OtwTaDksjQQmWYAOhdnZ" alt="Keystone-SimpleBitcoinWallet-4"><figcaption></figcaption></figure>

## III. Sending and Receiving Bitcoin with *Simple Bitcoin Wallet*&#x20;

### A. Receiving Bitcoin&#x20;

You can use either receiving addresses displayed on your Keystone device or *Simple Bitcoin Wallet* to receive bitcoin.

**- Displaying Address on Keystone**

1\. Enter your generic wallet interface on your Keystone device and select a receiving address to display it in QR code format.

<figure><img src="/files/JH3atoyiVIZQI3FBn0tY" alt="Keystone-SimpleBitcoinWallet-5"><figcaption></figcaption></figure>

**- Displaying Addresses on your&#x20;*****Simple Bitcoin Wallet***

1\. Select the wallet that you want to display its address, for this tutorial, this would be \[Keystone Hardware wallet].

<figure><img src="/files/PsYXTA8r433hAnDR9Ji2" alt="Keystone-SimpleBitcoinWallet-6"><figcaption></figcaption></figure>

2\. Alternatively touch \[Receive] on the bottom right of your screen > then select \[Receive to Bitcoin address] to display the receiving address.

<figure><img src="/files/q0tzod6xRfUsbtnr6FZT" alt="Keystone-SimpleBitcoinWallet-7"><figcaption></figcaption></figure>

### B. Sending Bitcoin

**1. Using&#x20;*****Simple Bitcoin Wallet*****&#x20;to Create Transactions**

1\) Touch \[Send] to enter the remittance interface, then configure the receiving address and touch \[OK] and choose a wallet (e.g. Keystone hardware wallet).

<figure><img src="/files/G49MAyMTx5e4rgcKHxKX" alt="Keystone-SimpleBitcoinWallet-8"><figcaption></figcaption></figure>

2\) Set your desired amount, transaction fees, and label (optional), then touch \[OK] to display the unsigned transaction information in a dynamic QR code format.

<figure><img src="/files/MrnPVjx9U81jKfzKQGUJ" alt="Keystone-SimpleBitcoinWallet-9"><figcaption></figcaption></figure>

**2. Using Keystone Hardware Wallet to Sign Transactions**

1\) Touch the \[scan] icon on Keystone and use the camera on your hardware wallet device to scan the QR code displayed on *Simple Bitcoin Wallet*.

<figure><img src="/files/LDO4ThCRwN1wiYreDrV9" alt="Keystone-SimpleBitcoinWallet-10"><figcaption></figcaption></figure>

2\) Check the transaction details. Then touch \[Sign], and input your password / fingerprint for your device to obtain the signed transaction information (awaiting broadcast).

<figure><img src="/files/cbu1zMyyABToIYKZXkc7" alt="Keystone-SimpleBitcoinWallet-11"><figcaption></figcaption></figure>

**3. Using&#x20;*****Simple Bitcoin Wallet*****&#x20;to Broadcast Transactions**

1\) Touch \[OK], and use your smartphone camera to scan the QR code displayed on your Keystone device to transmit the signed transaction data.

2\) Open up the broadcasting interface on your *Simple Bitcoin Wallet* and touch \[OK] to broadcast the transaction.

<figure><img src="/files/UaJRVGkRgbPmp4w50eVq" alt="Keystone-SimpleBitcoinWallet-12"><figcaption></figcaption></figure>


# ETH & Web3 Wallets

One of the core design principles of Keystone Hardware Wallet is to be **compatible** with as many software wallets as possible.

The keystone hardware wallet is compatible with the following ETH & Web3 wallets:&#x20;

{% content-ref url="/pages/-MVzjClzDuQFACnCeQ1h" %}
[MetaMask](/3rd-party-wallets/eth-and-web3-wallets-keystone/bind-metamask-with-keystone)
{% endcontent-ref %}

{% content-ref url="/pages/oHvS1irb46ULViPBi9bL" %}
[MetaMask Mobile](/3rd-party-wallets/eth-and-web3-wallets-keystone/metamask-mobile)
{% endcontent-ref %}

{% content-ref url="/pages/lFotIHfhPBVy644v7iFc" %}
[Rabby Wallet](/3rd-party-wallets/eth-and-web3-wallets-keystone/rabby-wallet)
{% endcontent-ref %}

{% content-ref url="/pages/kfOiBcFf26mqgl7fQYph" %}
[Core Wallet (Extension)](/3rd-party-wallets/eth-and-web3-wallets-keystone/core-wallet-extension)
{% endcontent-ref %}

{% content-ref url="/pages/EE6u2cnuohiZS3kAAEyy" %}
[BlockWallet](/3rd-party-wallets/eth-and-web3-wallets-keystone/blockwallet)
{% endcontent-ref %}

{% content-ref url="/pages/00G2SdsStq5kGmkHOKLg" %}
[Bitget](/3rd-party-wallets/eth-and-web3-wallets-keystone/bitget)
{% endcontent-ref %}

{% content-ref url="/pages/-MW7KrOU8RvqtPJ9vrZr" %}
[Polkadot{.js} (DOT/KSM)](/3rd-party-wallets/eth-and-web3-wallets-keystone/polkadot.js-polkadot-kusama-with-kesytone)
{% endcontent-ref %}


# MetaMask

Keystone is the only hardware wallet that is compatible with both the MetaMask extension and the MetaMask mobile app. It fully supports all EVM chains, as well as the main coins, tokens, and Dapps.

🎉🎉🎉<mark style="background-color:orange;">Great news!</mark>&#x20;

<mark style="background-color:orange;">The waitlist for our 3rd generation product is now open. Visit our</mark> [<mark style="background-color:orange;">homepage</mark>](https://keyst.one/) <mark style="background-color:orange;">to find out more.</mark>

Firmware versions M-5.0 (Multi-Coin) or newer will allow you to use the MetaMask Extension (V10.8.0 or newer) with your Keystone and set the MetaMask extension as a watch-only wallet on your Keystone Essential or Pro.

## **I. Preparation**

1\. [Firmware](https://keyst.one/firmware?locale=en) versions M-5.0 (Multi-Coin) or newer running on Keystone Essential or Pro.&#x20;

&#x20;  (Please read[ How to upgrade firmware](https://support.keyst.one/getting-started/firmware-upgrading) for more details.)

2\. Download the MetaMask browser extension (**V10.8.0 or newer**) from MetaMask's [official website](https://metamask.io/download).&#x20;

## **II.Important Notes**

A wallet generated by MetaMask has its recovery phrase online. This means that this recovery phrase has been connected to the network(internet).

Therefore, even if you import this recovery phrase created by MetaMask into Keystone (or any other hardware wallets) to continue managing your digital assets, this recovery phrase might already be at risk of being attacked by hackers.

{% content-ref url="/pages/za1waTlj0y6kWl5UkulY" %}
[Potential Trouble with Importing MetaMask wallet into Keystone](/3rd-party-wallets/eth-and-web3-wallets-keystone/bind-metamask-with-keystone/potential-trouble-with-importing-metamask-wallet-into-keystone)
{% endcontent-ref %}

{% hint style="danger" %}
In principle, we highly recommend creating a new recovery phrase (new wallet with a 24-word seed phrase) offline on a Keystone hardware wallet and then transferring your assets from your MetaMask wallet to the new one prior to using your Keystone to interact with MetaMask. This is the safest way to protect your assets.
{% endhint %}

## **III. Bind MetaMask** **with your Keystone Hardware Wallet**

#### **1. Set Up Your MetaMask**

1\) If you are running any fork of MetaMask other than the standard production fork, disable it now.

2\) Run the “MetaMask Extension”. Click on \[Get Started] to begin setting up your MetaMask.

<figure><img src="/files/uq4nN9o3uBfl75TDeaWk" alt="Keystone-MetaMask-1"><figcaption></figcaption></figure>

3\) Choose to either create a new MetaMask wallet or import one. Here we will create a new Secret Recovery Phrase as a demonstration.&#x20;

<figure><img src="/files/9u13l617UtvFZzc4HGvT" alt="Keystone-MetaMask-2"><figcaption></figcaption></figure>

4\) Set up your password. Please try to set a strong password to maximize the security of your account.

<figure><img src="/files/8xdjl5K1S6E6rCQttoLF" alt="Keystone-MetaMask-set-up"><figcaption></figcaption></figure>

5\) Keep your secret recovery phrase somewhere safe.

<figure><img src="/files/lU8S7YHNh02shOnPt2vi" alt="Keystone-MetaMask-recovery"><figcaption></figcaption></figure>

<figure><img src="/files/rnIJtyoV4xWBad4dRlsE" alt="Keystone-MetaMask-5"><figcaption></figcaption></figure>

<figure><img src="/files/gicvvhEFyQvbQYYj5lHp" alt="Keystone-MetaMask-confirm"><figcaption></figcaption></figure>

<figure><img src="/files/JSksYRxRWZRIJbqaGrod" alt="Keystone-MetaMask-7"><figcaption></figcaption></figure>

6\) Now you have successfully set up your MetaMask. Feel free to browse around the MetaMask main page to familiarize yourself with it.

<figure><img src="/files/zDhOXeZIiq7NWbWYbpB9" alt="Keystone-MetaMask-10"><figcaption></figcaption></figure>

#### **2. Connect MetaMask to Your Keystone**

{% hint style="info" %}
Please note that if your firmware version is **M-9.10** or newer, the **connection process on the Keystone** hardware wallet has been improved.&#x20;

To connect your software wallet, simply tap on \[Connect Software Wallet] and then select \[MetaMask]. The QR code will be displayed automatically.&#x20;

For more information about the updated UI design, please visit [Keystone's Revamped UI](/getting-started/getting-started-with-m-10.0-or-newer-for-beginners).
{% endhint %}

1\) Keystone: Tap the "Menu" icon > then Tap \[Software Wallet] > then Select \[MetaMask / Defi / Web3] and Tap \[Confirm] on the Keystone device.

<figure><img src="/files/yvSjsKlTjSV20SM2eom8" alt="Keystone-MetaMask-11"><figcaption></figcaption></figure>

2\) tap the icon on the top right corner of the toolbar > then select \[Connect Software Wallet] > then choose the accounts that you are going to import and tap \[Confirm].

<figure><img src="/files/t4b1SdBzHjdT6j5BeVCe" alt="Keystone-MetaMask-12"><figcaption></figcaption></figure>

3\) MetaMask: Click on the "Menu" icon on the top right corner > then select \[Connect Hardware Wallet].

<figure><img src="/files/QCmf1EC7D6j9CgHBHaLP" alt="Keystone-MetaMask-13"><figcaption></figcaption></figure>

4\) Select \[QR-based] and then click \[Continue].

<figure><img src="/files/zqnxGaPMEgL5awiYl82p" alt="Keystone-MetaMask-14"><figcaption></figcaption></figure>

5\) MetaMask uses your computer's camera to scan the QR code displayed on the Keystone hardware wallet.

<figure><img src="/files/ml36CLqvVtMbtkGp3sZR" alt="Keystone-MetaMask-15"><figcaption></figcaption></figure>

6\) Select the Account that you want to bind and click \[Unlock].

<figure><img src="/files/jC126R0Rz8nLYnOyaWzY" alt="Keystone-MetaMask-16"><figcaption></figcaption></figure>

7\) MetaMask should now be successfully bound to your Keystone.

<figure><img src="/files/9CWsJUYsjwmnhrbKv0a4" alt="Keystone-MetaMask-17"><figcaption></figcaption></figure>

## **IV. Sending ETH (Mainnet) Using MetaMask Extension**

#### 1. Generate an ETH transaction with your MetaMask.&#x20;

a. Click on \[send], then enter the associated address in \[send to address], don’t forget to also set your desired \[amount], then click \[Next].

<figure><img src="/files/fkbrdC0tY9vPJK6EzjuK" alt="Keystone-MetaMask-18"><figcaption></figcaption></figure>

<figure><img src="/files/hBtr7WZyQ5mSPUnfL6B5" alt="Keystone-MetaMask-19"><figcaption></figcaption></figure>

b. You can adjust the transaction fee to the limit you’re comfortable with by selecting \[edit] > \[Advanced Option].

* The Max priority fee (aka “miner tip”) goes directly to miners and incentivizes them to prioritize your transaction. You’ll often pay the maximum amount set.
* The max fee is the total, global amount paid for your transaction (base fee + priority fee).

<figure><img src="/files/FUUipEbTZ5x13PfTJ0Ni" alt="Keystone-MetaMask-19"><figcaption></figcaption></figure>

<figure><img src="/files/NIZQ3XWouvpVtvjZVIBN" alt="Keystone-MetaMask-20"><figcaption></figcaption></figure>

<figure><img src="/files/EwZFe6lxT9Gl9QrB8f2x" alt="Keystone-MetaMask-21"><figcaption></figcaption></figure>

c. Click on \[Confirm] after confirming all the transaction details, then get the unsigned transaction in QR code format.

<figure><img src="/files/YIh01OE3RegVbIu1ykIY" alt="Keystone-MetaMask-22"><figcaption></figcaption></figure>

<figure><img src="/files/fyzsw4MDS2K8NFSkwsCf" alt="Keystone-MetaMask-23"><figcaption></figcaption></figure>

#### 2. Using your Keystone Hardware Wallet to Sign Transactions

a. In MM / Defi / Web3 mode, touch the “scan” icon on the top right of your Keystone hardware wallet’s main page, then scan the QR code displayed on the MetaMask interface.

<figure><img src="/files/jN55b28Q4ylavMUDg3IK" alt="Keystone-MetaMask-24"><figcaption></figcaption></figure>

b. After confirming the transaction information, press \[Sign] and enter your password or fingerprint to sign the transaction to get the signed transaction information in QR code format.

<figure><img src="/files/SfZ9ODAfiSQ8nbHoIPai" alt="Keystone-MetaMask-25"><figcaption></figcaption></figure>

**3. Broadcasting the transaction with your MetaMask**

a. Click on \[Get Signature] on the MetaMask interface and scan the QR code displayed on your Keystone hardware wallet. Once the scan is completed, the transaction will be broadcasted directly onto the ETH blockchain.

<figure><img src="/files/GPLYDDpihnyUIhrOJcbq" alt="Keystone-MetaMask-26"><figcaption></figcaption></figure>

<figure><img src="/files/uthwRqAmUtaGMP2t9lKk" alt="Keystone-MetaMask-27"><figcaption></figcaption></figure>

<figure><img src="/files/duHYZYoQlyOCgN8tSiHc" alt="Keystone-MetaMask-28"><figcaption></figcaption></figure>

Instructions recommended:

[**How to Use Uniswap with Keystone?**](https://support.keyst.one/3rd-party-wallets/eth-and-web3-wallets-keystone/bind-metamask-with-keystone/how-to-use-metamask-keystone-with-defi)

[**How to Configure EVM Chains on Metamask?**](https://support.keyst.one/3rd-party-wallets/eth-and-web3-wallets-keystone/bind-metamask-with-keystone/configure-evm-chains-on-metamask)

[**How to Switch ETH Path to Ledger Live / Legacy Format?**](https://support.keyst.one/advanced-features/how-to-switch-eth-path-to-ledger-live-legacy-format)


# MetaMask & DeFi

This tutorial explains how to use your Keystone & MetaMask to interact with DeFi platforms (dapps) using Uniswap as an example. The same method would apply for other dapps.

## I. **Preparation**

1\. [Firmware](https://keyst.one/firmware?locale=en) version M-5.0 (Multi-Cion) running on Keystone Essential or Pro.

&#x20;   (Please read[ How to upgrade firmware](https://support.keyst.one/getting-started/firmware-upgrading) for more details.)

2\. Bind MetaMask extension V10.8.0 or newer with the Keystone Hardware Wallet ([Tutorial](https://support.keyst.one/3rd-party-wallets/eth-and-web3-wallets-keystone/bind-metamask-with-keystone)).

3\. Uniswap: <https://app.uniswap.org/#/swap>.

## **II. Connect Uniswap to "MetaMask** Extensio&#x6E;**”**

1\. Visit Uniswap website: <https://app.uniswap.org/#/swap>. Switch to the \[Swap] tab and click \[Connect wallet].

<figure><img src="/files/rwOjxkqBgUFZRBfUSKpQ" alt="Keystone-MetaMask-DeFi-1"><figcaption></figcaption></figure>

2\. Select \[MetaMask] as your wallet, Then click \[Next] to connect.

<figure><img src="/files/9rYp2JtTtP3hoNEAQdsc" alt="Keystone-MetaMask-DeFi-2"><figcaption></figcaption></figure>

<figure><img src="/files/leeKPIDZE95rVI8tKFr6" alt="Keystone-MetaMask-DeFi-3"><figcaption></figcaption></figure>

3\. Uniswap should now be successfully connected with your MetaMask (Keystone account).

<figure><img src="/files/hdnpD8IuT6MsLHSMpSrx" alt="Keystone-MetaMask-DeFi-4"><figcaption></figcaption></figure>

## **III. Swap from ETH to Tokens (e.g. USDT)**

1\. Select a Token (e.g. USDT) and set the amount you want to swap, then click \[Swap].

<figure><img src="/files/6v3aZGsIXq1jUYebFAna" alt="Keystone-MetaMask-DeFi-5"><figcaption></figcaption></figure>

2\. Confirm the transaction details and click \[Confirm Swap].

<figure><img src="/files/KDJeek7b8bNhqgx9AoIW" alt="Keystone-MetaMask-DeFi-6"><figcaption></figcaption></figure>

3\. Click \[Confirm] on MetaMask Extension to get the unsigned transaction data in QR code format.

<figure><img src="/files/e4GmnPY6g9Q4ELCSJWu5" alt="Keystone-MetaMask-DeFi-7"><figcaption></figcaption></figure>

4\. Keystone: Touch the “Scan” icon and scan the QR code shown on MetaMask Extension.

<figure><img src="/files/bBWgjXpyEtaDA4SKLlxD" alt="Keystone-MetaMask-DeFi-8"><figcaption></figcaption></figure>

5\. Confirm the transaction details on Keystone Hardware Wallet. Touch \[Sign] and enter the password to verify. Get the signed transaction data in QR code format.

<figure><img src="/files/fmw8YCsVhD5w4ibSx2yT" alt="Keystone-MetaMask-DeFi-9"><figcaption></figcaption></figure>

6\. Click \[Get Signature] on MetaMask Extension and scan the QR code shown on the Keystone device.

<figure><img src="/files/VPFLb8xvPjmATFnLLprw" alt="Keystone-MetaMask-DeFi-10"><figcaption></figcaption></figure>

7\. Transaction submitted automatically after the scanning is finished.

<figure><img src="/files/-MbFl3tR6CQDOnAsh-M6" alt="Keystone-MetaMask-DeFi-11"><figcaption></figcaption></figure>

## **IV. Swap from Tokens to ETH/Tokens**

### 1. Approve

If it is the first time you are swapping from Token A to ETH or Token B, you will be required to authorize \[Approve] the third party (e.g. the smart contract of Token A) to spend Token A in your wallet before you can \[Swap].

1\) Uniswap: Select the coin type and set the amount you want to swap. Click \[Approve]. Then click \[Confirm] on MetaMask Extension to get the unsigned transaction data in QR code format.

<figure><img src="/files/Oe9oNROHNPBxfI2hsKxs" alt="Keystone-MetaMask-DeFi-12"><figcaption></figcaption></figure>

2\) On Keystone: Touch the “scan” icon and scan the QR code that is shown on MetaMask Extension. Confirm the transaction details on Keystone. Touch \[Sign] and enter your password/fingerprint to verify. It will then show the signed transaction data in QR code format.

<figure><img src="/files/yoCTISCjhdBBBOpFGVJA" alt="Keystone-MetaMask-DeFi-13"><figcaption></figcaption></figure>

3\) Click \[Get Signature] on MetaMask Extension and scan the QR code shown on the Keystone device to broadcast the transaction.

<figure><img src="/files/wTgazlhswTFsVawrr5M2" alt="Keystone-MetaMask-DeFi-14"><figcaption></figcaption></figure>

### 2. Swap

The process of “Swap from Tokens to ETH / Tokens” is the same as the one of “Swap from ETH to Tokens”. The only difference is the methods of calling contracts.

<figure><img src="/files/ND6aSOYqkNnhQaNZlMt3" alt="Keystone-MetaMask-DeFi-15"><figcaption></figcaption></figure>

## **V. Add Liquidity (e.g. ETH + UNI)**

This part of the tutorial will explain how to add V2 liquidity on the Rinkeby testnet as an example. And the process of "add liquidity" on mainnet is the same as on testnet.

### 1. Approve

If it is the first time you are adding liquidity to a pair, you will be required to click \[Approve] to authorize the third party (e.g. the smart contract of Token A) to spend Token A in your wallet before you can \[Supply].

1\) Switch to the “Pool” tab on Uniswap. Click \[More] > \[V2 Liquidity ] > \[Add V2 Liquidity].

<figure><img src="/files/10TsB5Ny7GBuwveZlJKK" alt="Keystone-MetaMask-DeFi-16"><figcaption></figcaption></figure>

<figure><img src="/files/uLRsvgqTmAsUCABf6kzO" alt="Keystone-MetaMask-DeFi-17"><figcaption></figcaption></figure>

2\) Select the coin type and set the amount you want to supply. Then click \[Approve UNI].

&#x20;   (Tip: You can set fee tier and price range yourself If you are adding V3 liquidity).

<figure><img src="/files/uRepqzQZr5O9nG66I88q" alt="Keystone-MetaMask-DeFi-18"><figcaption></figcaption></figure>

3\) Click \[Confirm] on MetaMask Extension to get the unsigned transaction data in QR code format.

<figure><img src="/files/sZkOszkO5cohTXvhKIHS" alt="Keystone-MetaMask-DeFi-19"><figcaption></figcaption></figure>

4\) Keystone Hardware Wallet: Touch the “scan” icon and scan the QR code shown on MetaMask Extension.

<figure><img src="/files/EqY1PWp3x5b3BK2HgsHe" alt="Keystone-MetaMask-DeFi-20"><figcaption></figcaption></figure>

5\) Confirm the transaction details on the Keystone device. Touch \[Sign] and enter a password or fingerprint to verify. This will then show the signed transaction data in QR code format.

<figure><img src="/files/OIEWI0c6NFIP56hJQbP3" alt="Keystone-MetaMask-DeFi-21"><figcaption></figcaption></figure>

6\) Click \[Get Signature] on MetaMask Extension and scan the QR code shown on Keystone device.

<figure><img src="/files/3Bf6ql7mpu9cD1ve31wA" alt="Keystone-MetaMask-DeFi-22"><figcaption></figcaption></figure>

7\) The transaction will be submitted automatically after the scanning has finished.

<figure><img src="/files/radpgEHRvaYkehTPM8o3" alt="Keystone-MetaMask-DeFi-23"><figcaption></figcaption></figure>

### 2. Supply

1\) Once the approving transaction is confirmed, click \[Supply].

<figure><img src="/files/U73HEDiXaxGrjrpKNkqJ" alt="Keystone-MetaMask-DeFi-24"><figcaption></figcaption></figure>

2\) Confirm the transaction details and click \[Confirm Supply].

<figure><img src="/files/V5NtcMhEVEz51clqIH4I" alt="Keystone-MetaMask-DeFi-25"><figcaption></figcaption></figure>

3\) Click \[Confirm] on MetaMask Extension to get the unsigned transaction data in QR code format.

<figure><img src="/files/EeWpTb9wAr3R6p2GRUQi" alt="Keystone-MetaMask-DeFi-26"><figcaption></figcaption></figure>

4\) Keystone Hardware Wallet: Touch the “Scan” icon and scan the QR code shown on MetaMask Extension.

<figure><img src="/files/OzCiG92yEOzYlETary81" alt="Keystone-MetaMask-DeFi-27"><figcaption></figcaption></figure>

5\) Confirm the transaction details on the Keystone device. Touch \[Sign] and enter your password or fingerprint to verify. The device will then show the signed transaction data in QR code format.

<figure><img src="/files/mN3g9InJOPIguM5JEoWI" alt="Keystone-MetaMask-DeFi-28"><figcaption></figcaption></figure>

6\) Click \[Get Signature] on MetaMask Extension and scan the QR code shown on the Keystone device.

<figure><img src="/files/WVB9FQI1gOaI4u5ZTjg6" alt="Keystone-MetaMask-DeFi-29"><figcaption></figcaption></figure>

7\) The transaction is submitted automatically after the scanning has finished.

<figure><img src="/files/cwJ8UCBgALuS5Yu7FQyh" alt="Keystone-MetaMask-DeFi-30"><figcaption></figcaption></figure>

## **VI. Remove Liquidity**

This part of the tutorial will explain how to remove liquidity on the Rinkeby testnet as an example. And the process of "remove liquidity" on mainnet is the same as on testnet.

### 1. Approve

If it is the first time you are removing the liquidity of a given liquidity pair, you will be required to click \[Approve] to authorize the third party (e.g. the smart contract of Token A) to spend Token A in your wallet before you can \[Remove] liquidity.

1\) Switch to the “Pool” tab on Uniswap. Click \[Manage] -> \[Remove].

<figure><img src="/files/W7dv8TR7x0pnPMNh4wXo" alt="Keystone-MetaMask-DeFi-31"><figcaption></figcaption></figure>

2\) Set the amount and click \[Approve].

<figure><img src="/files/1rl5uWGyuXHOTFE3v5aA" alt="Keystone-MetaMask-DeFi-33"><figcaption></figcaption></figure>

3\) Click \[SIGN] on MetaMask Extension to get the unsigned message in QR code format.

<figure><img src="/files/3Im2Rfw50ACXXfd5IuFa" alt="Keystone-MetaMask-DeFi-34"><figcaption></figcaption></figure>

4\) Keystone Hardware Wallet: Touch the “scan” icon and scan the QR code shown on MetaMask Extension.

<figure><img src="/files/3MNxk5hxLAD3FGJAYIDq" alt="Keystone-MetaMask-DeFi-35"><figcaption></figcaption></figure>

5\) Confirm the message on the Keystone device. Touch \[Sign] and enter your password or fingerprint to verify. After signing, you will then receive the sign message in a QR code format.

<figure><img src="/files/71z4EmW9RW1ehu2w4gdC" alt="Keystone-MetaMask-DeFi-36"><figcaption></figcaption></figure>

6\) Click \[Get Signature] on MetaMask Extension and scan the QR code shown on your Keystone device.

<figure><img src="/files/17s6P0NAmNKtpvmrj6Db" alt="Keystone-MetaMask-DeFi-37"><figcaption></figcaption></figure>

7\) Approval has been completed.

<figure><img src="/files/Z8R0kkU3bibeqsgaByy9" alt="Keystone-MetaMask-DeFi-38"><figcaption></figcaption></figure>

### 2. Remove

1\) Once the approval is completed, click \[Remove].

<figure><img src="/files/yElTzyJmEFeuy6GyOW1v" alt="Keystone-MetaMask-DeFi-39"><figcaption></figcaption></figure>

2\) Confirm the transaction details and click \[Confirm].

<figure><img src="/files/zOWesspLuB4JE1ml2bnA" alt="Keystone-MetaMask-DeFi-40"><figcaption></figcaption></figure>

3\) Click \[Confirm] on MetaMask Extension to get the unsigned message in QR code format.

<figure><img src="/files/3d2hH6Loet3Cv57nFowI" alt="Keystone-MetaMask-DeFi-41"><figcaption></figcaption></figure>

4\) Keystone Hardware Wallet: Touch the “Scan” icon and scan the QR code shown on MetaMask Extension.

<figure><img src="/files/6WsicddhTa5QtLUyESzo" alt="Keystone-MetaMask-DeFi-42"><figcaption></figcaption></figure>

5\) Confirm the transaction data on your Keystone device. Touch \[Sign] and enter your password or fingerprint to verify. The device will then show the signed transaction data in QR code format.

<figure><img src="/files/Isgvb0qHQPbjS1pWR7pH" alt="Keystone-MetaMask-DeFi-43"><figcaption></figcaption></figure>

6\) Click \[Get Signature] on MetaMask Extension and scan the QR code shown on your Keystone device.

<figure><img src="/files/aGhix9upPewdfdcG2GXi" alt="Keystone-MetaMask-DeFi-44"><figcaption></figcaption></figure>

7\) The transaction is submitted automatically after the scanning has finished.

<figure><img src="/files/e8EZZsOSCCg3qaoRVOhY" alt="Keystone-MetaMask-DeFi-45"><figcaption></figcaption></figure>

**Instructions recommended:**

{% content-ref url="/pages/-MeTrCm1NbNLC1YuswHl" %}
[Decoding DeFi Transactions](/advanced-features/decode-defi-transactions)
{% endcontent-ref %}


# Importing MetaMask Wallet into Keystone

By using the official MetaMask extension (V10.8.0 or newer), users can import their existing MetaMask wallet into their Keystone hardware wallets (with M-5.0 or newer firmware versions) and continue to manage their assets in the same wallet by utilizing MetaMask as a watch-only wallet.

{% hint style="danger" %}
In principle, we highly recommend creating a new recovery phrase (new wallet with a 24-word seed phrase) offline on a Keystone hardware wallet and then transferring your assets from your MetaMask wallet to the new one prior to using your Keystone to interact with MetaMask. This is the safest way to protect your assets.
{% endhint %}

## I. Operation

This section will explain, step-by-step, how to import an existing MetaMask account into your Keystone and then interact with MetaMask using your Keystone to manage your assets on particular accounts.

1.Run the “MetaMask Extension” and enter the main interface. Then, check the MetaMask wallet you want to import to Keystone. In this tutorial, we will import the wallet labeled as “Account 1” into Keystone.

<figure><img src="/files/PTExcy0HMAZy1P7ULgVR" alt="Keystone-MetaMask-LedgerPath-1"><figcaption></figcaption></figure>

2\. Obtain the secret recovery phrase for your MetaMask wallet (in this case, the recovery phrase for “Account 1”).

If you have forgotten your secret recovery phrase, you can reveal it as follows：

*1) Click on the "Menu" icon on the top right corner > then select \[Setting] > \[Security & Privacy] > \[Reveal Secret recovery phrase].*

<figure><img src="/files/rPJGUeQ3R8afdw8OWo9A" alt="Keystone-MetaMask-LedgerPath-2"><figcaption></figcaption></figure>

<figure><img src="/files/fsANdFfhVy8a8arUJ9e5" alt="Keystone-MetaMask-LedgerPath-3"><figcaption></figcaption></figure>

*2) Enter your password and click on \[Next] to display the secret recovery phrase. Then, carefully record it. We suggest to use a metal tablet for high permanence.*

<figure><img src="/files/8e9gOxthEyimt81SdmCK" alt="Keystone-MetaMask-LedgerPath-4"><figcaption></figcaption></figure>

<figure><img src="/files/LnEx93ThBEEwv2NA4v52" alt="Keystone-MetaMask-LedgerPath-5"><figcaption></figcaption></figure>

3\. Turn on the Keystone device. Tap the "Menu" icon > \[Setting] > \[Create/Import Wallet] > Ether your password and tap \[Confirm].

<figure><img src="/files/CsEfbbRzQFw1CQPlGbY4" alt="Keystone-MetaMask-LedgerPath-6"><figcaption></figcaption></figure>

4\. Select \[Import Wallet] > \[Import a Wallet with Single Backup], then select the proper recovery phrase length (in this case, 12) and tap \[Next].

<figure><img src="/files/PLhWOV4MDCGsQFfTNsDf" alt="Keystone-MetaMask-LedgerPath-7"><figcaption></figcaption></figure>

5\. Enter your recovery phrase > tap \[Import Wallet] to finish importing wallet > add any cryptocurrencies to the list based on your needs and tap \[√]. Now, your MetaMask Account has been successfully imported.

<figure><img src="/files/9WmnoxrGFopkCrXzp4MA" alt="Keystone-MetaMask-LedgerPath-8"><figcaption></figcaption></figure>

6\. Click on the "Menu" icon > \[Software Wallet] > select  \[MetaMask / Rabby / DeFi] and tap \[Confirm] > tap \[Export Later] to enter the wallet homepage. Check whether the “Account 0” address on Keystone and MetaMask are the same.

<figure><img src="/files/8k0pZB8hAcrK96A4ZqVJ" alt="Keystone-MetaMask-LedgerPath-9"><figcaption></figcaption></figure>

7\. Tap the \[•••] button on the top right of the screen > then tap \[Connect Software Wallet] to display the QR code.

<figure><img src="/files/ACV8ah5Qzt3onFQecD3F" alt="Keystone-MetaMask-LedgerPath-10"><figcaption></figcaption></figure>

**8. Uninstall and reinstall the MetaMask extension. (This is a necessary and important step.** For more information, please see the [Potential Trouble with Importing Accounts](https://support.keyst.one/3rd-party-wallets/eth-and-web3-wallets-keystone/bind-metamask-with-keystone/potential-trouble-with-importing-metamask-wallet-into-keystone).**)**

9\. Run the “MetaMask Extension” and **set up MetaMask by creating a new Secret Recovery Phrase**. (After setting up and entering the main interface, you will see a new MetaMask account. This new account has nothing to do with your old MetaMask account so you can simply disregard it.)

<figure><img src="/files/6rBlt1tAAR6vpEMQxnNx" alt="Keystone-MetaMask-LedgerPath-11"><figcaption></figcaption></figure>

<figure><img src="/files/XO8TxL0K0s6nTVAT5aWI" alt="Keystone-MetaMask-LedgerPath-12"><figcaption></figcaption></figure>

<figure><img src="/files/OMDioggLuh3JPZhLSUMn" alt="Keystone-MetaMask-LedgerPath-13"><figcaption></figcaption></figure>

10.Click on the "Menu" icon on the top right corner > then select \[Connect Hardware Wallet].

<figure><img src="/files/ANaxakJIxwIGA7PCP7rN" alt="Keystone-MetaMask-LedgerPath-14"><figcaption></figcaption></figure>

11\. Select \[QR-based] and then click \[Continue].

<figure><img src="/files/7Y76ldeLHRAqiEWeUox3" alt="Keystone-MetaMask-LedgerPath-15"><figcaption></figcaption></figure>

12\. MetaMask uses your computer's camera to scan the QR code displayed on the Keystone hardware wallet.

<figure><img src="/files/UGa6YuobfSMbHvY1Ax3v" alt="Keystone-MetaMask-LedgerPath-16"><figcaption></figcaption></figure>

13\. Select the Account (e.g. Account 1) that you want to bind and click \[Unlock].

<figure><img src="/files/GBeJBlodLdeUeWduXZOy" alt="Keystone-MetaMask-LedgerPath-17"><figcaption></figcaption></figure>

14\. MetaMask should now be successfully bound to your Keystone. Check that the “Keystone 1” account on MetaMask is the same as the account on Keystone. Now you can continue to manage your assets in this wallet by interacting with MetaMask and using your Keystone for signing purposes.

<figure><img src="/files/m6aDRs4DOUka7byKndzn" alt="Keystone-MetaMask-LedgerPath-18"><figcaption></figcaption></figure>

That’s all!

We hope this guide is useful when you decide to import an existing MetaMask Wallet/Account to a Keystone hardware wallet!

**Instructions recommended:**

{% content-ref url="/pages/-MVzj8TOa\_mCPGFJp8Lo" %}
[MetaMask & DeFi](/3rd-party-wallets/eth-and-web3-wallets-keystone/bind-metamask-with-keystone/how-to-use-metamask-keystone-with-defi)
{% endcontent-ref %}

{% content-ref url="/pages/ATNX3zrUspMmfQ0oRTDd" %}
[How to Switch ETH Path to Ledger Live / Legacy Format?](/3rd-party-wallets/eth-and-web3-wallets-keystone/bind-metamask-with-keystone/how-to-switch-eth-path-to-ledger-live-legacy-format)
{% endcontent-ref %}

{% content-ref url="/pages/9Yndd4Rua1fDkIexJIV7" %}
[Configure EVM Chains on MetaMask](/3rd-party-wallets/eth-and-web3-wallets-keystone/bind-metamask-with-keystone/configure-evm-chains-on-metamask)
{% endcontent-ref %}


# Potential Trouble with Importing MetaMask wallet into Keystone

## I.**Important Notes**

A wallet generated by MetaMask has its recovery phrase online. This means that this recovery phrase has been connected to the network(internet).

Therefore, even if you import this recovery phrase created by MetaMask into Keystone (or any other hardware wallets) to continue managing your digital assets, this recovery phrase might already be at the risk of being attacked by hackers.

{% hint style="danger" %}
In principle, we highly recommend creating a new recovery phrase (new wallet with a 24-word seed phrase) offline on a Keystone hardware wallet and then transferring your assets from your MetaMask wallet to the new one prior to using your Keystone to interact with MetaMask. This is the safest way to protect your assets.
{% endhint %}

**Instructions recommended:**

{% content-ref url="/pages/-MVzjClzDuQFACnCeQ1h" %}
[MetaMask](/3rd-party-wallets/eth-and-web3-wallets-keystone/bind-metamask-with-keystone)
{% endcontent-ref %}

{% content-ref url="/pages/oHvS1irb46ULViPBi9bL" %}
[MetaMask Mobile](/3rd-party-wallets/eth-and-web3-wallets-keystone/metamask-mobile)
{% endcontent-ref %}

## II.Potential trouble sample

We have recently received feedback from some users about not being able to select certain accounts when binding their Keystone hardware wallet to MetaMask. Let’s explore and address this problem together:

(1) As you can see in the examples provided below, there are two existing accounts in the MetaMask wallet within the example shown in the picture below (“ Account 1” and “Account 2”). In this example, this wallet has already been imported into Keystone as well. The Keystone acccount0’s public key is the same as the one of MetaMask’s Account 1:

<figure><img src="/files/Kyd4mjPcW0i8gbY929lY" alt="Keystone-MetaMask-Others-1"><figcaption></figcaption></figure>

(2) When you try to bind Keystone with MetaMask under such a situation by selecting which account you wish to bind, you’ll soon find that “account 1” and “account 2”, unlike the other accounts, can not be selected as shown in the picture below：

<figure><img src="/files/9j4Q5SpS6NF3Xoig3k0N" alt="Keystone-MetaMask-Others-2"><figcaption></figcaption></figure>

(3) This happens because “account 1” and “account 2” are already bound to MetaMask.

Due to the potential scenario above, we’ve decided to write this guide to explain how to correctly import an existing MetaMask Wallet into Keystone, hoping we could help users avoid this situation.

##


# Importing Your Ledger Wallet/Account into Your Keystone Hardware Wallet

This guide explains how to import your existing Ledger wallet/account into your Keystone hardware wallet. Doing so will allow you to swiftly sign transactions using Keystone QR codes with MetaMask while still managing your digital assets. Let’s take a look at how to do this in more detail:

## I. Preparation

1\. Firmware version M-5.0 (Multi-Coin) running on Keystone Essential or Pro.&#x20;

&#x20;  (Please read [How to upgrade firmware](https://support.keyst.one/getting-started/firmware-upgrading) for more information.)

2\. Recovery Phrase for your Ledger wallet.

## II. Import your Ledger wallet/account into Keystone

1\. Turn on the Keystone device. Tap the "Menu" icon > \[Setting] > \[Create/Import Wallet] > Ether your password and then tap \[Confirm].

<figure><img src="/files/xIRhaD4syKFYgNPm13h4" alt="MetaMask-ImportingLedger into Keystone-1"><figcaption></figcaption></figure>

2\. Select \[Import Wallet] > \[Import a Wallet with Single Backup], then select \[24] for the recovery phrase length and tap \[Next].

<figure><img src="/files/XmRa2RtAKbf8CLVarNKa" alt="MetaMask-ImportingLedger into Keystone-2"><figcaption></figcaption></figure>

3\. Enter your recovery phrase in order > then tap \[Import Wallet] to finish > add any amount of cryptocurrencies to your list based on your needs and tap \[√]. Your Ledger Account has now been successfully imported.

<figure><img src="/files/3jBhgJALCpoYGYdT7k28" alt="MetaMask-ImportingLedger into Keystone-3"><figcaption></figcaption></figure>

4\. You can now sync your Keystone device with the Keystone Mobile App to easily view all of your coins and execute transactions. Please check the page link below for related tutorial:

{% content-ref url="/pages/-MVyOy-t8rfzqoaEeCAD" %}
[Keystone Mobile App Syncing](/getting-started/syncing-with-the-keystone-vault-mobile-app)
{% endcontent-ref %}

### **Important Note:**

{% hint style="info" %}
If the bitcoin amount shown on the Keystone companion app isn’t the same as your Ledger wallet, this is most likely due to the Keystone companion app currently only supports Nested SegWit addresses (addresses that start with "3"), please check [**here**](https://support.keyst.one/miscellaneous/faq#9.-ive-imported-my-recovery-phrase-from-another-wallet-but-why-isnt-the-bitcoin-amount-the-same-as-m) (FAQ 9) for solutions and more information.
{% endhint %}

## **III. Binding your Keystone to MetaMask**

Firmware versions M-5.0 (Multi-Coin) or newer will allow you to use the **MetaMask Extension (V10.8.0 or newer)** as a watch-only wallet with your Keystone Essential or Pro.

1\. If you are already using MetaMask with your ledger hardware wallet and wish to use the exact same wallet with a keystone hardware wallet instead, **please remove the Ledger accounts from MetaMask first** **or reinstall the MetaMask extension**. (This is a necessary and important step. For more information, please see the second section of this guide: [Potential Trouble with Importing Accounts](https://support.keyst.one/3rd-party-wallets/eth-and-web3-wallets-keystone/bind-metamask-with-keystone/potential-trouble-with-importing-metamask-wallet-into-keystone).)

<figure><img src="/files/jAMs9dSN3JBLjnfO6HdG" alt="MetaMask-ImportingLedger into Keystone-4"><figcaption></figcaption></figure>

<figure><img src="/files/b05E7R1YDtyyZPpSVf7N" alt="MetaMask-ImportingLedger into Keystone-5"><figcaption></figcaption></figure>

2\. If you are new to MetaMask, download the MetaMask browser extension from [MetaMask's official website](#i.-preparation), then set it up to enter its main interface.

<figure><img src="/files/jP9Lm56pi7juhJkYWed0" alt="MetaMask-ImportingLedger into Keystone-6"><figcaption></figcaption></figure>

<figure><img src="/files/AB4JovkajhGEnKe9Z0uu" alt="MetaMask-ImportingLedger into Keystone-7"><figcaption></figcaption></figure>

<figure><img src="/files/iQhHNcy6tn8zo9hIYmqM" alt="MetaMask-ImportingLedger into Keystone-8"><figcaption></figcaption></figure>

3.On your Keystone: navigate the menu in this order: \[Menu] > \[Watch-only Wallet] > \[MetaMask / DeFi / Web3] > \[Confirm] > \[Display QR Code]. The last step will display a QR Code for syncing purposes.&#x20;

{% hint style="info" %}
**Tips:** If you want to switch the wallet path to Ledger Live / Legacy formats to identify your digital assets, please check [**here**](https://support.keyst.one/3rd-party-wallets/eth-and-web3-wallets-keystone/bind-metamask-with-keystone/how-to-switch-eth-path-to-ledger-live-legacy-format) for tutorial and more information.
{% endhint %}

<figure><img src="/files/sd5JFJRFoSp27kRJO6LF" alt="MetaMask-ImportingLedger into Keystone-9"><figcaption></figcaption></figure>

4.On the main MetaMask interface, click on the round "Menu" icon on the top right corner > then select \[Connect Hardware Wallet].

<figure><img src="/files/s1x8IewbpLCPXoQ2fQHu" alt="MetaMask-ImportingLedger into Keystone-10"><figcaption></figcaption></figure>

5\. Select \[QR-based] and then click \[Continue].

<figure><img src="/files/xqDk9ZH3EBBasfdsygBf" alt="MetaMask-ImportingLedger into Keystone-11"><figcaption></figcaption></figure>

6\. MetaMask utilizes your computer's camera to scan the QR code displayed on the Keystone hardware wallet.

<figure><img src="/files/DeWX7pro1KuKKbJQ7tyT" alt="MetaMask-ImportingLedger into Keystone-12"><figcaption></figcaption></figure>

7\. Select the Account (e.g. Account 1) that you want to bind and click \[Unlock].

<figure><img src="/files/aMRnlUGgAxdV3LReyDZx" alt="MetaMask-ImportingLedger into Keystone-14"><figcaption></figcaption></figure>

8\. MetaMask should now be successfully bound to your Keystone. You can now continue to manage your assets in this wallet by interacting with MetaMask as a watch-only wallet while using your Keystone for signing.

<figure><img src="/files/X5IrqgB81MJsjlsAz0qc" alt="MetaMask-ImportingLedger into Keystone-15"><figcaption></figcaption></figure>

**Instructions recommended:**

{% content-ref url="/pages/ATNX3zrUspMmfQ0oRTDd" %}
[How to Switch ETH Path to Ledger Live / Legacy Format?](/3rd-party-wallets/eth-and-web3-wallets-keystone/bind-metamask-with-keystone/how-to-switch-eth-path-to-ledger-live-legacy-format)
{% endcontent-ref %}

{% content-ref url="/pages/-MVzj8TOa\_mCPGFJp8Lo" %}
[MetaMask & DeFi](/3rd-party-wallets/eth-and-web3-wallets-keystone/bind-metamask-with-keystone/how-to-use-metamask-keystone-with-defi)
{% endcontent-ref %}

{% content-ref url="/pages/9Yndd4Rua1fDkIexJIV7" %}
[Configure EVM Chains on MetaMask](/3rd-party-wallets/eth-and-web3-wallets-keystone/bind-metamask-with-keystone/configure-evm-chains-on-metamask)
{% endcontent-ref %}


# How to Switch ETH Path to Ledger Live / Legacy Format?

Firmware versions M-5.0 (Multi-Coin) or newer support the switching of wallet paths (ETH) to Ledger Live and Legacy formats with your Keystone device in the MetaMask / DeFi / Web3 mode.

Keystone's original default wallet path (ETH) format is BIP44 Standard so If you want to import a recovery phrase from a Ledger device (Ledger Live / Legacy), you will need to switch the wallet path to Ledger Live / Legacy formats to identify your digital assets.

This guide will show you how to switch the wallet path (ETH) to Ledger Live / Legacy formats. Let’s take a look in more detail.

## **I. Preparation**

[Firmware](https://keyst.one/firmware?locale=en) versions M-5.0 (Multi-Cion) or newer running on Keystone Essential or Pro.

{% content-ref url="/pages/-MVz-o9g8Dc-vlyVuAZj" %}
[Firmware Upgrade](/getting-started/firmware-upgrading)
{% endcontent-ref %}

## **II. Operation**

1\. Display the QR code&#x20;

1\)If your Keystone is in another mode now, tap the \[Menu] icon > \[Software Wallet] > \[MetaMask / Rabby / DeFi] > \[Confirm] > tap the \[•••] icon tap \[Connect Software Wallet] to display the QR Code for connecting purposes.

<figure><img src="/files/XhqN1dDEvghrxzEDJsBu" alt="Keystone - different ETH path -1"><figcaption></figcaption></figure>

2\)Tap the \[•••] icon > tap \[Connect Software Wallet] to display the QR Code for connecting purposes.

<figure><img src="/files/nrVmHlt8OY0fMPy1O4YO" alt="Keystone - different ETH path -2"><figcaption></figcaption></figure>

2\. Tap the \[•••] icon > tap \[Change Derivation Path]. Select a proper wallet path based on your needs and tap \[Confirm].

<figure><img src="/files/WWqdrIfbc4MGcwMtX6pq" alt="Keystone - different ETH path -3"><figcaption></figcaption></figure>

3\. The address format should have been changed for now. Reconnect software wallet to make this new format address binded on the software wallet.&#x20;

<figure><img src="/files/zIQshisYu3PH62PqMQQl" alt="Keystone - different ETH path -4"><figcaption></figcaption></figure>

### Important Notes

* In **ledger live** format, Keystone only supports the synchronization of the **first 10 addresses.**&#x20;
* In BIP44 Standard and ledger Legacy formats, Keystone supports the synchronization of all addresses.

Instructions recommended:

[**How to Use MetaMask with Keystone?**](https://support.keyst.one/3rd-party-wallets/eth-and-web3-wallets-keystone/bind-metamask-with-keystone)


# Configure EVM Chains on MetaMask

Learn how to configure EVM chains, like Binance Smart Chain, on MetaMask extension for seamless decentralized finance and blockchain applications.

Keystone with firmware versions M-5.0 provides full support for any EVM-compatible blockchains. Users can now add any EVM-compatible blockchains on Metamask and use Keystone with it.

This guide will show you how to add the Polygon (Matic Network) Network on Metamask as an example. The same method would apply for other chains. Let’s take a look in more detail.

For more information on how to use MetaMask with EVM-compatible blockchains, please visit the [MetaMask](https://metamask.io/) official website.

## **I. Preparation**

1\. [Firmware](https://keyst.one/firmware?locale=en) versions M-5.0 (Multi-Cion) or newer running on Keystone Essential or Pro.&#x20;

&#x20;  (Please read [How to Upgrade Firmware](https://support.keyst.one/getting-started/firmware-upgrading) for more details.)

2\. Install MetaMask extension with version V10.8.0 or newer.&#x20;

3\. Set up and connect MetaMask with Keystone. (Check [here](https://support.keyst.one/3rd-party-wallets/eth-and-web3-wallets-keystone/bind-metamask-with-keystone) for tutorial)

## **II. Add Polygon (Matic Network) to Metamask**

Users can choose to add Polygon (Matic Network) to MetaMask either automatically or manually.

### 1. Adding it Automatically

1\) Find the Polygon network on <https://chainlist.org>, choose the network (e.g. Polygon Mainnet) and click on \[Connect Wallet].

<figure><img src="/files/QQEpRwXY1gPlzDAgnEBs" alt="Keystone-EVM chains-1"><figcaption></figcaption></figure>

2\) Select the Account (e.g. Keystone 1), then click on \[Next] > \[Connect].

<figure><img src="/files/u44W27bRXCUZQUJn7MT4" alt="Keystone-EVM chains-2"><figcaption></figcaption></figure>

3\) Click on \[Add To MetaMask] > \[Approve] > \[Switch network].

<figure><img src="/files/qKclu0TEBHWIEOOtZ424" alt="Keystone-EVM chains-3"><figcaption></figcaption></figure>

<figure><img src="/files/NHfGST6xRgyi1R2vU1GD" alt="Keystone-EVM chains-5"><figcaption></figcaption></figure>

4\) Polygon Mainnet has now been successfully added to your MetaMask.

<figure><img src="/files/LIbU2pp5RdrFl8rDcWuc" alt="Keystone-EVM chains-6"><figcaption></figcaption></figure>

### **2.** Add it Manually&#x20;

You can add custom networks to MetaMask manually but there's probably no reason to do so unless you're a software developer. If you would still like to do so manually, please follow the instructions below:

1\) Run the MetaMask Extension and enter the MetaMask main page.

2\) Click on the Network Selection button at the top of the MetaMask Extension > \[Add Network].

<figure><img src="/files/y5tWQXg36dAtGdFipuco" alt="Keystone-EVM chains-7"><figcaption></figcaption></figure>

3\) Input the relevant Polygon details below into the blanks provided: Network Name: Polygon Mainnet. Then click \[Save]. &#x20;

* **New RPC URL**: <https://polygon-rpc.com>&#x20;
* **Chain ID**: 137&#x20;
* **Currency Symbol** (optional): MATIC&#x20;
* **Block Explorer URL** (optional): <https://explorer.matic.network/>

<figure><img src="/files/Mm4HtaKqhrAX2RxccWSS" alt="Keystone-EVM chains-8"><figcaption></figcaption></figure>

Sometimes changing the RPC URL can help during network congestion:

* [https://rpc-mainnet.matic.network  ](<https://rpc-mainnet.matic.network&#xD;&#xA;https://rpc-mainnet.maticvigil.com&#xD;&#xA;https://rpc-mainnet.matic.quiknode.pro&#xD;&#xA;>)
* [https://rpc-mainnet.maticvigil.com  ](<https://rpc-mainnet.matic.network&#xD;&#xA;https://rpc-mainnet.maticvigil.com&#xD;&#xA;https://rpc-mainnet.matic.quiknode.pro&#xD;&#xA;>)
* [https://rpc-mainnet.matic.quiknode.pr](<https://rpc-mainnet.matic.network&#xD;&#xA;https://rpc-mainnet.maticvigil.com&#xD;&#xA;https://rpc-mainnet.matic.quiknode.pro&#xD;&#xA;>)

4\) You have now connected to the Polygon Mainnet with your Metamask Wallet!

<figure><img src="/files/ee0XmXw1NIhOOWNboKdY" alt="Keystone-EVM chains-9"><figcaption><p><a href="https://rpc-mainnet.matic.network
https://rpc-mainnet.maticvigil.com
https://rpc-mainnet.matic.quiknode.pro
"></a></p></figcaption></figure>

Instructions recommended:

[How to Use Uniswap with Keystone?](https://support.keyst.one/3rd-party-wallets/eth-and-web3-wallets-keystone/bind-metamask-with-keystone/how-to-use-metamask-keystone-with-defi)


# MetaMask Mobile

The Only hardware wallet that supports MetaMask mobile. It fully supports all EVM chains, as well as the main coins, tokens, and decentralized applications of EVM chains.

🎉🎉🎉<mark style="background-color:orange;">Great news!</mark>&#x20;

<mark style="background-color:orange;">The waitlist for our 3rd generation product is now open. Visit our</mark> [<mark style="background-color:orange;">homepage</mark>](https://keyst.one/) <mark style="background-color:orange;">to find out more.</mark>

Firmware M-5.0 (Multi-Coin) or newer allows Keystone devices to work with MetaMask Mobile V5.0.0 or later. Keystone Essential can also be set to use MetaMask Mobile as a watch-only wallet.

## **I.Preparation** <a href="#id-3rdcjqhafqg2" id="id-3rdcjqhafqg2"></a>

1.[ Firmware](https://keyst.one/firmware?locale=en) version M-5.0 (Multi-Coin) or newer running on Keystone Essential or Pro. \
&#x20;  (Please read[ How to upgrade firmware](https://support.keyst.one/getting-started/firmware-upgrading) for more details.)

2\. Connect MetaMask Mobile V5.0.0 or newer with the Keystone Hardware Wallet.

## II.Important Notes

Generate wallets with online recovery phrases, making them vulnerable to hacking attacks. Importing these recovery phrases into Keystone or other hardware wallets does not eliminate this risk.

{% hint style="danger" %}
To secure assets, it is advised to create a new wallet with a 24-word recovery phrase on a Keystone hardware wallet offline, and then transfer the assets from MetaMask to this new wallet before using Keystone with MetaMask. This method ensures the highest level of safety for assets.
{% endhint %}

{% content-ref url="/pages/za1waTlj0y6kWl5UkulY" %}
[Potential Trouble with Importing MetaMask wallet into Keystone](/3rd-party-wallets/eth-and-web3-wallets-keystone/bind-metamask-with-keystone/potential-trouble-with-importing-metamask-wallet-into-keystone)
{% endcontent-ref %}

## **III.Connect Keystone to Metamask Mobile** <a href="#id-4l7cilqwdj1q" id="id-4l7cilqwdj1q"></a>

#### 1. Set up your MetaMask Mobile

1\) Run “MetaMask Mobile” and get started.&#x20;

<figure><img src="/files/BmDcXU01CnKSlk0dx5Xr" alt="Keystone-MetaMask Mobile-1"><figcaption></figcaption></figure>

2\) Tap \[Create a new wallet] or \[Import with Secret Recovery Phrase]

3\) Create a password > Tap \[View] to reveal your Secret Recovery Phrase. Then tap \[Continue] for the next step > Re-enter your Secret Recovery Phrase to reconfirm it. Tap \[Complete backup] to finish the setup.

<figure><img src="/files/SMnyxxbA6NE3AtNq5LWY" alt="Keystone-MetaMask Mobile-2"><figcaption></figcaption></figure>

You have now successfully finished setting up your MetaMask Mobile. Feel free to browse around MetaMask Mobile to familiarize yourself with its various functions and features.

<figure><img src="/files/x0Hlj4pwtZsjaifT9xVH" alt="Keystone-MetaMask Mobile-3"><figcaption></figcaption></figure>

**2. Connect Keystone Hardware Wallet to MetaMask Mobile**

1\) Keystone: Tap the "Menu" icon > then Tap \[Software Wallet] > then Select \[MetaMask / Defi / Web3] and Tap \[Confirm] on the Keystone device.

{% hint style="info" %}
Please note that if your firmware version is **M-9.10** or newer, the **connection process on the Keystone** hardware wallet has been improved.&#x20;

To connect your software wallet, simply tap on \[Connect Software Wallet] and then select \[MetaMask]. The QR code will be displayed automatically.&#x20;

For more information about the updated UI design, please visit [Keystone's Revamped UI](/getting-started/getting-started-with-m-10.0-or-newer-for-beginners).
{% endhint %}

{% hint style="info" %}
The recent versions have renamed \[Watch-only Wallet] to \[Software Wallet].
{% endhint %}

<figure><img src="/files/WSZHZzkiJ045lXSn60MV" alt="Keystone-MetaMask Mobile-4"><figcaption></figcaption></figure>

2\) Tap the icon on the top right corner of the toolbar > then select \[Connect Software Wallet] > then choose the accounts that you are going to import and tap \[Confirm].

<figure><img src="/files/K5HXoEcTD3ReZAX0ugUY" alt="Keystone-MetaMask Mobile-5"><figcaption></figcaption></figure>

3\) MetaMask Mobile: Tap on your account profile photo > then select \[Connect Hardware Wallet] > Tap \[Continue] and use MetaMask Mobile to scan the QR code displayed on the Keystone Hardware Wallet. After scanning the QR code, select an account that you want to connect > Tap \[Unlock].

<figure><img src="/files/fspfOUZU8SRhuKpwRR08" alt=""><figcaption></figcaption></figure>

## IV.Send ETH with Keystone Hardware Wallet <a href="#ez1ma1qxewn9" id="ez1ma1qxewn9"></a>

#### **1. Create an ETH transaction on MetaMask Mobile**

Tap \[Send] to input the receiving address and amount > Tap \[Next] > Tap \[Confirm with Keystone] > Tap \[Confirm with Keystone]to display the unsigned transaction in QR code format on your mobile device.

<figure><img src="/files/2v9mONTLyb63c3y2nAY5" alt="Keystone-MetaMask Mobile-6"><figcaption></figcaption></figure>

#### **Advanced Feature about how to adjust the \[Estimated gas fee]:**

1\) Before taping \[Confirm with Keystone], you could tap on the estimated gas fee amount to change the max fee or make further edits in the advanced options menu.

2\) Select the max fee amount or tap \[Advanced options] to modify the configuration of the transaction fee. Tap \[Save] when finishing the modifications.

<figure><img src="/files/PoRXoSzds8vpVyHpS9AO" alt="Keystone-MetaMask Mobile-7"><figcaption></figcaption></figure>

**2. Sign the transaction with Keystone Hardware Wallet**

1\) Choose MM/Defi/Web3 mode and tap the icon on the first page to scan the QR code displayed on the MetaMask Mobile app. Then tap \[Sign] for the next step.

<figure><img src="/files/rcCXqNGESHlmLdFrmBwg" alt="Keystone-MetaMask Mobile-8"><figcaption></figcaption></figure>

2\) Enter your password after signing the transaction, then tap \[Confirm]. A QR code will be displayed on your Keystone Hardware Wallet.

<figure><img src="/files/oGQiIZMI2rWnKQdJjbXM" alt="Keystone-MetaMask Mobile-9"><figcaption></figcaption></figure>

#### **3. Finish the transaction with MetaMask Mobile** <a href="#s553bzkh6axl" id="s553bzkh6axl"></a>

1\) Scan the QR code shown on the Keystone Firmware Wallet with your mobile device using the Metamask Mobile app to finish the transaction.

2\) Check your transaction information on MetaMask Mobile

<figure><img src="/files/dWaZgk1YscjUUIfqGrjk" alt="Keystone-MetaMask Mobile-10"><figcaption></figcaption></figure>


# Defi with MetaMask Mobile

This tutorial explains how to use your Keystone & MetaMask to interact with DeFi platforms (Dapps) such as Uniswap. The same method would apply to other Dapps.

## I. **Preparation** <a href="#id-17hg42nkpftg" id="id-17hg42nkpftg"></a>

1.[ Firmware](https://keyst.one/firmware?locale=en) version M-5.0 (Multi-Coin) or newer running on Keystone Essential or Pro.

2\. Connect MetaMask Mobile V5.0.0 or newer with the Keystone Hardware Wallet ([Tutorial](/3rd-party-wallets/eth-and-web3-wallets-keystone/metamask-mobile)).

3\. Uniswap website:[ https://app.uniswap.org/#/swap](https://app.uniswap.org/#/swap).

{% hint style="info" %}
***Please read***[ ***How to upgrade firmware***](https://support.keyst.one/getting-started/firmware-upgrading) ***for more details.***
{% endhint %}

## **II. Swap tokens on Uniswap** <a href="#id-5povlkk0lket" id="id-5povlkk0lket"></a>

#### **1.Connect Uniswap to MetaMask Mobile** <a href="#kiu1vyok7j9n" id="kiu1vyok7j9n"></a>

1\) Run the MetaMask Mobile app and tap on the **menu icon** to open the \[Browser].

<figure><img src="/files/4Zs5tcMNHJvx4orrK6Ia" alt="Keystone-Uniswap-1"><figcaption></figcaption></figure>

2\) Visit the Uniswap website:<https://app.uniswap.org/#/swap>. Select your Keystone account and tap on \[Connect]. Uniswap should then be successfully connected to your MetaMask Mobile.

<figure><img src="/files/90u8cx9L7UhvkOdwc5F6" alt="Keystone-Uniswap-2"><figcaption></figcaption></figure>

**2. Swap ETH to another Token**

1\) Select a Token (e.g. USDT), set the swapping amount, then tap on \[Swap], after confirming the transaction detail, tap on \[Confirm Swap] to execute the swap.

<figure><img src="/files/WWoLD7ddNNiRJGMuB860" alt="Keystone-Uniswap-3"><figcaption></figcaption></figure>

2\) Tap on \[Confirm] to get the unsigned QR code.

<figure><img src="/files/x7N6deT7Wm1thsXXWBvx" alt="Keystone-Uniswap-4"><figcaption></figcaption></figure>

3\) Keystone: Tap on the “scan” icon, then scan the QR code displayed on MetaMask Mobile.

<figure><img src="/files/hRTI9kMONWcdj5ElU9sH" alt="Keystone-Uniswap-5"><figcaption></figcaption></figure>

4\) Confirm the transaction details on your Keystone Hardware Wallet. Tap on \[Sign] and enter your password to verify. You will then receive the signed transaction data in QR code format.

<figure><img src="/files/pE1C14o8YbYt4zHC5abx" alt="Keystone-Uniswap-6"><figcaption></figcaption></figure>

5\) Tap on \[Get Signature] on MetaMask Mobile and scan the QR code displayed on your Keystone device. The transaction would submit automatically after the scanning is complete.

<figure><img src="/files/TitVuthaooqBpahwx49Z" alt="Keystone-Uniswap-7"><figcaption></figcaption></figure>

#### **3. Swap Tokens to ETH or another Token** <a href="#safluwgtcs2p" id="safluwgtcs2p"></a>

1\) You will need to give the Uniswap protocol permission to access your UNI tokens if you’d like to use them in a transaction when swapping them to ETH or any other Token. Tap on \[Allow the Uniswap protocol to use your UNI] > then tap on \[Sign]

<figure><img src="/files/zY7fTP4mPdXd8VS6LbIK" alt="Keystone-Uniswap-8"><figcaption></figcaption></figure>

2\) Tap on the “scan” icon on the top right corner of your Keystone device. Scan the QR code displayed on MetaMask Mobile with your Keystone device to sign the transaction by pressing the \[sign] button after you’ve confirmed the transaction details.

<figure><img src="/files/pVSIAYeSWttH9wfB9vQf" alt="Keystone-Uniswap-9"><figcaption></figcaption></figure>

3\) Uniswap: Select a Token (e.g. USDT) and set the amount, then tap on \[Swap]. Once you’ve confirmed the transaction details, tap on \[Confirm Swap] to execute the swap.

<figure><img src="/files/IcgS4k8TADeRePXWep7h" alt="Keystone-Uniswap-10"><figcaption></figcaption></figure>

4\) Tap on \[Confirm] to get the unsigned QR code.

<figure><img src="/files/fHzXgjOZVv9Qv3Nw2rrb" alt="Keystone-Uniswap-11"><figcaption></figcaption></figure>

5\) Using your Keystonedevice, tap on the “scan” icon and scan the QR code displayed on MetaMask Mobile.

<figure><img src="/files/YzzPikVSIKFePkPXplGy" alt="Keystone-Uniswap-12"><figcaption></figcaption></figure>

6\) Confirm the transaction details on Keystone Hardware Wallet. Tap on \[Sign] and enter the password to verify. Get the signed transaction data in QR code format.

<figure><img src="/files/qEVY5Pg7yS0XTBu0u9xf" alt="Keystone-Uniswap-13"><figcaption></figcaption></figure>

7\) Tap \[Get Signature] and scan the QR code displayed on the Keystone device. The transaction should submit automatically after the scanning.

<figure><img src="/files/mTDQkBBgHwFAOhYLsZuL" alt="Keystone-Uniswap-14"><figcaption></figcaption></figure>

## **III.Add Liquidity** <a href="#id-8w4mloky9z94" id="id-8w4mloky9z94"></a>

#### **1. Approve** <a href="#nwxvj83wb7v2" id="nwxvj83wb7v2"></a>

1\) Switch to the “Pool” tab on Uniswap. Tap on \[More] > select the \[V2 Liquidity ] option in the drop-down menu > then select \[Add V2 Liquidity].

<figure><img src="/files/4K3O61Ey9KBLoqV7QwBo" alt="Keystone-Uniswap-15"><figcaption></figcaption></figure>

2\) Select the Tokens you’d like to swap from and to and your desired amount. In this case, we will be swapping ETH for UNI. Tap on \[Approve UNI] to allow Uniswap access to your UNI tokens > then tap on \[Approve] to get the unsigned QR code.

{% hint style="info" %}
***You can set the fee and price range yourself If you are adding liquidity to V3 liquidity.***
{% endhint %}

<figure><img src="/files/k8R4e65lRul06ulpPp2X" alt="Keystone-Uniswap-16"><figcaption></figcaption></figure>

3\) On your Keystone device: Tap on the “scan” icon and scan the QR code displayed on your MetaMask Mobile app.

<figure><img src="/files/k5Wz6l2ldvq3tS4XBJ2C" alt="Keystone-Uniswap-17"><figcaption></figcaption></figure>

4\) Confirm the transaction details on Keystone Hardware Wallet. Tap \[Sign] and enter your password to approve the transaction. Your Keystone device will provide the signed transaction data in QR code format.

<figure><img src="/files/IjtATk0ihVupv8eq6vPd" alt="Keystone-Uniswap-18"><figcaption></figcaption></figure>

5\) Tap \[Get Signature] and scan the QR code displayed on the Keystone device. The transaction should submit automatically after the scanning is complete.

<figure><img src="/files/8WFKTRyHm4fRLPjI7taY" alt="Keystone-Uniswap-19"><figcaption></figcaption></figure>

#### **2. Supply** <a href="#aaqsp7o5g3xy" id="aaqsp7o5g3xy"></a>

1\) Tap \[Supply] when the approval is completed. Once you’ve finished confirming the transaction details, then tap on \[Confirm Supply] to add your liquidity to the Uniswap pool.

<figure><img src="/files/OQzoulxljFVO5cY03dcq" alt="Keystone-Uniswap-20"><figcaption></figcaption></figure>

2\) Tap \[confirm] to get the unsigned QR code.

<figure><img src="/files/wA5n40aaMrh98oCcmIoK" alt="Keystone-Uniswap-21"><figcaption></figcaption></figure>

3\) On your Keystone device: Tap on the “scan” icon and scan the QR code displayed on your MetaMask Mobile app.

4\) Confirm the transaction details on Keystone Hardware Wallet. Tap \[Sign] and enter your password to approve the transaction. You will then receive the signed transaction data in QR code format.

5\) Tap on \[Get Signature] and scan the QR code displayed on the Keystone device. The transaction would submit automatically after the scanning.

### **IV. Remove Liquidity** <a href="#txuru54usdpx" id="txuru54usdpx"></a>

#### **1. Approve** <a href="#gbjolfrrarg6" id="gbjolfrrarg6"></a>

1\) Switch to the “Pool” tab on Uniswap. Then tap on \[More] > and select the \[V2 Liquidity] option.

<figure><img src="/files/gupU6ZtMUtlgu6edmz1a" alt="Keystone-Uniswap-22"><figcaption></figcaption></figure>

2\) Tap on \[Manage]>then tap on \[Remove] to select the amount you’d like to remove from the liquidity pool. In this guide, we will be removing all of our funds so 100% is set.

<figure><img src="/files/kgzNtxPJ1FqCZYx8fAmx" alt="Keystone-Uniswap-23"><figcaption></figcaption></figure>

3\) Tap on \[Approve], then tap on \[Sign] to get the unsigned QR code.

<figure><img src="/files/KawxPUvR4lhaVoFw16lV" alt="Keystone-Uniswap-24"><figcaption></figcaption></figure>

4\) On your Keystone device: Tap the “scan” icon and scan the QR code displayed on your MetaMask Mobile app.

<figure><img src="/files/lkDhMGi5jBwOLBIALwfl" alt="Keystone-Uniswap-25"><figcaption></figcaption></figure>

5\) Confirm the transaction details on Keystone Hardware Wallet. Tap \[Sign] and enter the password to approve the transaction. You will then receive the signed transaction data in QR code format.

<figure><img src="/files/g9gTzafFUhkzbvsPHi8K" alt="Keystone-Uniswap-26"><figcaption></figcaption></figure>

6\) Tap \[Get Signature] and scan the QR code displayed on the Keystone device. Then the V2 liquidity token will be allowed to be removed after the signing has been executed.

<figure><img src="/files/HYvKp9m3Y7GhLluJbGSt" alt="Keystone-Uniswap-27"><figcaption></figcaption></figure>

7\) Tap \[Remove] after you’ve confirmed the transaction details, then tap on \[Confirm].

<figure><img src="/files/z4Oa7xOLtYBvWgOBJY2F" alt="Keystone-Uniswap-28"><figcaption></figcaption></figure>

8\) Tap on \[Confirm] to get the unsigned QR code.

<figure><img src="/files/Reb3zwa7oX8UHjDRjwAR" alt="Keystone-Uniswap-30"><figcaption></figcaption></figure>

9\) On your Keystone device: Tap the “scan” icon and scan the QR code displayed on your MetaMask Mobile app.

<figure><img src="/files/oUzznLPBi1Wk0M7z4Uo1" alt="Keystone-Uniswap-31"><figcaption></figcaption></figure>

10\) Confirm the transaction details on Keystone Hardware Wallet. Tap on \[Sign] and enter the password to approve the transaction. You will then receive the signed transaction data in QR code format.

<figure><img src="/files/XEf6qU6ko0mRmgIqlEeI" alt="Keystone-Uniswap-32"><figcaption></figcaption></figure>

11\) Tap \[Get Signature] and scan the QR code displayed on the Keystone device. The transaction will be automatically submitted once the scanning is complete.

<figure><img src="/files/l7asZtU3Onl2c5zeZCHn" alt="Keystone-Uniswap-33"><figcaption></figcaption></figure>


# Configuring EVM Chains on MetaMask Mobile

Learn how to configure EVM chains, like Binance Smart Chain, on MetaMask Mobile for seamless decentralized finance and blockchain applications.

The Keystone hardware Wallet supports all EVM chains compatible with MetaMask. Those EVM-compatible chains are also configurable on Metamask mobile App as well.

This guide will show you how to add the Binance Smart Chain(BSC) Mainnet Network to your Metamask mobile app. The same method is applicable for any other EVM-compatible chains.

## **I. Preparation** <a href="#id-5fbzrl90gih8" id="id-5fbzrl90gih8"></a>

1.[ Firmware](https://keyst.one/firmware?locale=en) version M-5.0 (Multi-Coin) or newer running on Keystone Essential or Pro.

2\. Connect MetaMask Mobile V5.0.0 or newer with the Keystone Hardware Wallet ([Tutorial](/3rd-party-wallets/eth-and-web3-wallets-keystone/metamask-mobile)).

{% hint style="info" %}
***Please read***[ ***How to Upgrade Firmware***](https://support.keyst.one/getting-started/firmware-upgrading) ***for more details.***
{% endhint %}

## **II. Add EVM Chains onto MetaMask Mobile** <a href="#jruohttyn6ws" id="jruohttyn6ws"></a>

#### **1. Automatically add EVM chains** <a href="#h48006xfehdc" id="h48006xfehdc"></a>

1\) Run the MetaMask Mobile app and tap on the **Menu icon** on the top left corner and select the \[Browser] option.

<figure><img src="/files/IwceojXl00nZEsUbIpoV" alt="Keystone-EVM chains access-1"><figcaption></figcaption></figure>

2\) Type[ https://chainlist.org](https://chainlist.org/) in the URL search bar and select your desired network available on the page.

<figure><img src="/files/Grx71r6ND59XxKl1zJsB" alt="Keystone-EVM chains access-2"><figcaption></figcaption></figure>

3\) Scroll the screen down until you’ve found the network you’d like to add.

<figure><img src="/files/LqsxRCtNjQJQtClA9y5Y" alt="Keystone-EVM chains access-3"><figcaption></figcaption></figure>

4\) Select a network you’d like to add to MetaMask and tap \[Approve] to complete the addition and move onto the next step.

<figure><img src="/files/q71J5PPH4byrn873vqRc" alt="Keystone-EVM chains access-4"><figcaption></figcaption></figure>

5\) Tap \[Switch Network] to change to the network added, for this guide, we’ve added Binance Smart Chain Mainnet. You can see how it has been successfully added to the MetaMask Mobile app.

<figure><img src="/files/vJzUNPYOKJKxy7yXH83z" alt="Keystone-EVM chains access-5"><figcaption></figcaption></figure>

#### **2. Manually Configure EVM chains on MetaMask Mobile** <a href="#kymh96pa9bs7" id="kymh96pa9bs7"></a>

Adding networks manually is not recommended for normal users as it is generally used by IT developers. The instructions below explains how you can manually add networks onto the MetaMask Mobile app. For this section of the guide, we will be adding the Polygon network:

1\) Tap \[Menu Icon]> then \[Settings]

<figure><img src="/files/C6yhCPP3Ka5CcV9pIRk8" alt="Keystone-EVM chains access-6"><figcaption></figcaption></figure>

2\) Select \[Networks] and tap \[Add Network]

<figure><img src="/files/FCRMmUJxsPBGI1dVBXyf" alt="Keystone-EVM chains access-7"><figcaption></figcaption></figure>

3\) Input the necessary Polygon network details below into the blanks provided. Then tap \[Save].

* **Network Name:** Polygon Mainnet
* **New RPC URL**:[ https://polygon-rpc.com](https://polygon-rpc.com/)
* **Chain ID**: 137
* **Currency Symbol** (optional): MATIC
* **Block Explorer URL** (optional):[ https://explorer.matic.network/](https://explorer.matic.network/)

<figure><img src="/files/KpHIEGn5yx5EKNdQmLiZ" alt="Keystone-EVM chains access-8"><figcaption></figcaption></figure>

Sometimes, changing the RPC URL can help with transactions during network congestion:

* [https://rpc-mainnet.matic.network](https://rpc-mainnet.matic.networkhttps/rpc-mainnet.maticvigil.comhttps://rpc-mainnet.matic.quiknode.pro)
* [https://rpc-mainnet.maticvigil.com](https://rpc-mainnet.matic.networkhttps/rpc-mainnet.maticvigil.comhttps://rpc-mainnet.matic.quiknode.pro)
* [https://rpc-mainnet.matic.quiknode.pr](https://rpc-mainnet.matic.networkhttps/rpc-mainnet.maticvigil.comhttps://rpc-mainnet.matic.quiknode.pro)

4\) You have now connected to the Polygon Mainnet with your Metamask Wallet!

<figure><img src="/files/qhLdIOtLbTllMJlzkDPo" alt="Keystone-EVM chains access-9"><figcaption></figcaption></figure>

{% hint style="danger" %}
***Added network on MetaMask Mobile app will not sync with Metamask Extension!***
{% endhint %}


---

[Next Page](/llms-full.txt/1)

